
L322 Range Rover Service Procedures
AUTOMATIC TRANSMISSION - ZF 5HP24
REPAIRS 44-2-17
33. With assistance, carefully remove gearbox
from engine. Ensure torque converter remains
with gearbox.
34. Fit converter retaining plate and secure with
bolts.
Refit
1. Clean mounting and mating faces.
2. Remove torque converter retaining plate.
3. With assistance, carefully fit gearbox to engine.
Ensure engagement of torque converter spigot
and gearbox housing onto dowels.
4. Fit 8 Torx bolts securing automatic gearbox to
engine, tighten to 45 Nm (33 lbf.ft)
5. Clean fluid cooler pipes unions and mating
faces.
6. Position fluid cooler pipe to LH side of gearbox.
7. Lubricate fluid cooler sealing washers with
transmission fluid, fit banjo bolt to gearbox and
tighten to 37 Nm (27 lbf.ft)
8. Fit and lubricate new 'O' ring to fluid cooler pipe,
fit pipe to gearbox and tighten to 37 Nm (27
lbf.ft).
9. Position fluid cooler saddle clamp, fit bolt and
tighten to 6 Nm (4.4 lbf.ft)
10. Fit starter motor and tighten bolts to 45 Nm (33
lbf.ft).
11. Fit bolts securing drive plate to torque converter
and tighten to 45 Nm (33 lbf.ft)
12. Fit grommet to gearbox bell housing.
13. Fit undertray.
14. Fit oxygen sensor leads to gearbox casing.
15. Clean crankshaft sensor and mating face.
16. Position crankshaft sensor, fit bolt and tighten
to 6 Nm (4.4 lbf.ft)
17. Position selector cable support bracket to
gearbox, fit bolts and tighten to 10 Nm (7 lbf.ft)
18. Fit selector lever to inhibitor switch, fit nut and
tighten to 10 Nm (7 lbf.ft)
19. Fit and secure oxygen sensor leads to transfer
gearbox.
20. Connect multiplug to gearbox connector.
21. Connect multiplug to high/low shift motor.
22. Raise gearbox on jack.
23. Fit snubbers.
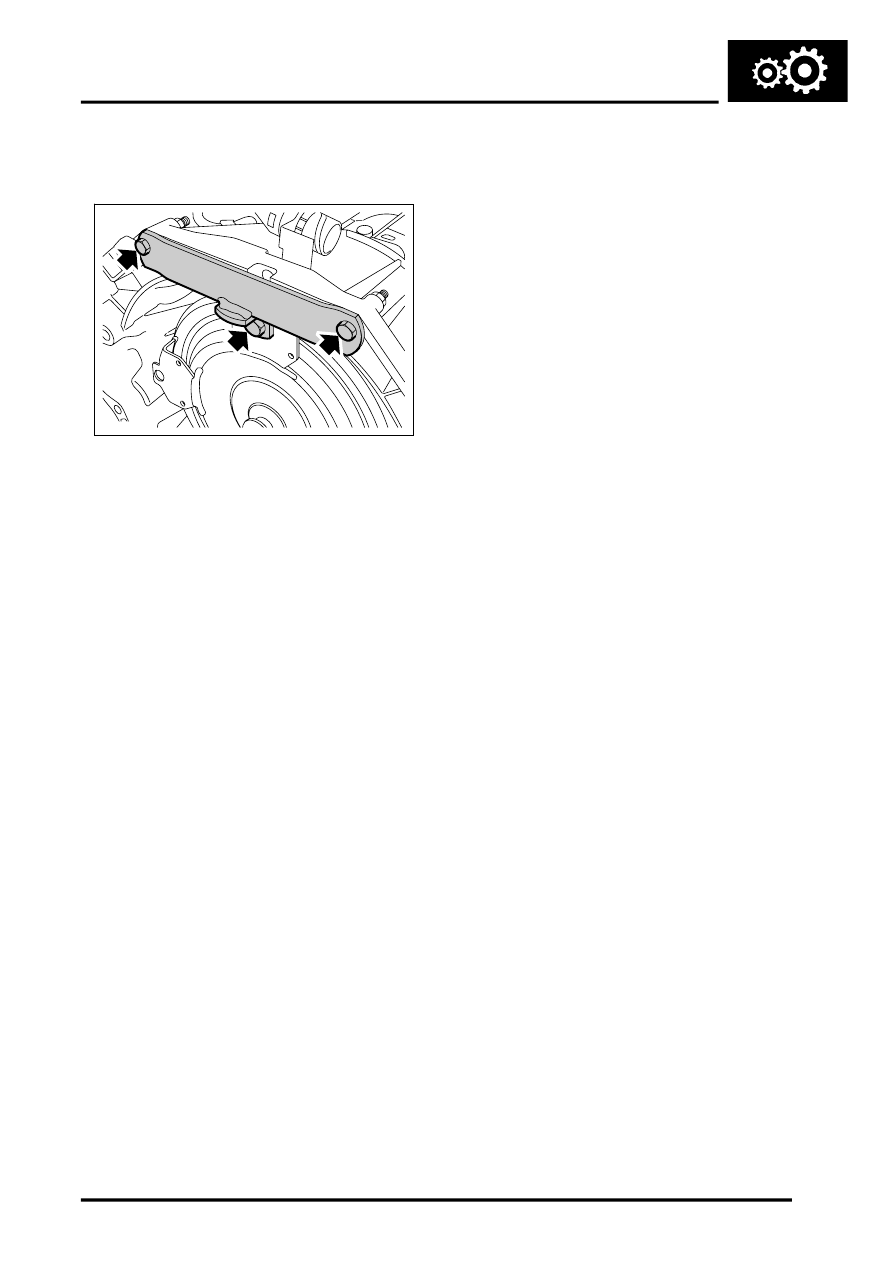
24. Fit cross member to mounting, fit nut and bolt
but do not tighten at this stage.
25. Align cross member, fit bolts and tighten to 68
Nm (50 lbf.ft).
26. Remove support from gearbox.
27. Tighten nut and bolt securing mounting to cross
member to 100 Nm (74 lbf.ft).
28. Fit heat shield and secure with nuts.
29. Fit rear propeller shaft.
DRIVESHAFTS, REPAIRS, Propeller
30. Fit front propeller shaft.
DRIVESHAFTS, REPAIRS, Propeller
31. Lower vehicle.
32. Fit top bell housing Torx bolts and tighten to 25
Nm (18 lbf.ft)
33. Fit and secure LH oxygen sensor lead to
gearbox bell housing.
34. Connect inhibitor switch multiplug.
35. Fit air intake plenum.
36. Fit fan to pulley and tighten viscous coupling
nut to 40 Nm (30 lbf.ft).
37. Connect battery earth lead.
38. Fill gearbox with fluid.
5HP24, ADJUSTMENTS, Gearbox fluid -
drain & refill.
M44 1870