Range Rover P38

19
FUEL SYSTEM
NEW RANGE ROVER
10
REPAIR
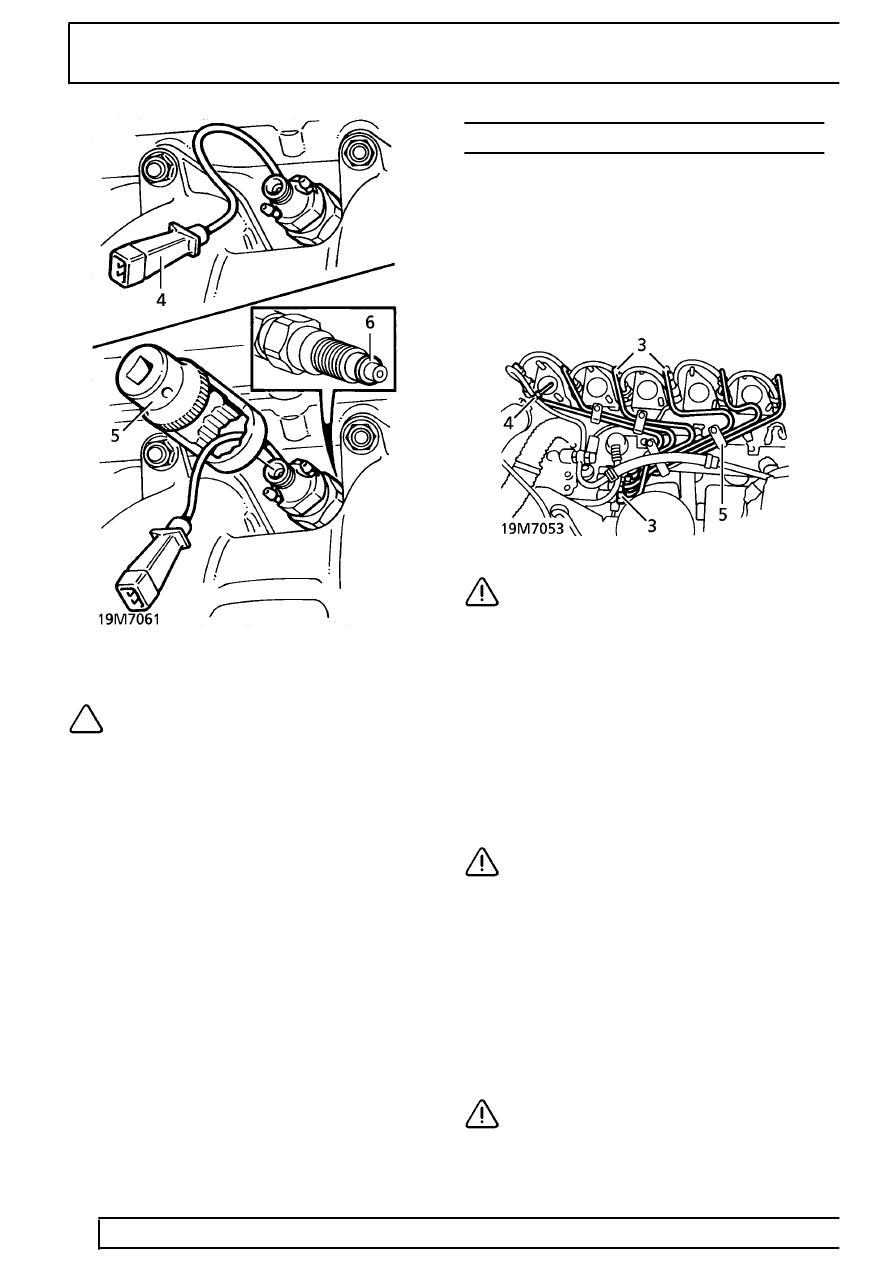
5. Remove injector using tool LRT-12-120.
NOTE: Special tool has cut-out for needle
lift sensor multiplug. Thread flylead
through tool. Ensure lead and connector
are not damaged during injector removal or
refitting.
6. Collect sealing washer and discard.
Refit
7. Ensure injector nozzle and cylinder head bore
are clean.
8. Apply anti-seize compound to injector threads.
9. Position injector with new sealing washer to
cylinder head. Using LRT-12-120. Tighten to
65
Nm (48 lbf.ft)
10. No. 4 injector only: Connect needle lift sensor
multiplug.
11. Remove plugs. Connect leak-off pipes.
12. Fit high pressure pipe assembly.
See this
section.
13. Reconnect battery negative lead.
HIGH PRESSURE PIPES
Service repair no - 19.60.14
Remove
1. Disconnect battery negative lead.
2. Remove inlet manifold.
See MANIFOLD AND
EXHAUST SYSTEM, Repair.
3. Using LRT-12-117, disconnect high pressure
pipes at Fuel Injection Pump (FIP) and injectors.
CAUTION: Hold delivery valves against
rotation as pipe unions are loosened.
4. Remove clip securing leak-off pipe to No. 1 high
pressure pipe.
5. Remove high pressure pipe assembly.
6. Plug high pressure pipes and connections.
Refit
7. Ensure all pipes and connections are clean,
8. Remove plugs. Position pipe assembly.
9. Using LRT-12-117, secure high pressure pipes
to injection pump. Tighten to
22 Nm (16 lbf.ft)
CAUTION: Hold delivery valves against
rotation as pipe unions are tightened.
10. Connect pipes to injectors. Do not tighten.
11. Secure leak-off pipe to No. 1 high pressure pipe
with clip.
12. Fit inlet manifold.
See MANIFOLD AND
EXHAUST SYSTEM, Repair.
13. Reconnect battery negative lead.
14. With assistance, crank engine. As fuel emerges
at injector connections, secure each pipe union
using tool LRT-12-117. Tighten to
22 Nm (16
lbf.ft)
CAUTION: Engine will start during high
pressure pipe bleeding procedure.
