Range Rover P38

19
FUEL SYSTEM
NEW RANGE ROVER
42
REPAIR
Refit
CAUTION: Hose clips used on the filler
neck of advanced EVAPS vehicles have a
special ’shear’ cap to ensure the correct
tightening torque is achieved. Always use NEW
clips of the correct type.
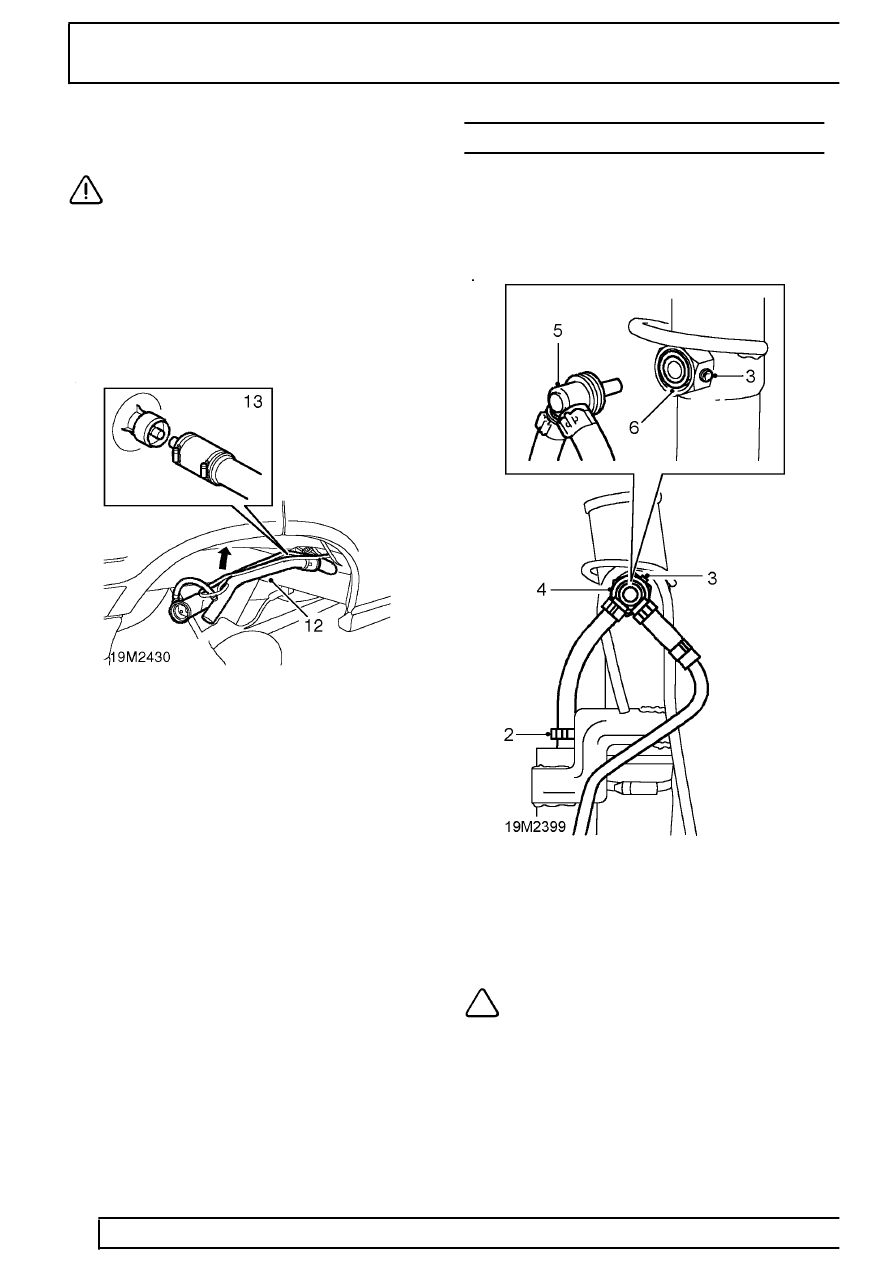
11. Loosely position new clip to filler neck hose.
12. Position filler neck assembly to fuel tank stub,
rotated anti-clockwise as shown.
13. Engage internal breather hose to fuel tank inner
stub.
14. Engage filler neck hose with fuel tank stub.
15. Manoeuvre filler neck into position and engage
with grommet.
16. Engage filler neck bracket with body stud and
secure with nut.
17. Tighten clip securing hose to fuel tank stub until
cap shears off.
18. Connect vent lines to fuel/vapour separator and
under floor connection, ensuring that quickfit
connections fully engage.
19. Connect pressure sensor breather line.
20. Replenish fuel if necessary.
21. Fit filler cap and tighten in accordance with
instructions.
22. Close filler flap.
23. Connect battery earth lead.
ANTI-TRICKLE FILL VALVE - ADVANCED EVAPS
Service repair no - 19.55.31
Remove
1. Remove the fuel filler neck.
See this section.
2. Release the cobra clip securing the hose to the
liquid/vapour separator and disconnect the hose.
3. Loosen the grub screw on the valve nut, two
complete turns.
4. Loosen the valve nut completely.
NOTE: The nut is held captive by the stub
pipe on the filler neck.
5. Carefully remove the valve and hose assembly
from the filler neck
