
Range Rover Classic
68
AIR SUSPENSION
12
REPAIR
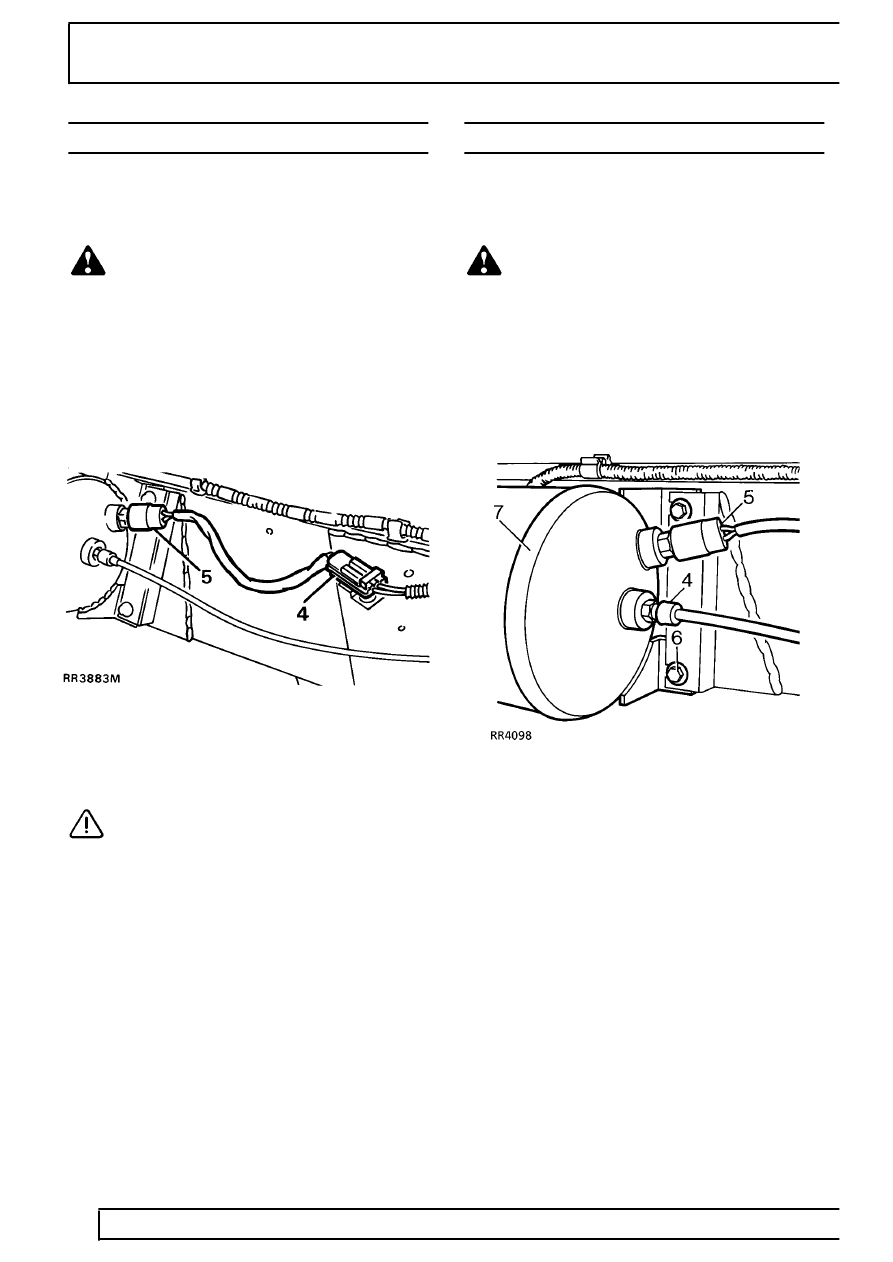
RESERVOIR PRESSURE SWITCH
Service repair no - 60.50.07
Remove
WARNING: Air suspension is pressurised
up to 10 bar. Dirt or grease must not enter
the system. Wear hand, ear and eye safety
standard protection when servicing system.
1. Depressurise system.
See Adjustment,
Depressurise System
2. Disconnect battery negative lead.
3. Clean around pressure switch with stiff brush
and soapy water.
4. Disconnect pressure switch multiplug.
5. Unscrew and remove pressure switch.
CAUTION: Protect opening from ingress of
dirt.
Refit
6. Apply Loctite 572 to thread of pressure switch.
7. Fit pressure switch. Tighten to
23 Nm.
8. Connect multiplug and battery.
9. Start engine to re-pressurise system.
10. Attain standard ride height.
11. Leak test pressure switch.
See Adjustment,
Leak Test Procedure
AIR RESERVOIR
Service repair no - 60.50.03
Remove
WARNING: Air suspension is pressurised
up to 10 bar. Dirt or grease must not enter
the system. Wear hand, ear and eye safety
standard protection when servicing system.
1. Depressurise reservoir.
See Adjustment,
Depressurise System
2. Clean around air pipe connection and drain plug
with stiff brush and soapy water.
3. Open drain plug to release any residual
pressure.
4. Disconnect air pipe.
See Disconnect/Connect
Air Pipe
5. Disconnect pressure switch multiplug.
6. Release four fixing bolts.
7. Remove reservoir.
Refit
8. Fit reservoir. Tighten bolts to
24Nm.
9. Connect air pipe, fitting rubber boot.
See
Disconnect/Connect Air Pipe
10. Connect pressure switch multiplug.
11. Tighten drain plug to
70 Nm.
12. Start engine to repressurise system.
13. Leak test reservoir.
See Adjustment, Leak
Test Procedure