
AIR HARNESS
- Make
- Land Rover
- Model
- Range Rover Classic
- Section
- REPAIR › AIR HARNESS
AIR SUSPENSION
13
REPAIR
ELECTRONIC CONTROL UNIT
Service repair no - 60.50.04
Remove
1. Remove front trim from right hand front seat
base.
2. Adjust seat rearward and upward.
3. Disconnect battery negative lead.
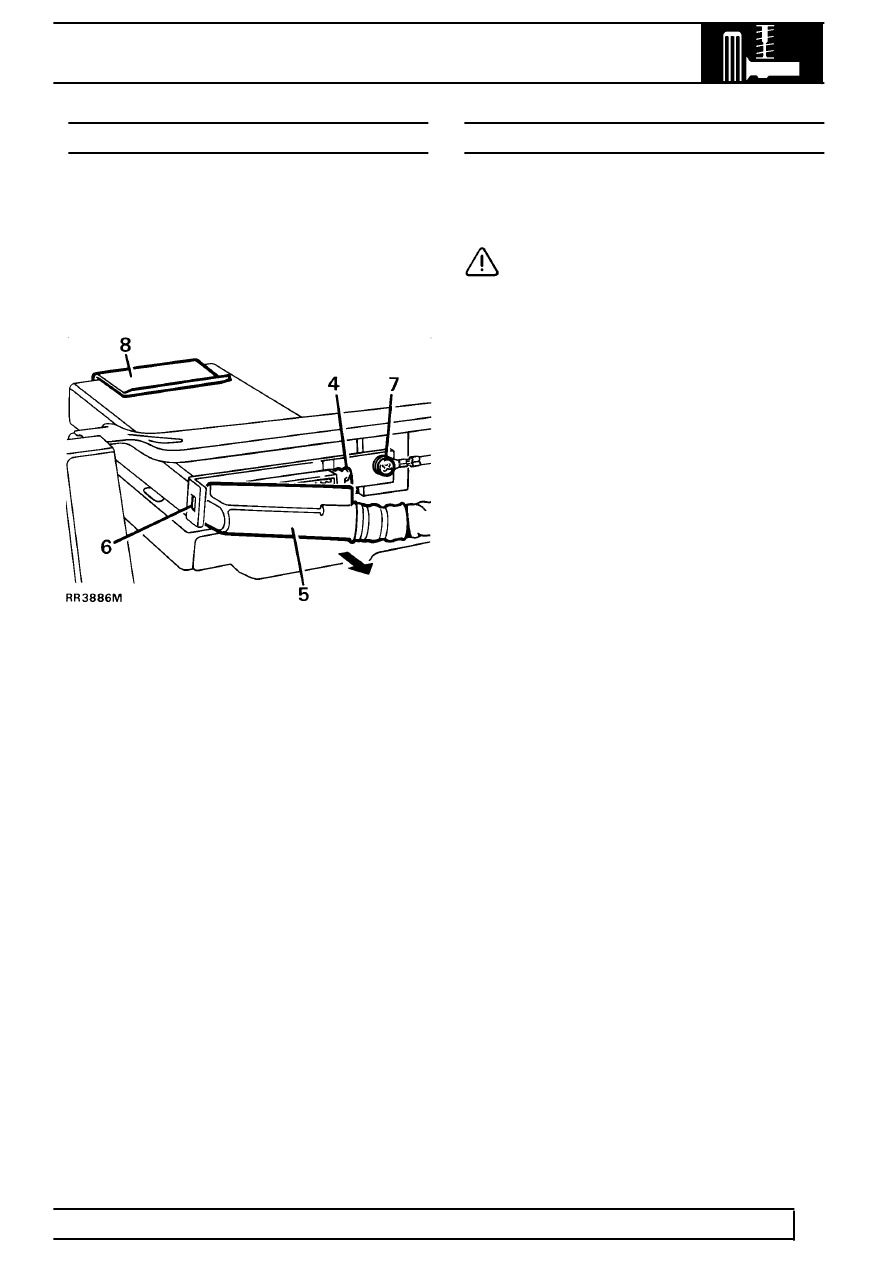
4. Release retaining clip from upper ECU plug.
5. Move plug in direction of arrow.
6. Detach hooked end of plug from retaining post.
7. Remove retaining screw.
8. Remove ECU from retaining clip.
Refit
9. Fit ECU into retaining clip.
10. Fit retaining screw.
11. Connect ECU harness plug. Ensure plug
retaining clip engages.
12. If fitting a new ECU, recalibrate height settings.
See Adjustment, System Calibration - Height
Sensor Datum
AIR HARNESS
Service repair no - 60.50.21
Remove
CAUTION: Thoroughly clean around all
connections before disconnecting air
pipes. Seal all exposed components
against ingress of dirt and moisture.
1. Place vehicle on a wheel free lift.
2. Remove wheels.
3. Remove air supply unit.
See Air Supply Unit
4. Disconnect air pipe from front left air spring.
5. Release front left chassis cable ties and clips.
6. Disconnect air pipe from reservoir.
7. Release back left chassis cable ties and clips,
leave clips in chassis.
8. Disconnect air pipe from back left air spring.
9. Release three rear chassis cable ties.
10. Disconnect air pipe from back right air spring.
11. Release back right chassis cable ties and clips.
12. Disconnect air pipe from front right air spring.
13. Release front right chassis cable ties and clips.
14. Remove air harness from vehicle.
Refit
15. Layout air harness, identifying routing and
connections.
16. Route air harness around chassis.
17. Remove sealing plugs, reconnect left front air
spring.
18. Secure left front chassis ties and clips.
19. Working around chassis.
Parts & tools for this job For Land Rover Range Rover
- TOOLDigital multimeterSearch: automotive digital multimeter
- PARTAssorted fuse kitSearch: car fuse assortment kit
- TOOLWire crimper and connector kitSearch: wire crimper connector kit
Links open Amazon search results in a new tab. As an Amazon Associate I earn from qualifying purchases.