
Removal Note
- Make
- Mazda
- Model
- MX-5 (NA) Factory Workshop Manual
- Year
- 1990–1992
- Section
- Removal Note › Removal Note
BodyRemoval Note
Removal Note
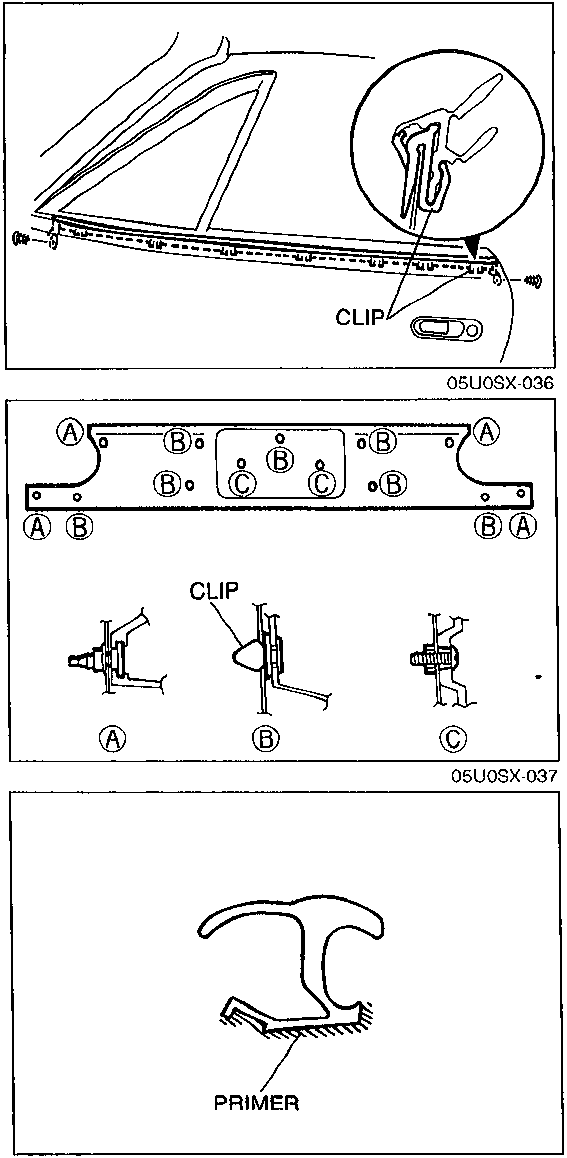
Front beltline molding
- Remove the door mirror. (Refer to page S–30.)
- Remove the front beltline molding.
Caution
• Do not damage the body.
Note
• The clips are where shown in the figure.
Rear finisher
- Remove the rear combination light. (Refer to Section T.)
- Remove the rear finisher.
Note
• The clips are where shown in the figure.
Beltline molding
Remove the convertible top for removal of the beltline molding. (Refer to page S–61.)
Installation Note
Windshield molding
- Remove the windshield. (Refer to page S–38.)
- Install the windshield. (Refer to page S–38.)
- Apply primer with a brush to the bonding area of the new upper molding, and allow it to dry for approx. 30 minutes.
Caution
• Keep the area free of dirt and grease. Do not touch the surface. If primer gets on the skin, remove it immediately.
Caution
• Lower the convertible top to prevent the glass from being pushed out by air pressure if a door is closed.
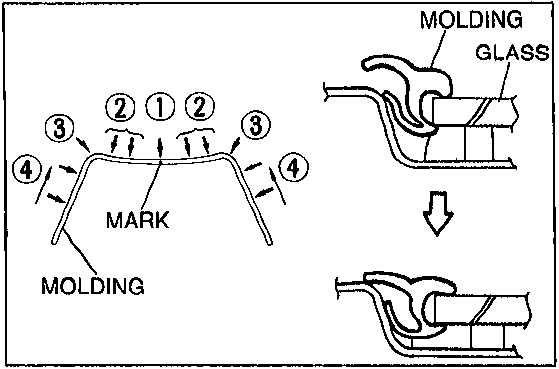
- Align the center mark in the molding with the glass mark (①).
- Install the upper portions of the molding into the body (②).
- Push the corner of the molding into the body (③).
- Push the side portions of the molding into the body, beginning from the bottom (④).
- Check for water leaks. If a leak is found, wipe the water off well and repeat the installation.
Hardening time of repair seal
| Temperature | Surface hardening time | Time required until car can be put into service |
|---|---|---|
| 5°C (41°F) | Approx. 1.5 hr | 12 hr |
| 20°C (68°F) | Approx. 1hr | 4 hr |
| 35°C (95°F) | Approx. 10 min | 2 hr |
Parts & tools for this job For 1990 Mazda MX-5
- TOOLTrim removal tool kitSearch: trim removal tool kit
- PARTTouch-up paintSearch: Mazda touch up paint
- PARTPanel clip assortmentSearch: Mazda panel clips assortment
Links open Amazon search results in a new tab. As an Amazon Associate I earn from qualifying purchases.