
Deployment of pre-tensioner removed from vehicle (page 2 of 2)
- Make
- Mini
- Model
- Mini Workshop Manual
- Year
- 1996–2000
- Section
- Precautions
Restraint systemsDeployment of pre-tensioner removed from vehicle · page 2 of 2
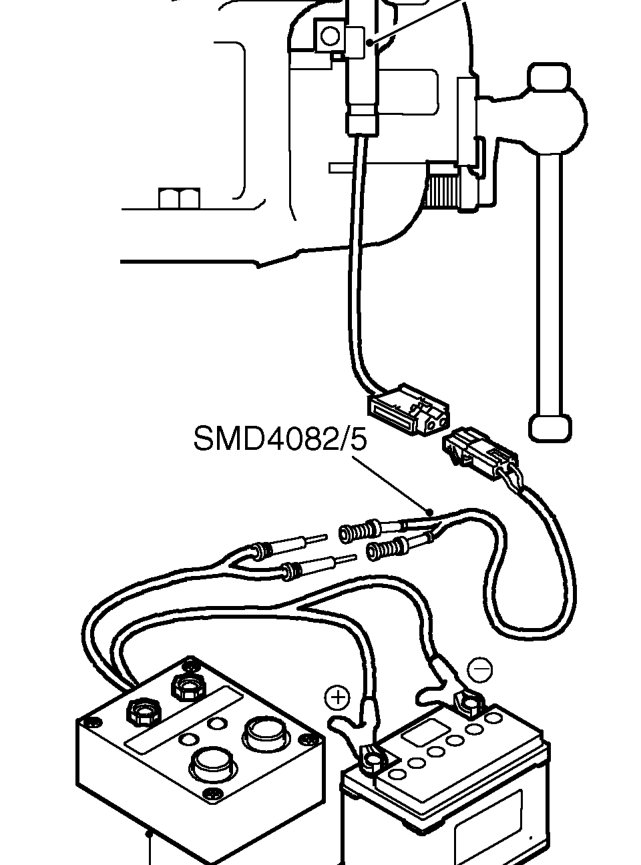
- Position gas generator tube vertically in vice with fly lead at bottom and tube bracket positioned on vice side to prevent tube being forced out of vice. Tighten vice to hold tube rigid and secure. DO NOT OVERTIGHTEN.
WARNING: Ensure deployment tool SMD 4082/1 is not connected to battery.
- Connect flylead SMD 4082/5 to pre-tensioner connector.
- Connect flylead SMD 4082/5 to tool SMD 4082/1.
WARNING: Do not lean over gas generator tube whilst connecting.
- Connect tool SMD 4082/1 to battery.
WARNING: Ensure all personnel are standing at least 15 metres away from vehicle.
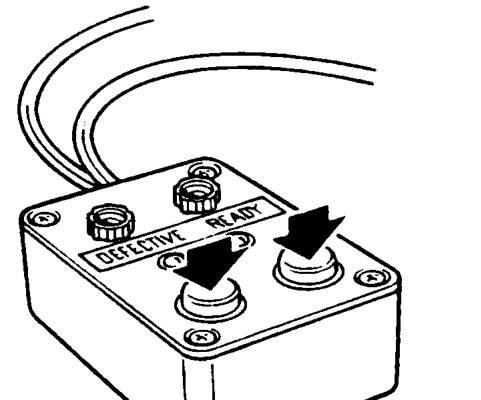
- Press both operating buttons to deploy pre-tensioner.
- DO NOT return to the vehicle for 5 minutes.
WARNING: If a suspected ’live’ unit fails to deploy using the above procedure, store the unit in accordance to the Storage Procedures outlined in this section and inform Rover Group.
- Using gloves, remove pre-tensioner from vice, place pre-tensioner in plastic bag, and seal bag.
- Transport deployed pre-tensioner to designated area for incineration.
NOTE: DO NOT transport pre-tensioner in the vehicle passenger compartment.
- Scrap all remaining parts of pre-tensioner assembly. DO NOT re-use or salvage any parts of the pre-tensioner assembly.
Parts & tools for this job For 1996 Mini Mini
- TOOLOBD2 scanner with SRSSearch: OBD2 scanner ABS SRS
- TOOLTrim removal tool kitSearch: trim removal tool kit
Links open Amazon search results in a new tab. As an Amazon Associate I earn from qualifying purchases.