Eclipse L4-1997cc 2.0L DOHC (1991)

8. INSTALLATION OF PISTON RING NO.2/7. PISTON RING NO.1
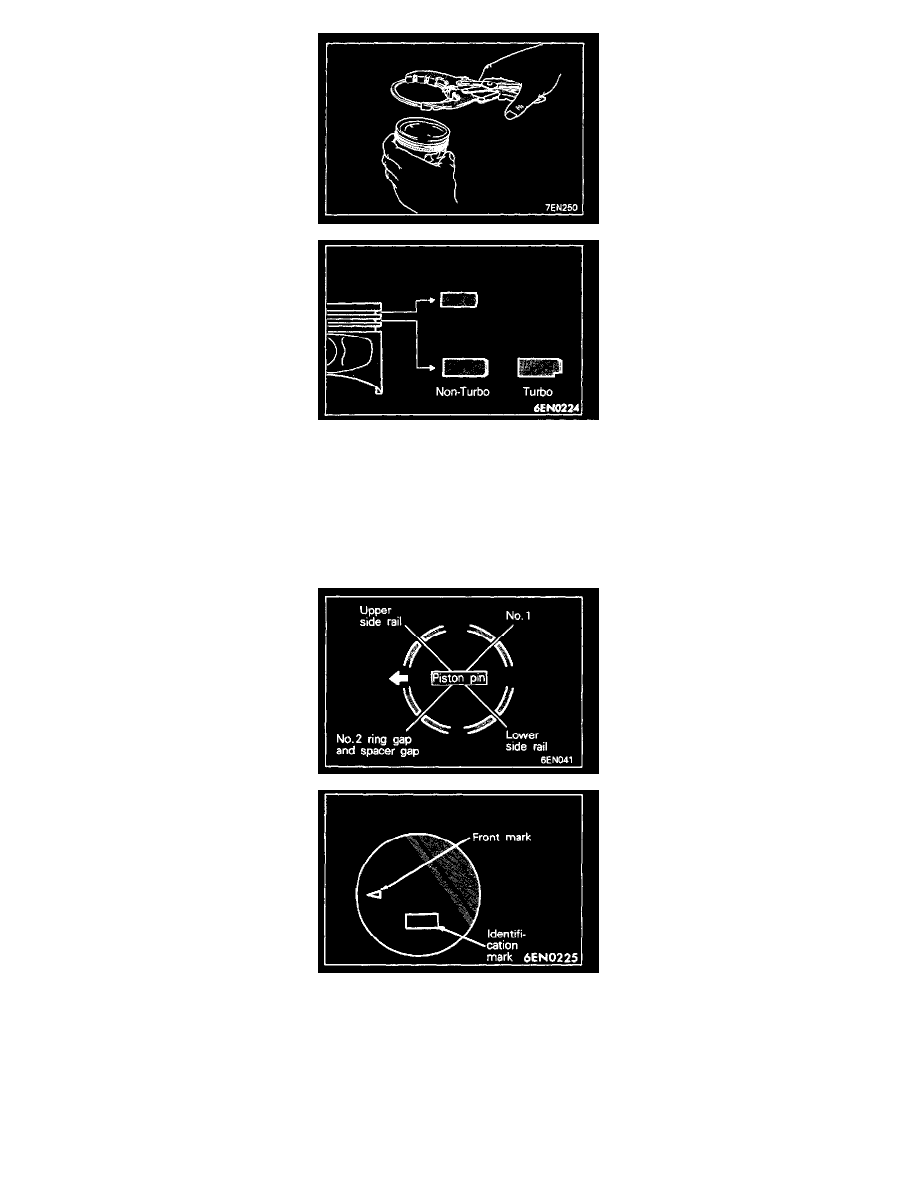
Using a piston ring expander, fit the No.2 and then No.1 piston ring into position.
NOTE:
1. Note the difference in shape between No.1 and No.2 piston rings.
2. Install piston rings No.1 and No.2 with their side having marks facing up (on the piston crown side).
4. INSTALLATION OF PISTON AND CONNECTING ROD
1. Apply an ample amount of engine oil to the piston outside surfaces, piston rings, and oil ring.
2. Position the piston ring and oil ring (side rail and spacer) end gaps as shown in the illustration.
3. Insert the piston and connecting rod assembly into the cylinder, working from the cylinder top surface. Make sure that the front mark stamped
on the piston top surface and that (identification mark) on the connecting rod face the front of engine.
Identification mark:
Piston: (Non-Turbo) 63D
(Turbo) 63DT
