
Drive shaft
- Make
- Rover
- Model
- 600 620 Diesel Repair Manual Supplement
- Year
- 1995–1999
- Section
- Repairs › Drive shaft
Drive shaftsDrive shaft · page 1 of 3
DRIVE SHAFT
Remove
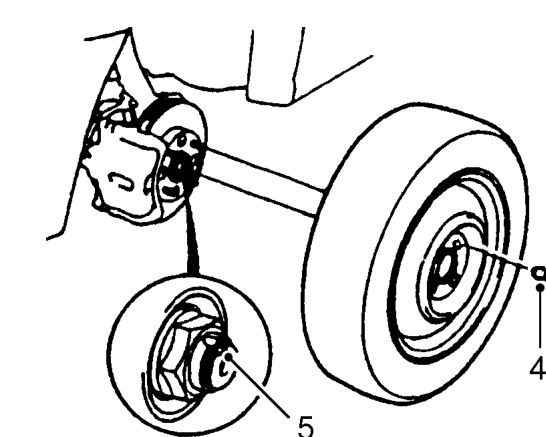
- Slacken wheel nuts slightly.
- Raise front of vehicle.
WARNING: Support on safety stands.
- Remove LH under belly panel. See BODY, Repairs.
- Remove wheel nuts and front wheel.
- Raise locking tab on drive shaft nut, then remove and discard nut.
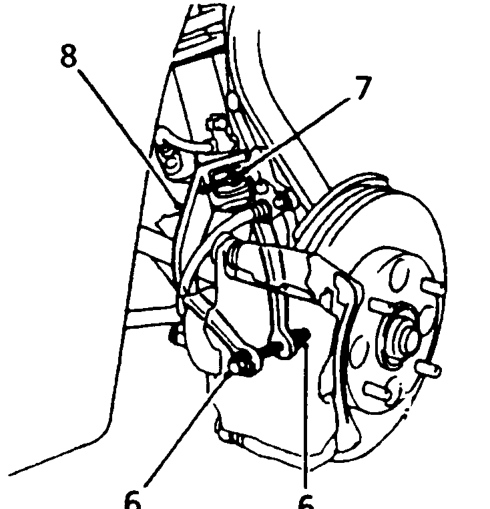
- Remove damper fork nut and bolt and discard nut.
- Remove damper pinch bolt.
- Remove damper fork and check for damage.
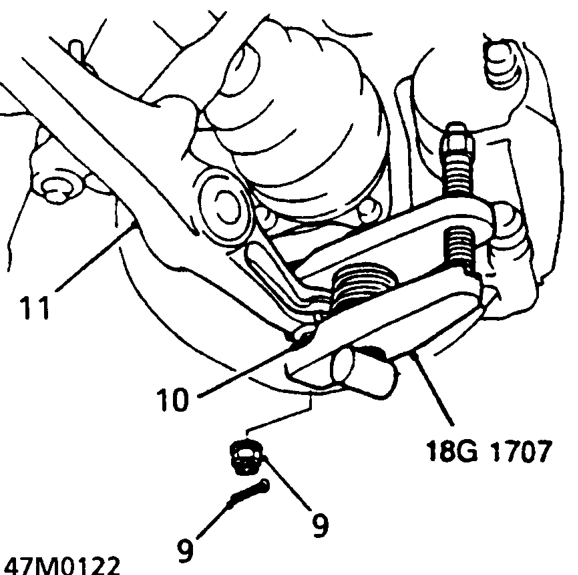
- Remove split pin and castle nut from lower arm ball joint. Discard split pin.
- Fit a 12 mm hex nut on the ball joint and flush with the ball joint pin end, to protect ball joint thread.
- Use ball joint remover 18G 1707 to separate ball joint and lower arm.
CAUTION: Be careful not to damage ball joint boot. Ensure bar on tool is at right angles as shown.
NOTE: If necessary, apply penetrating type lubricant to loosen the ball joint.
Parts & tools for this job For 1995 Rover 600
- PARTWheel bearingSearch: Rover 600 1995 wheel bearing
- TOOLBearing puller kitSearch: wheel bearing puller kit
- PARTCV boot kitSearch: Rover 600 1995 cv boot kit
Links open Amazon search results in a new tab. As an Amazon Associate I earn from qualifying purchases.