
Leon Mk1
| Slide box (vehicles from 07.00): removing and installing |
| Notes to consider before removing the slide box → Chapter |

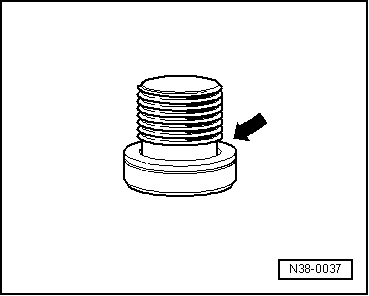
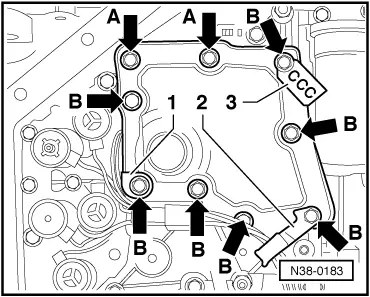
| 1 - | Sealing screw |
| q | 15 Nm |
| q | Always renew the seal → Fig. |
| q | Check the ATF level and top up → Chapter |
| 2 - | Overflow pipe |
| q | Remove to let the ATF come out → Chapter, ATF level: checking and filling; Changing ATF |
| 3 - | Bolt |
| q | 8 Nm |
| 4 - | Sump |
| q | Assembly procedure → Chapter, Planet gears: dismantling and assembling |
| 5 - | Magnet |
| q | Fit to the sump filler neck |
| 6 - | Bolt |
| q | 8 Nm |
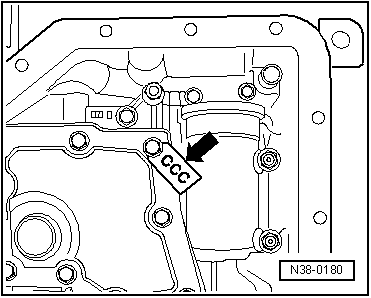
| 7 - | ATF strainer |
| q | Dismantling and fitting → Fig. |
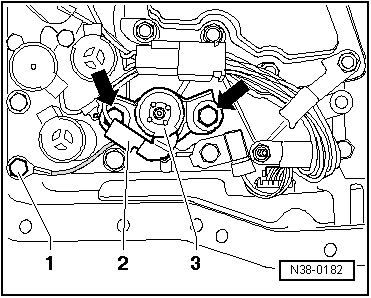
| 8 - | Bracket |
| q | With solenoid valves: -N88-, -N89-, -N90-, -N91-, -N92- |
| q | Dismantling and fitting → Fig. |
| 9 - | Bolt |
| q | M6×35 mm |
| q | 8 Nm |
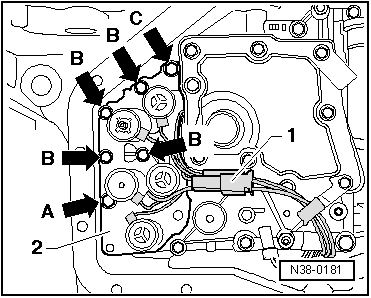
| 10 - | Bolt |
| q | M6×68 mm |
| q | 8 Nm |
| 11 - | Bolt |
| q | M6×12 mm |
| q | 8 Nm |
| 12 - | Solenoid valve -N93- |
| q | Dismantling and fitting → Fig. |
| 13 - | Bolt |
| q | M6×75 mm |
| q | 8 Nm |
| 14 - | Disc-shaped washer |
| 15 - | Sleeve |
| 16 - | O-ring |
| q | Always renew |
| 17 - | O-ring |
| q | Always renew |
| 18 - | Bolt |
| q | 8 Nm |
| 19 - | Slide box |
| q | Identification → Fig. |
| q | Dismantling and fitting → Chapter, Planet gears: dismantling and assembling |
| 20 - | Manual slide |
| q | Secure so that it does not come out when removing the slide box |
| 21 - | O-ring |
| q | Always renew |
| q | For the wiring harness connector |
| 22 - | Gearbox casing |
| 23 - | Connector |
| q | For wiring harness |
| q | Dismantling and fitting → Chapter, Planet gears: dismantling and assembling |
| q | Engage on fitting to the gearbox casing |
| 24 - | O-ring |
| q | Always renew |
| q | For the wiring harness connector |
| 25 - | Wiring harness |
| q | For the solenoid valves |
|
|
|
|
|
|
|
|