Leon Mk1
|
|
|
|
|
 Note!
Note!| Lubricate all points of support and sliding surfaces with -G 052 142 A2- grease |
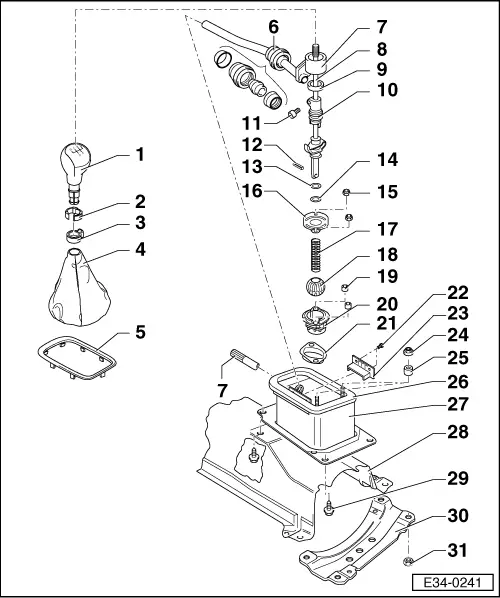
| 1 - | Gear lever knob |
| q | Dismantling and fitting → Chapter, Assembling the gear stick knob to the cover |
| 2 - | Attachment bush |
| 3 - | Clip |
| q | To attach the knob to the gear stick |
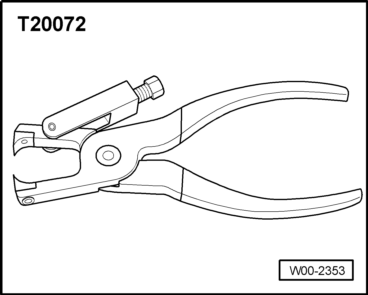
| q | To tighten the clamp one can also use the -T20072- tool. |
| q | Always renew |
| 4 - | Cover |
| q | Dismantling and fitting → Chapter, Assembling the gear stick knob to the cover |
| 5 - | Frame |
| q | Remove from the central console pulling upwards |
| 6 - | Control rod bearing |
| q | Made up of several components |
| q | It is broken on disassembly |
| q | On fitting make sure that the plastic components do not separate |
| 7 - | Control rod |
| q | Remove it together with the gear stick, from the protective cover → Fig. |
| 8 - | Gear stick |
| q | Before removing, remove the excentric adjuster → Fig. |
| q | Remove from the protective cover together with the control rod → Fig. |
| q | Adjusting the gearbox after assembly → Chapter |
| 9 - | Plastic ring |
| q | Fit on the excentric adjuster groove |
| 10 - | Excentric adjuster |
| q | Fit onto the gear stick after fitting the stick |
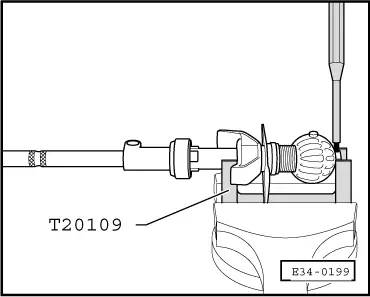
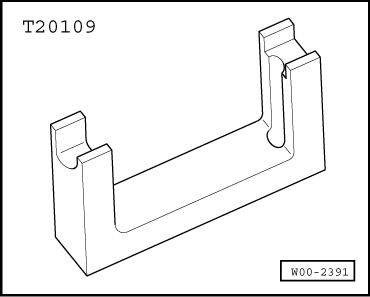
| q | Remove → Fig. |
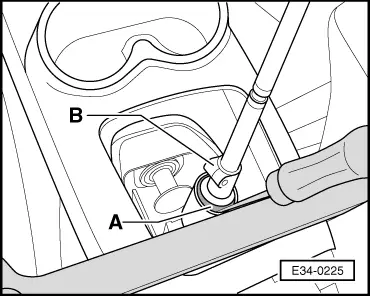
| 11 - | Bolt |
| q | 2 Nm |
| q | To secure the excentric adjuster |
| 12 - | Securing pin |
| q | Dismantling and fitting → Fig. |
| q | Always renew |
| 13 - | O-ring |
| 14 - | Plastic washer |
| 15 - | Nut, self-locking |
| q | 10 Nm |
| q | Always renew |
| 16 - | Fixing plate |
| q | Fitting position → Fig. |
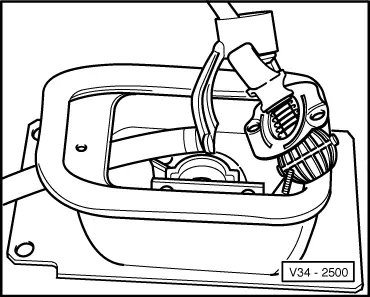
| 17 - | Spring |
| 18 - | Ball |
| q | Replace together with the ball support box |
| 19 - | Spacer |
| 20 - | Ball support box |
| q | Renew together with the ball |
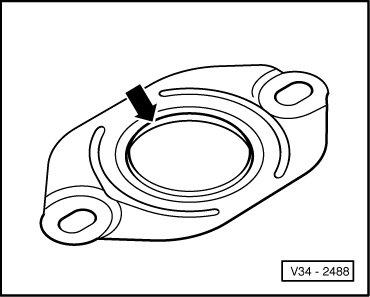
| 21 - | Gasket |
| q | For the ball support box |
| q | Renew if damaged |
| 22 - | Rivet |
| q | To secure the stop |
| 23 - | Stop |
| 24 - | Plastic nut |
| q | To secure the central console to the gear stick protective cover |
| 25 - | Spacer |
| q | To secure the central console to the gearbox protective cover |
| 26 - | Self-adhesive gasket |
| q | Stuck to gear stick protective cover |
| 27 - | Gear stick protective cover |
| q | Dismantling and fitting → Chapter, Gear drive mechanism: removing and installing |
| 28 - | Heat shield |
| 29 - | Bolt |
| q | 20 Nm |
| q | To secure the protective cover to the bodywork |
| 30 - | Cross beam |
| 31 - | Nut, self-locking |
| q | 20 Nm |
| q | Always renew |
|
|
|
|
|
|