
Leon Mk1
 Note
Note
Note
|
| Consult the equivalence table for tools and equipment according to applicability among Seat / VW / Audi / Skoda → Chapter. |

| Special tools and workshop equipment required |
| t | Torque wrench kit -SAT 8010-, see equivalent → Anchor |
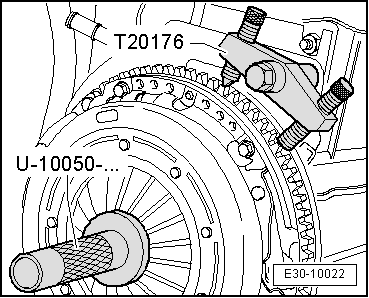
| t | Hose clamp -T20176 -, see equivalent → Anchor |
| t | Centre guide -U 10050-10-, see equivalent → Anchor |
| t | Lubricating grease → Spare parts catalogue. |

| 1 - | Flywheel |
| q | removing and fitting → Rep. gr.13 |
| q | Make sure that the centring pins have a tight fit. |
| q | Contact surface for clutch lining must be free of grooves, oil and grease. |
| 2 - | Clutch plate |
| q | Allocation → Electronic spare parts catalogue (ETKA) |
| q | Spring cage aligned towards pressure plate |
| q | Centring → Fig. |
| q | Lightly grease splines |
Note| Clean input shaft splines and in the case of used clutch plates, also the hub. Remove corrosion and apply only a very thin coating of grease -G 000 100- to the splines of the input shaft. Then move the clutch plate on the input shaft from side to side, until the hub moves smoothly on the shaft. Excess grease must be removed. |
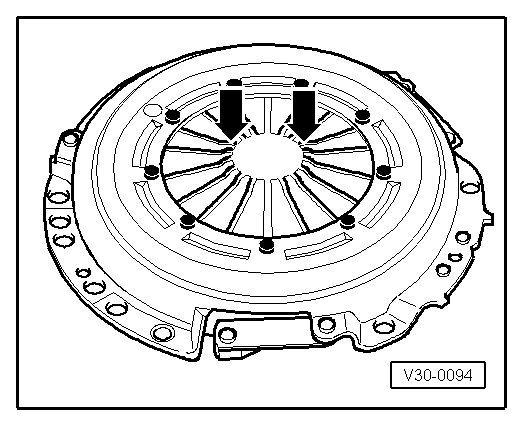
| 3 - | Thrust pad |
| q | removing and fitting → Fig. |
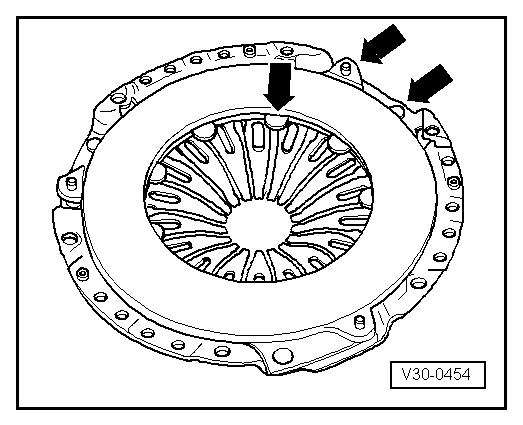
| q | Checking ends of diaphragm spring → Fig. |
| q | Check the elastic and riveted joints → Fig. |
Note| Pressure plates are protected against corrosion and greased. Only the contact surface may be cleaned, otherwise the service life of the clutch will be considerably reduced. |
| 4 - | M6 bolt, 13 Nm, M7 bolt, 20 Nm |
| q | select via the → Electronic spare parts catalogue (ETKA) |
| q | Loosen and tighten diagonally in several stages |
|
|
|
|
|