
Leon Mk1
 Note
Note
|
|
|
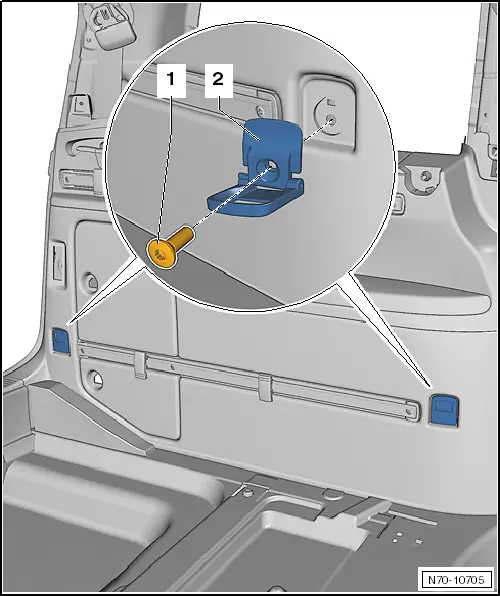
| – | Fold down fastening rings -2- and remove screws -1- (8 Nm). |
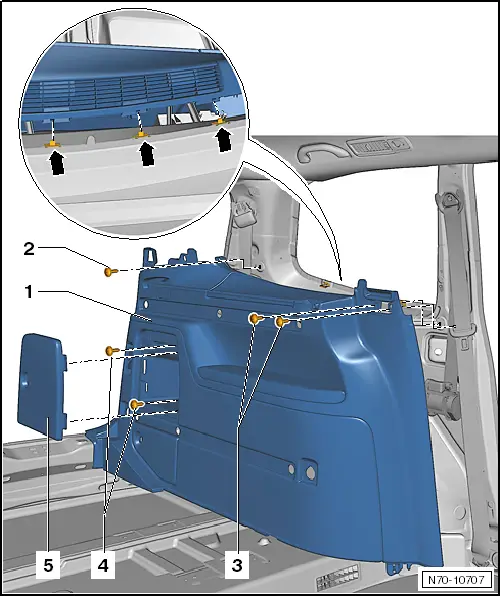
| – | Undo and remove the three bolts -1- (4.5 Nm) and remove upper guide rail -2-. |
| – | Undo and remove the three bolts -4- (4.5 Nm) and remove lower guide rail -5-. |
Note| During installation, make sure that all threaded connections are fitted with washers -3-. |

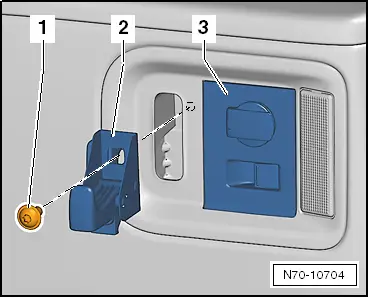
| – | Remove cover of storage box -5-. |
| – | Undo and remove bolts -2-, -3- and -4- (4.5 Nm). |
| – | Pull luggage compartment trim -1- inwards out of mountings in body. |
Note| When installing luggage compartment trim -1-, make sure clips -arrows- are correctly seated. |
Note
|