seat Workshop Repair Guides

SEAT Workshop Service and Repair Manuals

Luggage compartment trims > < Interior moulded roof: removing and fitting
Removing and installing lower A-pillar trims
  Note
Removal and installation are described for the left vehicle side. Follow same instructions for the right side as appropriate.
Removing
–  Remove dash panel end trim → Chapter.
Driver side only
–  Remove bonnet operating lever → General body repairs, exterior; Rep. gr.55.
   
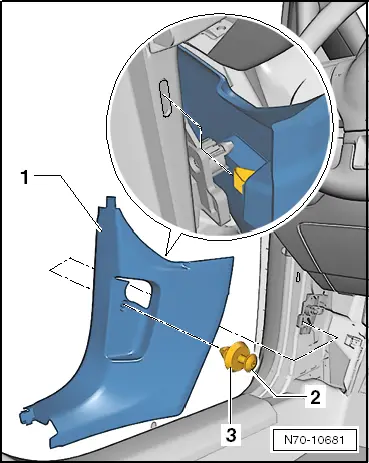
–  Remove cover of spreader pin -2- and twist spreader pin out.
–  Pull out spreader rivet -3-.
  Note
For right-hand drive vehicles, a clip in the area of the bulkhead on the driver's side also has to be detached.
Both sides of vehicle
–  Detach sill panel strip in transitional area leading to lower A-pillar trim -1- → Chapter
–  Unclip lower A-pillar trim from mounting in body in area of dash panel.
  N70-10681

Luggage compartment trims > < Interior moulded roof: removing and fitting