
Leon Mk1
|
|
|
|
|
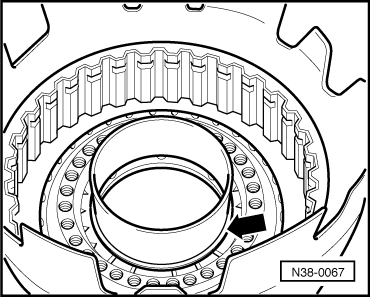
| t | The reverse gear clutch -K2- must only be removed for cleaning. |
| t | When removing the clutch, do not damage the ball valve -arrow-. |
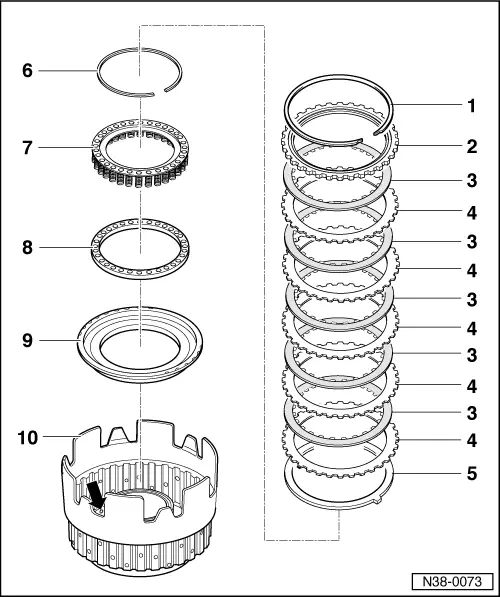
| 1 - | Safety ring |
| q | Mark it after removal and refit in the same position |
| q | Different thicknesses |
| 2 - | Support disk |
| q | Fit the flat side facing the inner disks |
| q | Different thicknesses |
| 3 - | Inner disk |
| q | Number of disks → Chapter |
| q | Before installing, leave in ATF 15 minutes |
| 4 - | Outer disk |
| q | Number of disks → Chapter |
| 5 - | Ondulated elastic washer |
| 6 - | Safety ring |
| q | Removing and installing → Fig. |
| q | Fitting position → Fig. |
| 7 - | Support tab |
| q | With springs |
| q | Fitting position → Fig. |
| 8 - | Springed support ring |
| 9 - | Piston |
| q | The sealing lips are fixed by vulcanisation to the piston |
| q | Before fitting, apply ATF to the sealing lips |
| q | When fitting the piston, turn it slightly |
| 10 - | Clutch housing |
 Note!
Note!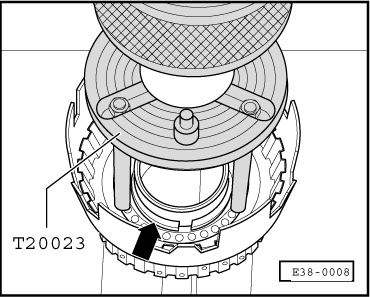
|
|