seat Workshop Repair Guides

SEAT Workshop Service and Repair Manuals

Removing and installing parts of the lubrication system > < Oil sump: remove and install
Oil pressure and oil pressure switch: check
   
Oil pressure and oil pressure switch: check
Special tools and workshop equipment required
t  Oil checker pressure gauge -V.A.G 1342-
t  Diode lamp -V.A.G 1527 B-
t  Auxiliary measuring equipment -V.A.G 1594 A-

  Note!
Operation inspection and repair of visual and acoustic oil pressure indicators: → Current flow diagrams, Electrical fault finding and Fitting locations
Checking process
   
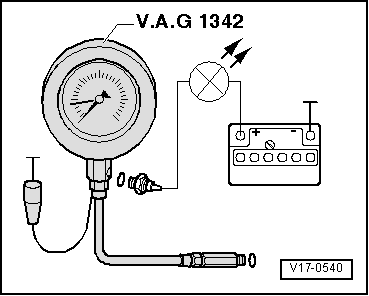
–  Remove the 0.5 bar oil pressure switch (green insulation) and screw it into the checker.
–  Screw the checker into the cylinder head, at the site of the oil pressure switch.
–  Ground the brown cable of the checker (-).
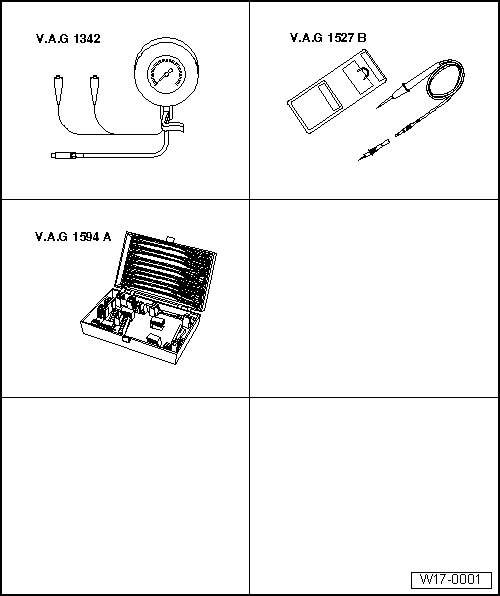
–  Using auxiliary cables -V.A.G 1594 A-, connect diode lamp -V.A.G 1527 B- to the positive battery terminal (+) and to the oil pressure switch. The lamp should not flash.
–  If the diode flashes, renew the 0.5 bar oil pressure switch.
If the lamp does not flash:
–  Start up the engine and slowly rev up.
   Between 0.3...0.6 bar of pressure the lamp should flash. If not, renew the 0.5 bar oil pressure switch.
–  Continue to rev up. At 2000 rpm, with the oil at a temperature of 80 °C, the oil pressure should be at a minimum of 2.0 bar.
  V17-0540
Marks on the dipstick
1 - Maximum mark
2 - Minimum mark
a - Area between the upper edge of the area marked and maximum mark: oil must not be topped up.
b - The level is in the area marked: oil need not be topped up.
c - Area between the minimum mark and the lower edge of the area marked: oil must be topped up with a maximum of 0.5 l.
  N17-0037

Removing and installing parts of the lubrication system > < Oil sump: remove and install