
Leon Mk1
|
|
|
 Note
Note
|
|
|
|
|

|
|
|
|
|
 WARNING
|
|
|
|
|
|
Note
|
|
|
|
|
|
 Caution
Note
|
|
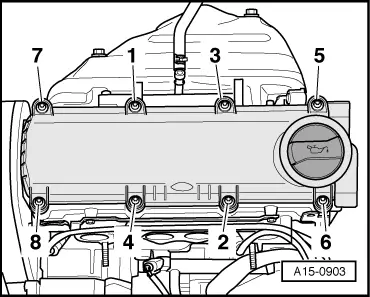
| Components: | Nm | |
| Rear notched belt guard | M6 | 10 → Remark |
| on cylinder head | M8 | 23 → Remark |
| Camshaft gear to camshaft | 100 | |
| Conductor frame to cylinder head | 23 | |
|