seat Workshop Repair Guides

SEAT Workshop Service and Repair Manuals

Exhaust turbocharger > < Compressor: removing and fitting
Intercooler: removing and fitting
   
Intercooler: removing and fitting
Special tools and workshop equipment required
t  Refractometer -T10007-
t  Hose clip pliers -VAS 6340-
t  Torque wrenches -V.A.G 1331-

Removing
–  Remove front bumper cover → General body repairs, exterior; Rep. gr.63
–  Remove air filter → Chapter.
–  Pull connectors off thermal switch and radiator fan.
  Note
To prevent damage to condenser or to refrigerant lines/hoses, ensure that the lines and hoses are not stretched, kinked or bent.
–  Remove retaining clamp(s) for refrigerant lines.
   
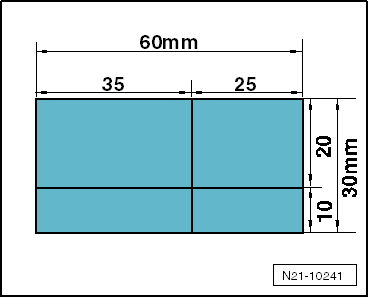
–  Make a paper template with the specified dimensions.
  N21-10241
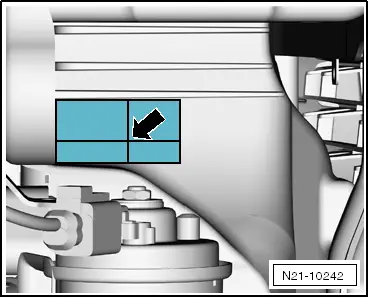
–  Fit the template on the plastic bracket at the front right so that it rests against the edges at the top and left.
–  Mark the intersection on the template -arrow- with a centre punch.
–  Drill a hole into the plastic bracket with a 5-mm drill bit.
–  Drill or cut the hole to 16 mm.
  N21-10242
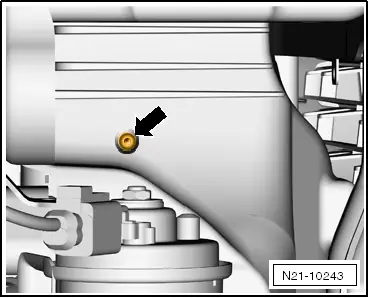
–  Unscrew securing bolt -arrow-.
  N21-10243
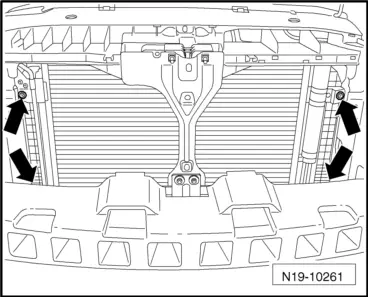
–  Unscrew securing bolts -arrows-.
–  Remove charge air cooler downwards.
Fitting
Installation is carried out in the reverse order. When installing, note the following:
Tightening torques:
  N19-10261
ComponentNm
Air vent guard on the radiator5
Radiator to charge air cooler5
Charge air cooler to condenser5


Exhaust turbocharger > < Compressor: removing and fitting