| –
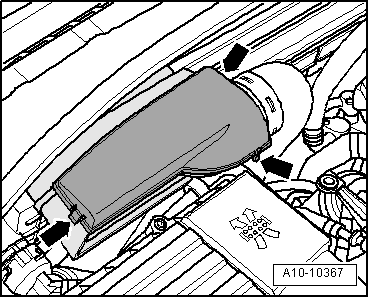
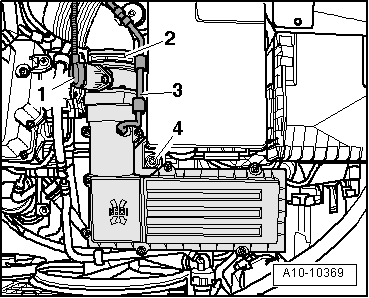
| Remove the electrical connector -1- from the air mass meter -G70-. |
| –
| Remove the aeration hose -3- and separate the bracket -2- of the air duct hose. |
| –
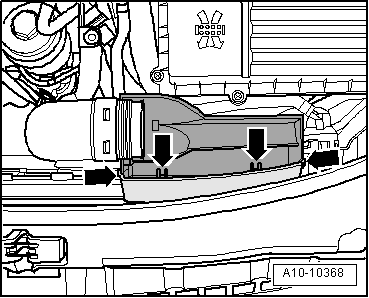
| Unscrew bolt -4- and remove air filter housing. |
| –
| Loosen the two bolts which attach the air mass gauge -G70-. |
| –
| Carefully extract the air mass gauge -G70- from the air filter housing guide. |
| For the air mass gauge to work properly, respect the instructions and work procedures which are described below. |

Note | t
| If the air filter element is very dirty or wet, the air mass gauge could get dirty with dust particles or get wet and therefore the readings will be incorrect. The consequence is a loss of power as the calculated quantity to be injected will be less. |
| t
| Always use original parts. |
| t
| Do not use a silicone based lubricant when fitting the air duct hose. |
| –
| Check that there are no salt residues, dirt or leaves in the air mass gauge, or in the air duct hose (clean air side). |
| –
| Check that there is no dirt between the air duct and the air filter element. Check that there are no salt residues, dirt or leaves in the air filter housing (top and bottom); clean with a vacuum cleaner if necessary. Air filter cartridge: removing and installing → Chapter |
| The rest of the installation is carried out in the reverse sequence. |
|
|
|