seat Workshop Repair Guides

SEAT Workshop Service and Repair Manuals

Remove and install the upper element of the oil tray > < Remove and install the lower element of the oil tray
Oil pump: removing and installing
Removing → Anchor.
Installing → Anchor.
Consult the equivalence table for tools and equipment according to applicability among Seat / VW / Audi / Skoda → Chapter.
Special tools and workshop equipment required
   
t  Extractor -T10118-, see equivalent → Anchor
t  Silicone sealant → Spare parts catalogue
  W00-1148
Removing
–  Release the fasteners -1 and 2- to remove the central soundproofing sump.
  A10-10761
–  Remove bolts -arrows-.
–  Remove the air conduit guard -Pos. 1 and 2-.
–  Remove the lower cover of the distribution chain.
  A21-10162
–  Disconnect the plug connection -1- from the oil level and oil temperature sender -G266- (depending on the version).
–  Drain the engine oil.
  A10-10025
–  Extract bolts -1... 20- crosswise.
–  Take off sump: if necessary loosen it by striking lightly with a rubber hammer.
  A17-10270
–  Remove the baffle plate -arrow-.
  Note
The following procedure must be performed in one operation; this requires the assistance of a second mechanic.
–  Remove bolts -arrows-.
  A17-10391
Engine codes BYT, BZB:
–  Remove bolts -arrows-.
  A17-10272
Engine codes CCZB, CDAA:
–  Remove bolts -arrows-.
  N17-10271
–  Pull chain tensioner back using assembly tool -T10118- and have oil pump removed by a second mechanic.
  N17-10160
Fitting
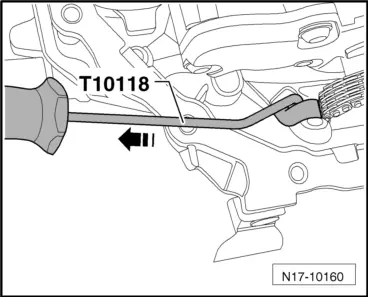
–  Pull back the chain tensioner using the assembly device -T10118- and fit the drive chain to the oil pump.
Installation is carried out in the reverse sequence; note the following:
l  Tightening torques → Chapter
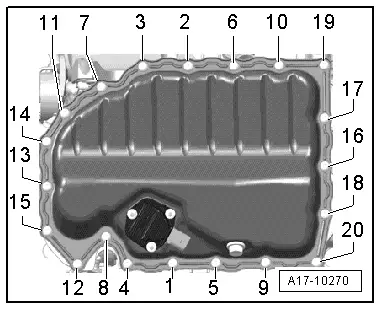
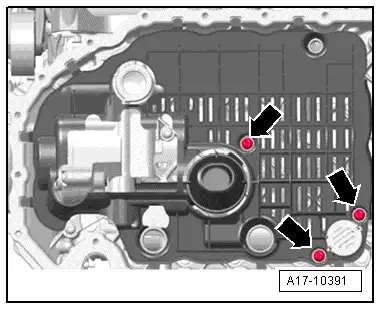
–  Before installing oil pump, check strainer in oil suction pipe and oil galleries in upper part of sump for soiling.
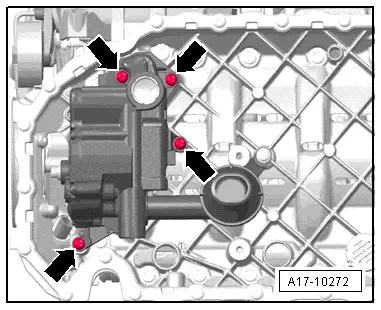
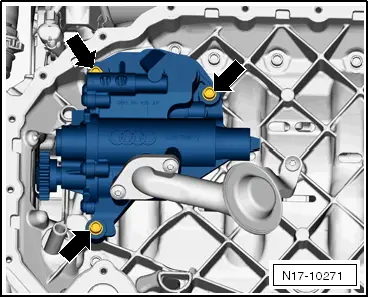
–  Check that both centring sleeves are fitted in oil pump.
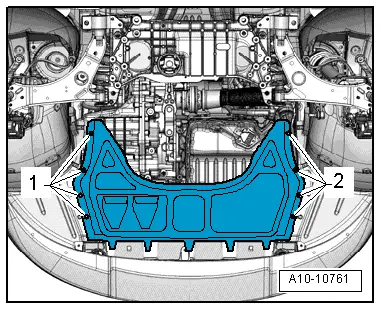
–  Renew baffle plate.
  Note
Plastic ribs which are permanently deformed when tightening are located on the splash guard. These plastic ribs allow the splash guard to adapt without play so that it does not cause any noises. For this reason, it is necessary to always replace the splash guard.
–  Fit the lower oil tray element → Chapter
  N17-10160

Remove and install the upper element of the oil tray > < Remove and install the lower element of the oil tray