seat Workshop Repair Guides

SEAT Workshop Service and Repair Manuals

Removing and installing ancillary bracket > < Removing and installing poly V-belts
Removing and installing tensioner for poly V-belt
Removing → Anchor.
Installing → Anchor.
   
Consult the equivalence table for tools and equipment according to applicability among Seat / VW / Audi / Skoda → Chapter.
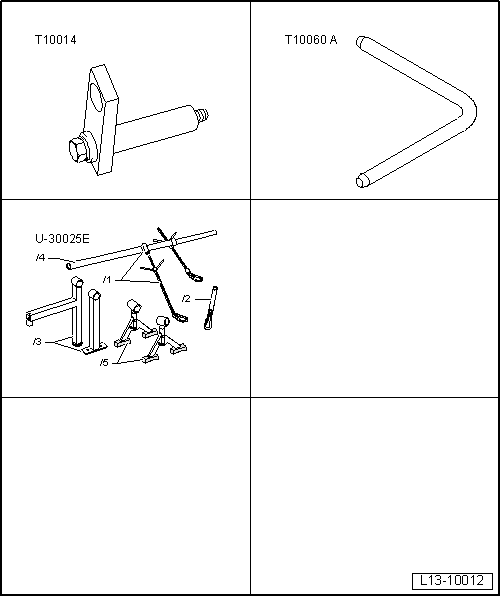
Special tools and workshop equipment required
t  counterhold -T10014-, see equivalent → Anchor
t  Hose clamp -T10060A-, see equivalent → Anchor
t  Socket -U-30025E-, see equivalent → Anchor
t  M10 nut

Removing
   
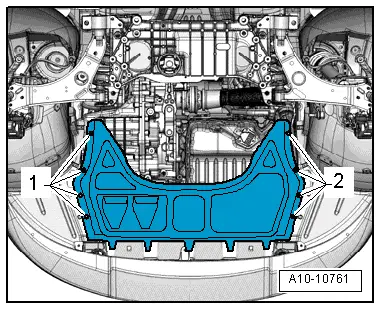
–  Release the fasteners -1 and 2- to remove the central soundproofing sump.
  A10-10761
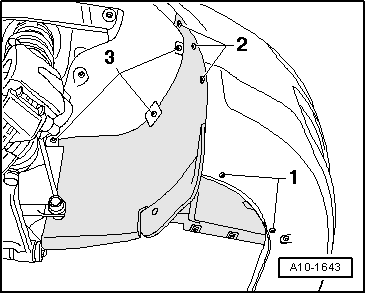
–  Remove the right hand side soundproofing by releasing the fasteners -1, 2, 3-.
  A10-1643
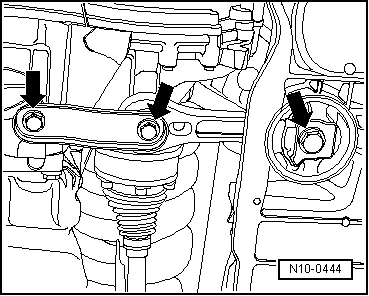
–  Unscrew the pendulum support -arrows-:
  N10-0444
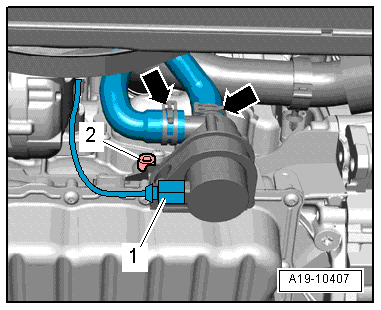
–  Unscrew the bolt -2- on the bracket for the coolant pump -V51-.
  Note
Ignore positions -1- and -arrow-.
  Note
With engines BZB, CDAA and CCZB, the spindle hook can be hung into the engine eye without the support tool -T10014-.
  A19-10407
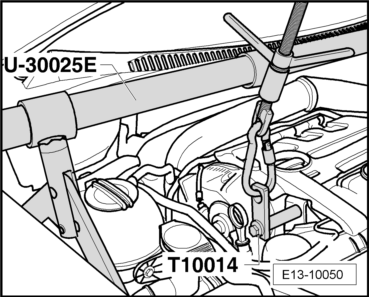
–  Bolt the support tool -T10014- to the engine eyebolt with an M10 nut.
–  Position the support -U-30025E- on the edges of the wings.
–  Place the spindle hook on the support tool -T10014- and slightly pre-tension.
  Caution
Take care not to damage the edges of the wings.
–  Put tension on the engine using the spindle.
  E13-10050
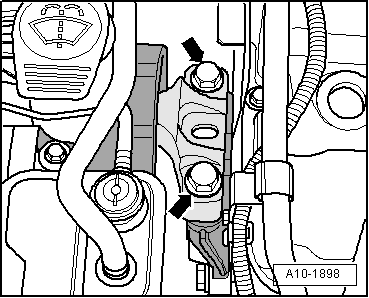
–  Unscrew the bolts -arrows- of the group mounting on the engine.
  A10-1898
–  Allow the engine to descend about 55 mm.
  Caution
If the poly V-belt runs in the opposite direction when it is refitted, this can cause breakage.
Before removing, mark direction of rotation of toothed belt with chalk or felt-tip pen for re-installation.
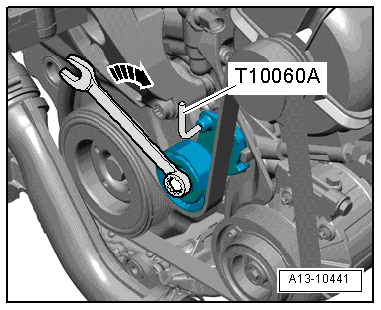
–  To release tension on the Poly-V belt, turn the tensioning device in the -direction of the arrow-.
–  Lock the tension device with the locking tool -T10060A-.
–  Remove the Poly-V belt with the tension device.
  A13-10441
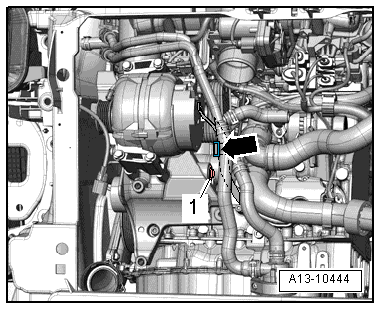
–  Release the cable harness -arrow-.
–  Unscrew the bolt -1- and remove the Poly-V tension device from the ancillary group bracket.
Installing
l  Tightening torque → Chapter
Reassembly is carried out in the reverse order; note the following:
  A13-10444
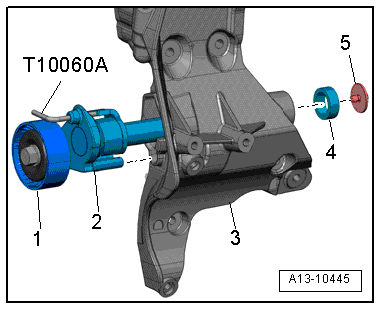
–  Insert the belt tension device -1- into the ancillary group bracket -3- and tighten the bolt -5-.
l  Note the location of the support element -2-: the support element projection should insert into the corresponding hole of the ancillary group bracket.
l  Note the centring socket -4-.
–  Install poly V-belt → Chapter.
–  Install continued coolant circulation pump -V51- → Chapter.
–  Engine brackets → Chapter.
  A13-10445

Removing and installing ancillary bracket > < Removing and installing poly V-belts