seat Workshop Repair Guides

SEAT Workshop Service and Repair Manuals

Crankshaft > < Removing and installing ancillary bracket
Removing and installing vibration damper
Removing → Anchor.
Installing → Anchor.
Consult the equivalence table for tools and equipment according to applicability among Seat / VW / Audi / Skoda → Chapter.
Special tools and workshop equipment required
   
t  Hose clamp -T10060A-, see equivalent → Anchor
  W00-10235
t  Spanner -T10355-, see equivalent → Anchor
Removing
  W00-10474
–  Release the fasteners -1 and 2- to remove the central soundproofing sump.
  A10-10761
–  Remove the right hand side soundproofing by releasing the fasteners -1, 2, 3-.
  A10-1643
–  Remove bolts -arrows-.
  A21-10162
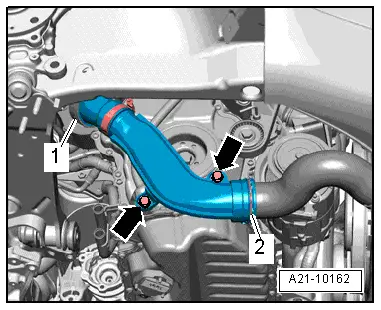
–  Remove the clamps -1- and -2- and remove the air duct.
  Caution
If the poly V-belt runs in the opposite direction when it is refitted, this can cause breakage.
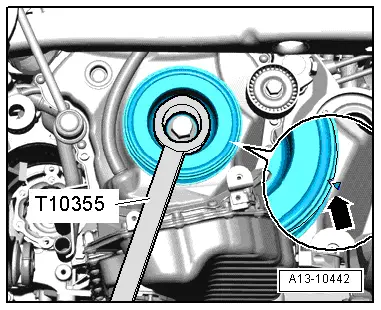
Before removing, mark direction of rotation of toothed belt with chalk or felt-tip pen for re-installation.
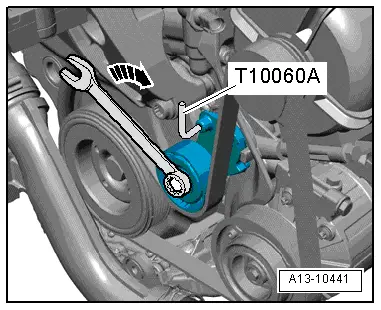
–  To release tension on the Poly-V belt, turn the tensioning device in the -direction of the arrow-.
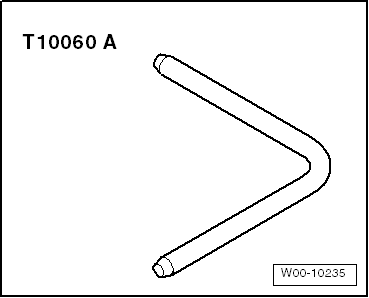
–  Lock the tension device with the locking tool -T10060A-.
–  Remove the Poly V belt from the alternator pulley.
  A13-10441
–  Rotate the vibration damper with the wrench -T10355- to the TDC position („OT“) -arrow-.
l  The notch on the vibration damper should face the mark -arrow- on the lower cover of the distribution chains.
–  Unscrew the vibration damper bolt using the wrench -T10355-.
  Caution
Risk of damage to engine.
To preserve the adjustment values, the crankshaft must not be moved from the TDC position („OT“) while the vibration damper has been removed.
Fitting
l  Tightening torque → Chapter
Reassembly is carried out in the reverse order; note the following:
–  Replace the vibration damper bolt.
  A13-10442
–  Fit new O-ring -1-.
–  Moisten the seal lip with gearbox oil.
–  Fit the vibration damper while noting the cogwheel -arrow-.
–  Install poly V-belt → Chapter.
  A13-10443

Crankshaft > < Removing and installing ancillary bracket