Leon Mk1
|
|
|
|
|
|
|
|
|
|
|
|
|
|
|
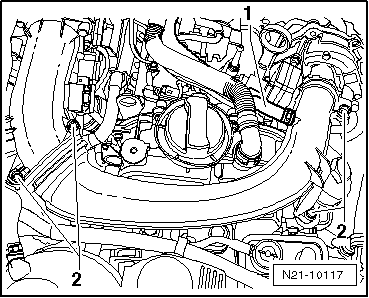
| Components: | Nm | |
| Screws of the pressure capsule on the exhaust turbocharger | 10 | |

|
|
|
|
|
|
|
|
|
|
|
|
|
|
|
| Components: | Nm | |
| Screws of the pressure capsule on the exhaust turbocharger | 10 | |