seat Workshop Repair Guides

SEAT Workshop Service and Repair Manuals

Engine cylinder head, valve gear > < Crankshaft - Components overview
Poly-V belt: Removing and installing
t  Removing → Anchor
t  Fitting → Anchor.
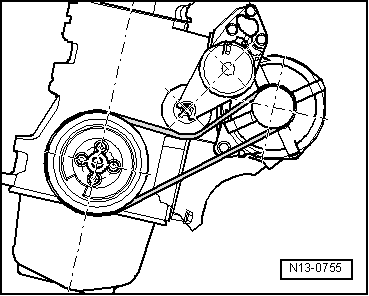
t  Routing of poly V-belt → Anchor
Special tools and workshop equipment required
   
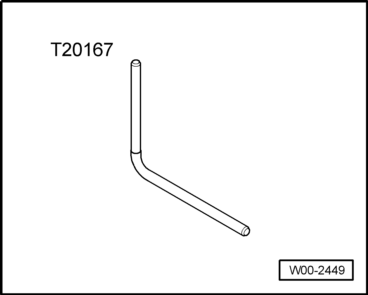
t  Counterhold -T20167-
  W00-2449
Removing
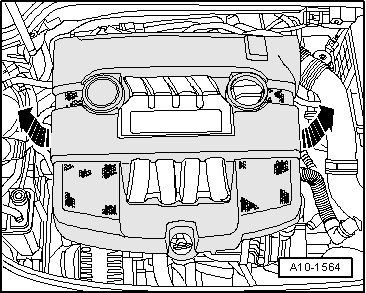
–  Detach engine cover -arrows- (according to version).
  A10-1564
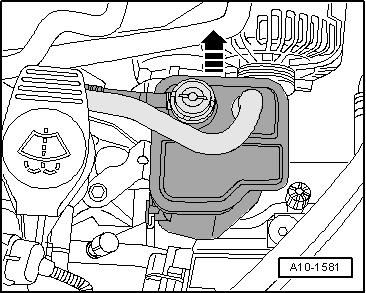
–  Take the active carbon filter out upwards with connected hoses and place to side.
  Note
Before removing the ribbed belt, mark its running direction with chalk or with a felt tipped pen. If the belt runs in the opposite direction when it is refitted, this can cause it to rupture.
  A10-1581
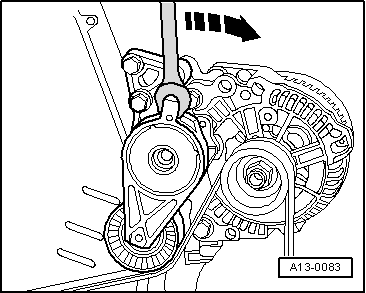
–  To slacken the Poly-V belt, turn the tensioner in the direction of the -arrow-.
  A13-0083
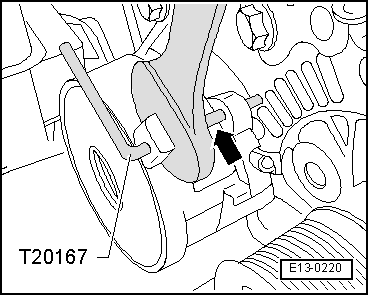
–  Immobilise the tensioner of the Poly-V belt with the counterhold -T20167--arrow-.
–  Take off poly V-belt.
Installing
Installation is carried out in the reverse order of removal while noting the following:
  Note
t  Ensure, before installing Poly-V belt, that all ancillaries (alternator, air conditioning compressor) are secured tightly.
t  When installing the Poly V-belt, check that has the correct D.O.R., and that it is properly seated in the pulleys.
  E13-0220
–  Fit the Poly-V belt on belt pulleys of crankshaft and air conditioner compressor.
–  Fit the ribbed belt to the alternator pulley last.
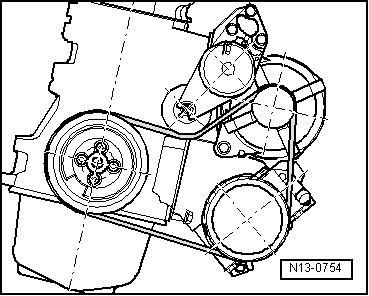
  N13-0754
–  Relax the tensioner and remove the counterhold -T20167- from its bedding -arrow-.
–  Check that poly V-belt is properly seated.
Continue installation following reverse order for removing.
–  Start engine and check that belt runs properly.
  E13-0220
Poly-V belt routing
Path of the Poly-V in vehicles without air conditioning/climate control
  N13-0755
Path of the Poly-V in vehicles with air conditioning/climate control
  N13-0754

Engine cylinder head, valve gear > < Crankshaft - Components overview