seat Workshop Repair Guides

SEAT Workshop Service and Repair Manuals

Unbolting control unit from hydraulic unit > < Removing and installing control unit and hydraulic unit
Removing
Removing
–  Note or request radio code on vehicles with coded radio if necessary.
–  Disconnect battery → Electrical system; Rep. Gr.27.
–  Remove battery.
   
–  Remove trim/air duct -1--arrows-.
–  Remove trim -2- for battery.
  N40-0109
–  If fitted, unclip control unit -arrows 2-.
–  Unbolt control unit bracket -arrow 1-.
–  Unbolt battery trim with cooling system expansion tank -arrows 3- and lay to side without opening cooling system.
–  Draw off as much brake fluid as possible from brake fluid reservoir using a suction bottle.
–  Connect bleed bottle hose to front left brake caliper bleed valve and open bleed valve.
–  Fit brake pedal depressor -V.A.G 1869/2-.
–  Depress brake pedal with brake pedal depressor.
–  Close front left bleed valve.
  N45-0126
–  Release control unit connector -arrow 1- and pull off -arrow 2-.
–  Place sufficient lint-free cloths under the control unit and hydraulic unit.
Ensure no brake fluid gets onto contacts.
  N45-0127
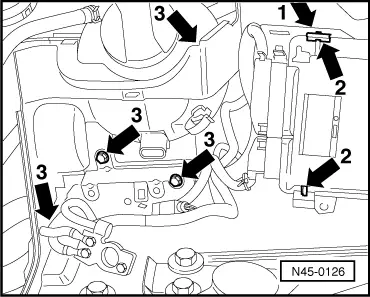
–  Unbolt brake pipes -2- from hydraulic unit to brake master cylinder, and seal brake pipes threaded holes with plugs from repair kit Part No. 1H0 698 311 A.
–  Remove brake master cylinder → Chapter.
–  Unbolt remaining brake pipes -3- from hydraulic unit, and seal brake pipes and threaded holes with plugs from repair kit Part No. 1H0 698 311 A.
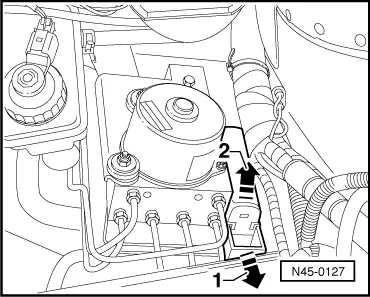
–  Unscrew self-locking nuts -1- from bracket for hydraulic unit.
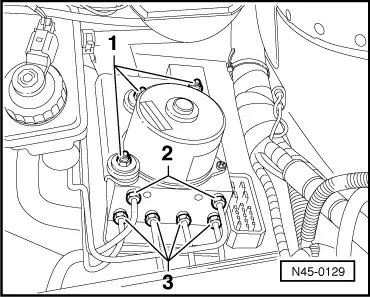
–  Remove hydraulic unit together with control unit.
  N45-0129

Unbolting control unit from hydraulic unit > < Removing and installing control unit and hydraulic unit