skoda Workshop Repair Guides

Skoda Workshop Service and Repair Manuals

Installing rear rubber-metal bearing > < Installing front rubber-metal bearing
Removing rear rubber-metal bearing
–  Remove rear wheels.
–  Remove coil springs → Chapter.
–  Remove the rear silencer of the exhaust gas system → Engine → Rep. gr.26..
   
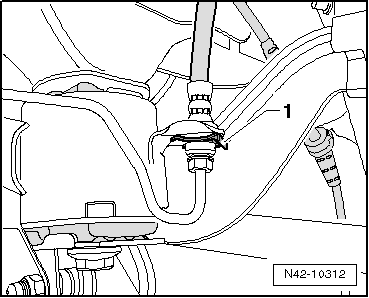
–  Pull out retaining clip -1-.
  Note
Do not separate the brake lines.
  N42-10312
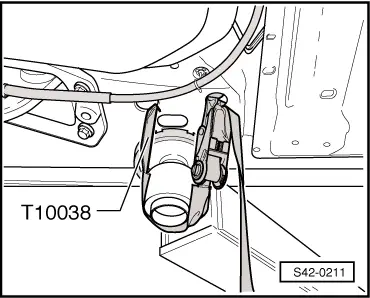
–  Lash the vehicle on both sides to the supporting arms of the lift platform using tensioning straps -T10038-.
  WARNING
If the vehicle is not lashed, there is a risk of the vehicle toppling off the lift platform.
  S42-0211
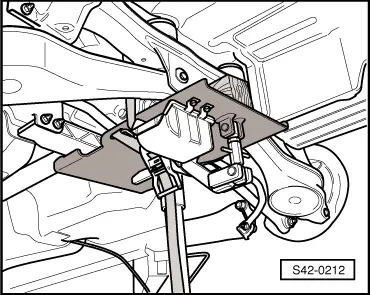
–  Position engine/gearbox jack e.g. -V.A.G 1383 A- with universal gearbox mount e.g. -V.A.G 1359/2- under the assembly carrier and secure with tensioning strap.
  S42-0212
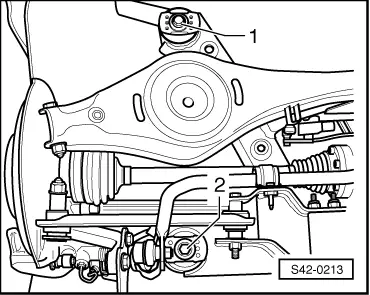
–  Release screw -1- or -2- on both sides.
  Note
To provide a clearer illustration, only the left vehicle side is illustrated.
In order to fix the assembly carrier, the fixing devices -T10096- must be successively screwed into the positions -1- and -2- on both vehicle sides.
  S42-0213
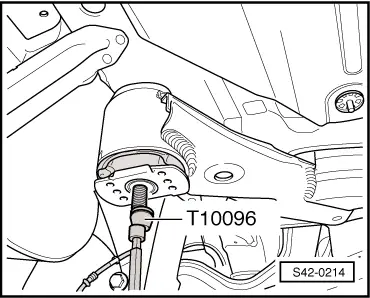
–  Fix the position of the assembly carrier using fixing devices -T10096-.
  Note
The fixing devices -T10096- must only be tightened to maximum 20 Nm as otherwise the fixing bolt thread becomes damaged.
–  Successively replace the fixing bolts at the assembly carrier on both sides with fixing devices -T10096- and tighten to 20 Nm.
The position of the assembly carrier is now fixed.
–  Lower assembly carrier with engine/gearbox jack, e.g. -V.A.G 1383 A- approx. 10 cm.
–  Mark the position of the rubber-metal bearing to the assembly carrier e.g with a felt-tip pen.
  S42-0214
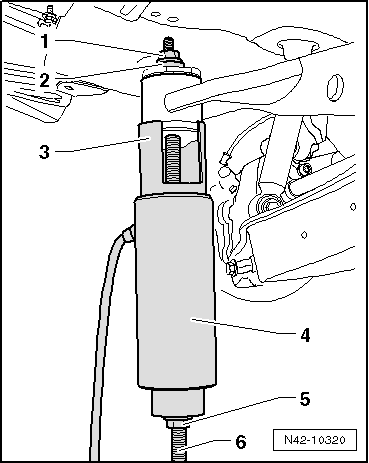
–  Position the special tools as shown in the figure.
1 - Nut -T10263/5-
2 - Washer out -T10263-
3 - Pipe section -T10263/6-
4 - Hydraulic cylinder e.g. -VAS 6178-
5 - Nut -T10263/5-
6 - Screw -T10263/4-
–  Pretension special tools.
–  Pull out the rubber-metal bearing by actuating the pump.
  Note
When pulling out the rubber-metal bearing, the outer ring of the bearing is sheared off. This is done with a loud bang.
  N42-10320
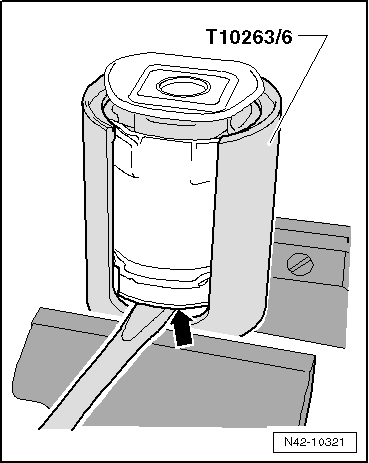
–  After pulling out the rubber-metal bearing, it must be removed from the pipe section -T10263/6-.
–  Clamp pipe section -T10263/6- on the surfaces provided in a vice.
–  Lever between the pipe section -T10263/6- and the rubber-metal bearing -arrow- using a screwdriver and drive out the rubber-metal bearing; if necessary slightly knock onto the drift with a hammer.
  N42-10321

Installing rear rubber-metal bearing > < Installing front rubber-metal bearing