skoda Workshop Repair Guides

Skoda Workshop Service and Repair Manuals

Waiting time > < Preparations for installing the window
Glueing
Glueing
   
Dimensions for applying the glue
1 - Glue bead
2 - Primer
3 - Glass
a - Bead width - 8 mm
b - Bead height - 12 mm
c - Distance between outer edge of glass and bead centre - 8 mm.
  Note
On the rear window on Octavia Combi II, the adhesive bead must be applied as close as possible to the outer edge of the window because of possible touching of the collecting bar for the rear window heater and the resulting corrosion of the tailgate. At the same time ensure that not too much glue is pressed out of the bottom edge of the window after pressing on the window.
  S64-0124
–  After completing the preparations cut back the nozzle for applying the glue as shown in the figure.
–  Dimension -a- 12 mm.
–  Bead width 8 mm.
–  Application direction -arrow-.
  Note
t  The bead section is dependent on the section of the nozzle and the application speed.
t  When using a 1 window pane component glue -DH 009 100- or -DH 009 100 03-, preheat the glue cartridges for 20 minutes in the warming box e.g. -V.A.G 1939-.
t  Use disposable gloves when working with glues and adhesive materials.
  WARNING
Comply with the manufacturer's handling instructions.
  S64-0022
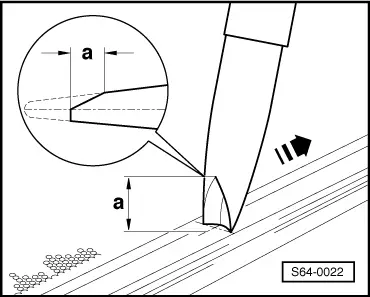
–  Apply the glue on the sealing profile (Pos. 1) perpendicular to the window surface and all around it.
  Note
t  Apply adhesive cement at a temperature of 10 to 30°C.
t  Open all vehicle windows before fitting the window into the frame.
–  Insert window pane into the frame with the aid of two suction cup tools (e.g. -V.A.G 1344-), centre and press onto the spacer catches.
  WARNING
The window pane must be inserted immediately after applying the adhesive cement, as otherwise the adhesion of the glue and sealing materials may be poor.
–  Insert window pane in frame using pane positioning wedges or eccentric pieces (applies for the windscreen).
–  Fix the window during hardening process with adhesive tape.
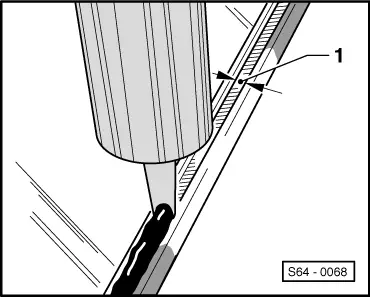
–  Any adhesive cement which was applied too thickly and is pressed out up to the heating filaments of the rear window heating must be removed.
  S64-0068

Waiting time > < Preparations for installing the window