skoda Workshop Repair Guides

Skoda Workshop Service and Repair Manuals

Removing and installing the fuel delivery unit > < Drain the fuel tank
Removing and installing the fuel tank
Special tools and workshop equipment required
t  Engine and gearbox jack, e.g. -V.A.G 1383 A-
Removing
l  The fuel tank must not be more than 1/4 full.
l  Ignition and all electrical components switched off, ignition key withdrawn.
  Note
t  Empty the fuel tank if necessary → Chapter.
t  Observe the safety instructions before starting fitting work → Chapter.
t  Observe rules for cleanliness → Chapter.
–  Removing rear seat bench → Body Work → Rep. Gr.72.
   
–  Unclip cover -4- with fuel pump control unit -J538--1-.
  Note
For vehicles with auxiliary heating, the plug connection for the dosing pump -V54- must be disconnected additionally.
  S20-0159
–  Unplug the 5-pin connector -1- from the fuel delivery unit.
–  Clean around the fuel filler neck.
–  Unscrew the right rear wheel.
–  Remove the rear right wheelhouse liner → Body Work → Rep. Gr.66.
  M20-0232
–  Unscrew screws -1- for filler neck on the body.
–  Unclip electrical line from the holder -2- at top and bottom filler neck.
  S20-0245
–  Disconnect vent line -1- (white) and fuel feed line -2- (black) at the connection point.
  Note
t  For vehicles with auxiliary heating, the fuel line for the dosing pump -V54- must be disconnected additionally.
t  Press in the securing ring in order to unlock the lines.
–  Remove the middle part of the exhaust system, if necessary first the front and rear part of the exhaust system must be separated → Chapter.
  S20-0163
–  Release fixing screws -2- and -4- and remove the tensioning strap.
–  Support fuel tank using the engine and gearbox jack -V.A.G 1383 A-.
–  Release fixing screws -1- and -3-.
–  Slightly lower the fuel tank.
  Note
The filler neck must be “extracted” between structure and rear axle To this end lift down the fuel tank with a 2nd mechanic from engine and gearbox jack -V.A.G 1383 A-.
Install
–  Check if the earth lead shows traces of oxidation on both connections, remove if necessary.
  S20-0246
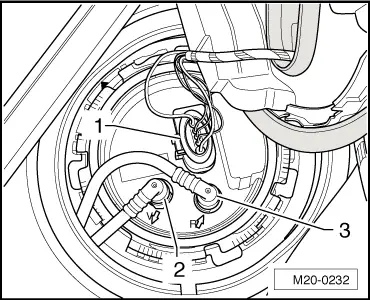
–  Check the fitting position of the earth lead -1-.
l  The plug -1- on the metal plate ring -2- must be placed on firmly.
l  The contact tab -4- must be inserted into the fuel tank -3- and secured with the spacer bush -5-.
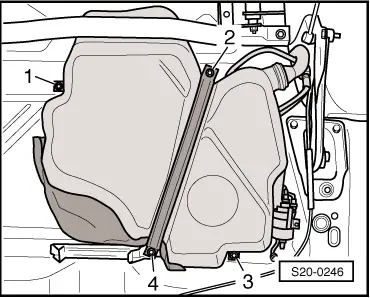
–  Insert the filler neck between rear axle and structure with the assistance of a second mechanic. Then position the fuel tank on the Engine and gearbox jack -V.A.G 1383 A-.
Further installation occurs in reverse order. Pay attention to the following:
t  
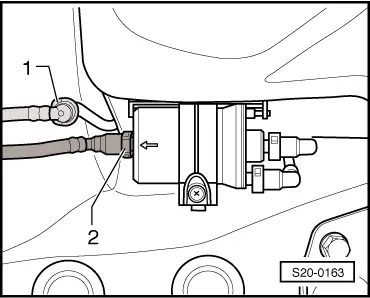
Lay the vent and fuel lines without any kinks.
t  Do not mix-up the feed and return line (the return line is blue, the feed line is black).
t  Make sure the line connections fit tightly and the 5-pin connector fit tightly.
t  Check earth connection of fuel tank/body at filler neck.
t  After installing the fuel tank, check whether the lines are still clipped in place on the fuel tank.
t  If the fuel delivery unit was replaced on vehicles with the fuel pressure sender for low pressure -G410 - ( → Chapter, position 4), adapt the engine control unit to the fuel pump → Vehicle diagnosis, testing and information system VAS 5051. On vehicles without the fuel pressure sender for low pressure -G410-, the adaptation is performed automatically while driving.
  S20-0242
–  Install cover -4- with fuel pump control unit -J538--1-.
   The arrow -2- on the cover points in direction of travel.
  S20-0159

Removing and installing the fuel delivery unit > < Drain the fuel tank