skoda Workshop Repair Guides

Skoda Workshop Service and Repair Manuals

Removing gearbox - four-wheel drive (Octavia II and Superb II) > < Removing and installing the gearbox
Removing gearbox - front-wheel drive (Octavia II and Superb II)
Special tools and workshop equipment required
t  Adapter -MP3-419/40 (VW 771/40)-
t  Gearbox attachment device -MP3-478 (3336)-
t  Hose clamps -MP7-602 (3094)-
t  Supporting device -T30099-
t  Base -T30099/1-
t  Gearbox mount -3282-
t  Adjusting plate -3282/33-
t  Engine/gearbox jack, e.g. -V.A.G 1383A-
t  Adapter -MP9 200/18 (10 - 222 A /18)-
t  Closing tool -T10249-
t  Tensioning strap -T10038-
t  Support -T10346-
t  Grease for plug serration of clutch disc -G 000 100-
–  Remove engine cover → engine; Rep. gr.10.
  Note
t  All cable straps which are detached or cut open when removing, should be fitted on again in the same place when installing.
t  After the battery earth strap is disconnected and connected, carry out additional operations → Electrical System; Rep. gr.27.
Disconnect the battery-earth strap with the ignition off → Electrical System; Rep. gr.27.
–  Remove air filter → Engine; Rep. gr.23 or → Engine; Rep. gr.24.
–  Remove battery and battery tray → Electrical System; Rep. gr.27.
For vehicles Octavia II
–  Remove the cooling water tank cover → Body Work; Rep. gr.66.
For all vehicles
   
–  Remove lock washer -3- for shift cable from gearbox shift lever -1- and pull off the shift cable from the stud -arrow-.
Metal relay lever
–  Remove lock washer -4- for selector cable from relay lever -2- and pull off the selector cable from the stud -arrow-.
  S34-0870
Plastic relay lever
l  In order to avoid damage to the selector cable, the cable lock must be separated from the selector cable before removal.
–  Pull forward the locking mechanism as far as the stop in -direction of arrow 1-, then lock by turning to the left in -direction of arrow 2-.
For all vehicles
  S34-1183
–  Disconnect cable support from gearbox -arrows-, lay aside and tie up.
A tube-hose line or a plastic line is fitted between the master cylinder and the bleeder.
  Note
When performing the following work, make sure that no brake fluid comes into contact with the frame side rail or the gearbox. If this is the case, these points must be cleaned thoroughly.
  S34-0871
If a plastic line is fitted, then the plastic return hose -3- must be removed at the master cylinder and closed with a suitable tool e.g. -T10249/1- (do not use hose clamp -MP7–602 -, otherwise the return hose -3- can get damaged).
  N30-10122
If a tube-hose line is fitted, pinch off the hose for the tube-hose line -A- to the master cylinder with the hose clamp -MP7-602 (3094)- (do not use the hose clamp -MP7–602- for the plastic line -A-).
–  Pull out retaining clip -arrow- for tube-hose line and/or plastic line up to the stop.
–  Pull out the tube-hose line and/or plastic line from the bleeder/slave cylinder and close in a suitable manner.
  Caution
After removing the tube-hose line, do not operate the clutch pedal.
  S34-0826
–  Remove earth strap -1- from top starter.
–  Disconnect plug -2- of the reversing light switch -F4-.
–  Disconnect connector and cables from the starter.
–  Remove engine/gearbox connecting screws at the top.
–  Remove fixing screw for starter at the top.
For vehicles Octavia II
If hose and cable connections are located in the area of the lifting eye of the engine for the supporting device -T30099-, these must now be removed.
  S34-0872
–  Fit supporting device -T30099-.
–  Take up the weight of the engine/gearbox unit at the spindle.
For vehicles Superb II
–  Remove the filling pieces from both upper edges of the wings.
If hose and cable connections are located in the area of the lifting eye of the engine for the supporting device -MP9-200 (10-222A)-, these must now be removed.
  S34-1082
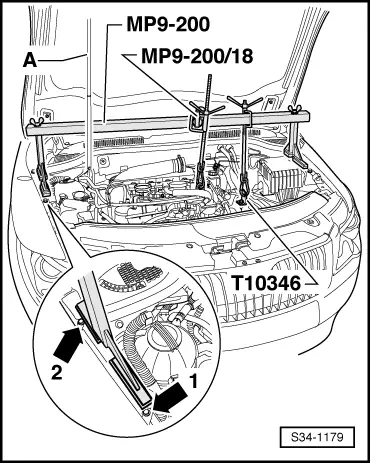
–  Screw the bracket -T10346- to the rear opening of the three openings in the battery tray.
–  To do so, use a collar screw M6 or one of the fixing screws for the battery tray.
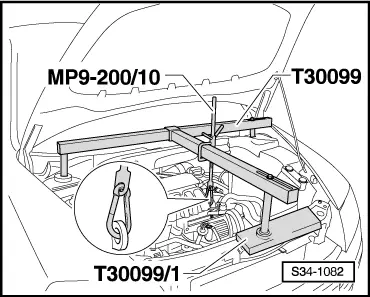
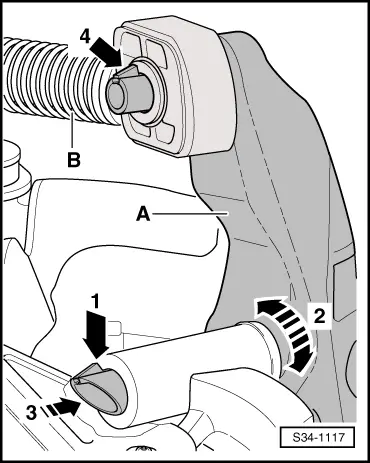
–  Position the supporting device -MP9-200 (10 - 222 A)- behind the pressurized gas strut -A- for the front flap.
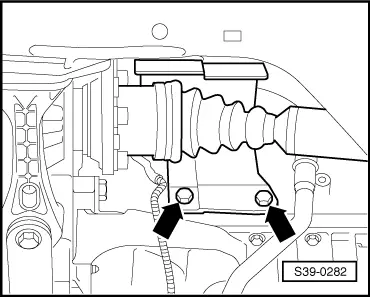
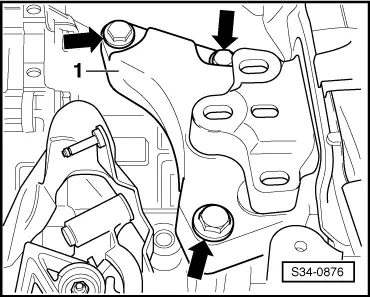
–  Place the feet of the supporting device, as shown in the illustration, behind the screw -arrow 1- and sideways up to the screw -arrow 2- on the wheelhouse frame side rail at the top.
–  Connect the holder -T10346- with the supporting device.
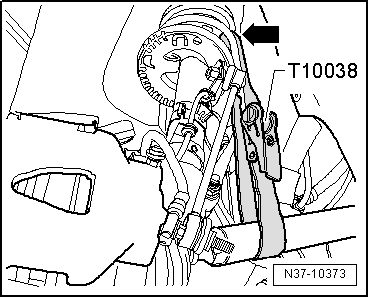
–  Hook the second spindle into the front left engine lifting eye.
–  Slightly take up the weight of the engine/gearbox unit via the spindle, do not raise.
For all vehicles
–  Loosen the wheel bolts on front left and front right.
–  Raise vehicle → Booklet.
–  Remove wheels at the front.
–  Remove noise insulation → Body Work; Rep. gr.50 and lower part of the front left wheelhouse liner → Body Work; Rep. gr.66.
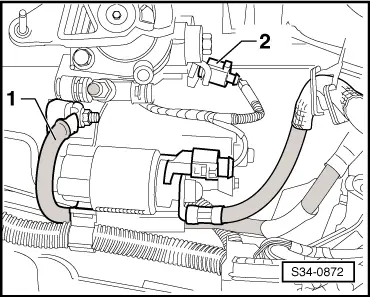
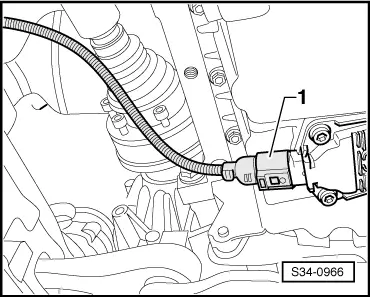
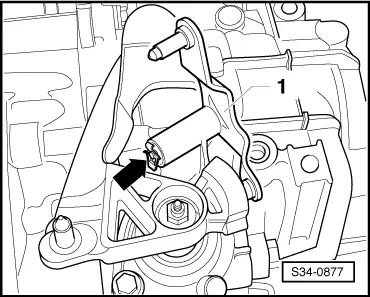
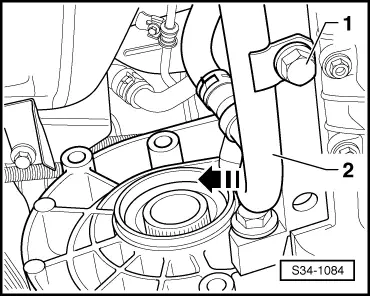
–  Unscrew bracket from starter.
–  Removing starter → Electrical System; Rep. gr.27.
  S34-1179
–  Disconnect plug connection -2- at the charge pressure sender -G31-.
–  Release screw -4-.
–  Remove the air guide pipe between the charge air cooler and the intake manifold, to do so slightly raise the retaining clips -1- and -3- → Engine; Rep. gr.21.
  S34-0867
–  Detach support (if present) -1- for exhaust system from gearbox -arrow- and front exhaust pipe → Engine; Rep. gr.26.
–  Separate exhaust system at the clamping sleeve and remove bracket for the exhaust system from the assembly carrier → Engine; Rep. gr.26.
–  Tie up pre-exhaust pipe.
  Note
The decoupling elements in the exhaust pipe should not be bent by more than 10° - risk of damage.
  S34-0873
–  Remove pendulum support from gearbox, to do so release the bolts -arrow B- and -arrow C-.
  S34-0882
–  Disconnect plug -1- for oil level and oil temperature sender -G266-.
  S34-0966
–  Remove left drive shaft from the flange shaft of the gearbox → Chassis; Rep. gr.40 and tie up as far as possible (do not damage the surface protection).
  N37-10373
–  Disconnect plug -B- from oil level and oil temperature sender -G266-.
For vehicles Octavia II with intermediate shaft
–  Remove drive shaft to the right → Chassis; Rep. gr.40.
–  Remove right intermediate shaft -C- from bracket -D--arrows- and pull off from the rigid shaft of the gearbox.
For all vehicles without intermediate shaft
  S34-0874
–  Only remove right drive shaft from the flange shaft -A- of the gearbox.
  S34-0891
–  For this purpose, remove screen cap for drive shaft (if present) from the engine -arrows-.
–  Secure drive shaft (e.g. with wire, cord).
For vehicles with start-stop system
  S39-0282
–  Separate the plug from the transmission neutral sender -G701--arrow-.
Continued for all vehicles:
  N34-11322
–  Disconnect the plug connection on the front left vehicle level sensor -G78- (if present).
–  Unscrew nut -2-.
–  Release screw -1- and remove the sender.
–  Fix the assembly carrier before removing → Chassis; Rep. gr.40.
–  Remove the assembly carrier with console without steering gear, left track control arm and coupling rod → Chassis; Rep. gr.40.
  S94-0202
–  Unscrew the screws -arrows- of the left unit mounting -2- from the console -1-.
  S34-0875
–  Lower the gearbox to the dimension -a- approx. 60 mm by adjusting the spindle.
  S34-0869
–  Unscrew the fixing screws -arrows- for the console -1-.
–  Remove console -1- from gearbox.
  S34-0876
Metal relay lever
–  Detach circlip -arrow- from the relay lever -1- and remove relay lever.
Plastic relay lever
l  Gearbox shift lever is located in the neutral position.
  S34-0877
The relay lever is secured with a clip -arrow 1- in the cover
–  Remove the clip -arrow 1- and the relay lever together with the cable lock -arrow 2-.
  N34-11141
The relay lever is secured with a catch -arrow 1- in the cover
–  Carefully press down the catch -arrow 1- up to the stop.
–  Move back and forward reversing lever -A- in its position -arrow 2-. To do so carefully pull out in -direction of arrow 3- with the cable lock -B-.
  Note
To install, grease bearing points and friction surfaces with grease -G 000 450 02-.
For all vehicles
–  Remove the gearshift lever from the gearshift shaft.
–  Remove engine/gearbox connecting screws at the bottom and screw (M8 x 30) for the bracket of the coolant pipe to turbocharger (if this wiring is available).
–  Align gearbox mount -3282 - for removal of gearbox „02Q“ with adjusting plate -3282/33-.
–  Insert gearbox mount -3282 - into engine/gearbox jack, e.g. -V.A.G 1383A-.
–  Align arms of the gearbox mount to match the holes in the adjusting plate.
  S34-1117
–  Screw in mounting elements-A-, as shown on the adjusting plate.
–  Instead of the mounting element-C- screw in the bolt -3282/29-.
–  Position the engine and gearbox jack e.g. -V.A.G 1383A- below the vehicle; the arrow -B- on the adjusting plate points in the direction of travel/vehicle.
–  Align the adjusting plate parallel to the gearbox.
  S34-0881
–  Secure adapter -MP3-419/40- in the threaded bore of the gearbox housing as shown.
–  Subsequently screw in the bolt -3282/29- into the hole for the fixing screw of the pendulum support on the gearbox.
–  Secure the gearbox on the gearbox mount -3282- using screw (M10 x 20) -A-.
While doing so the drift -B- should close at the bottom flush with the guide of the gearbox mount -3282--arrow-.
–  Remove engine/gearbox -C- connecting screw.
For vehicles with auxiliary heating
  S34-0827
–  Unscrew screw -1- and carefully press off the pipe -2- of the auxiliary heating from the engine -in direction of arrow-.
Continued for all vehicles
  S34-1084
–  Remove small cover plate -A- for flywheel.
–  Unscrew engine/gearbox connecting screw -arrow-.
–  Press gearbox from engine (dowel sleeves).
  S34-0879
–  Turn the gearbox in the area of the differential gear via the spindle -1- of the gearbox mount -3282- upwards.
–  Position the gearbox via the spindle -2- of the gearbox mount -3282- inclined to the left.
–  Then guide the right flange shaft of the gearbox past the flywheel, while doing so observe the frame side rail -arrow-.
–  Carefully lower the gearbox.
  Note
Observe all lines when lowering the gearbox.
  S34-1087

Removing gearbox - four-wheel drive (Octavia II and Superb II) > < Removing and installing the gearbox