
Octavia Mk2
 Note
Note
Note
|
|
|
Note
|
|
|
|
Note
|
|
Note
|
|
| Tightening torque |
| Component | Nm | |
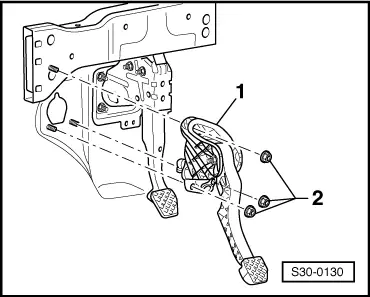
| Bearing bracket | → Chapter | |
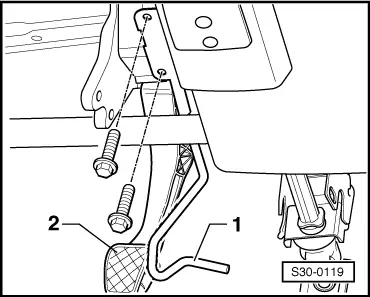
| Crash strut to bracket/steering column | 9 | |