skoda Workshop Repair Guides

Skoda Workshop Service and Repair Manuals

Removing and installing camshaft > < Removing and installing cylinder head cover and camshaft
Remove cylinder head cover
–  Disconnect the battery-earth strap with the ignition off → Electrical System; Rep. gr.27.
–  Drain coolant → Chapter.
–  Remove top timing case → Chapter.
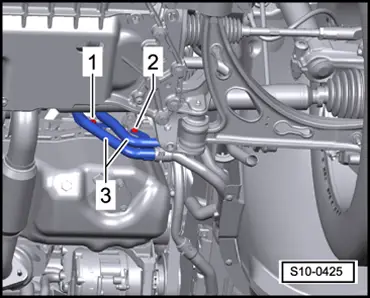
Vehicles with auxiliary heating.
   
–  Unscrew the screws -1 and 2- of the brackets for the coolant pipes for the auxiliary heating -3-.
Continued for all vehicles
  S10-0425
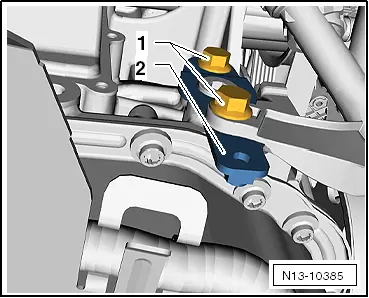
–  Release fixing screws -1- and remove bracket for coolant pipe -2-.
  N13-10385
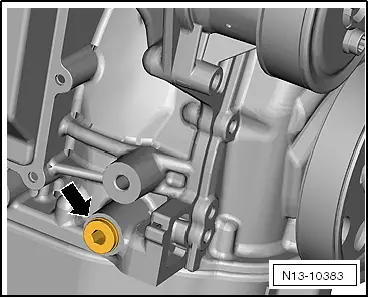
–  Release screw plug -arrow- at cylinder block.
  N13-10383
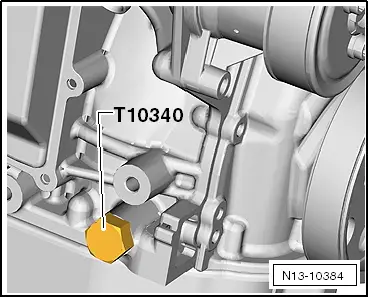
–  Turn the fixing screw -T10340- up to the stop in the cylinder block.
  Caution
If the fixing screw -T10340 - cannot be screwed in up to the stop, the crankshaft is not in the correct position!
In this case proceed as described below.
–  Unscrew the fixing screw.
–  Turn crankshaft 90° (1/4 turn) in direction of rotation of engine.
–  Turn the fixing screw -T10340- up to the stop in the cylinder block.
–  Tighten fixing screw -T10340- to 30 Nm.
–  Turn crankshaft up to the stop in direction of rotation of engine.
The crankshaft is locked in direction of rotation of engine with the fixing screw -T10340-.
  N13-10384
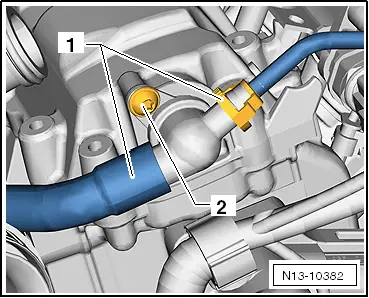
–  Separate the hoses -1- from the non-return valve.
–  Release the fixing screw -2- and pull the non-return valve out of the cylinder head cover.
  N13-10382
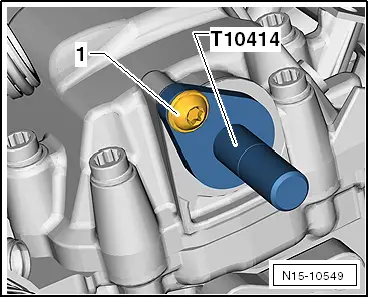
–  Insert the fixing bolt -T10414- up to the stop into the cylinder head cover.
–  Tighten fixing screw -1- by hand.
–  Removing the oil pan → Chapter.
  N15-10549
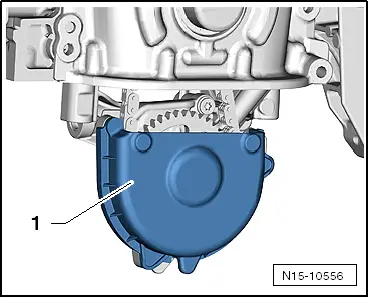
–  Pull off the cover -1- from the oil pump.
  N15-10556
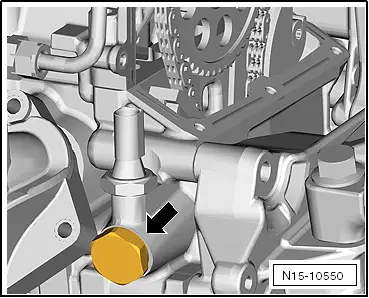
–  Release chain tensioner -arrow- for timing chain.
  N15-10550
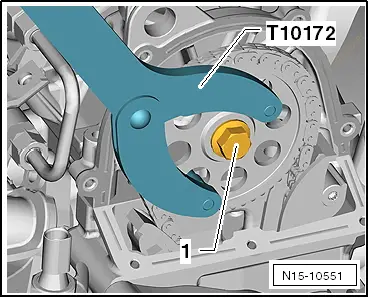
–  Hold the camshaft sprocket with the counterholder -T10172- and slacken the fixing screw -1- of the camshaft sprocket.
–  Remove the camshaft sprocket together with the fixing screw.
  N15-10551
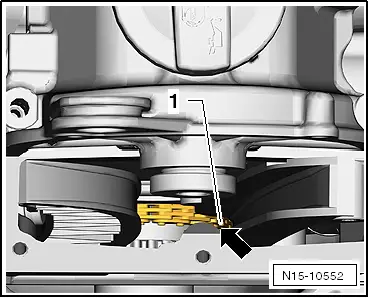
–  Place the chain sprocket -1- down on the integrated peg -arrow- in the timing case.
  Note
The integrated peg on the inner side of the timing case prevents the chain sprocket from falling down.
–  Detach hose to air filter from cylinder head cover.
For the vehicles Fabia II, Roomster
  N15-10552
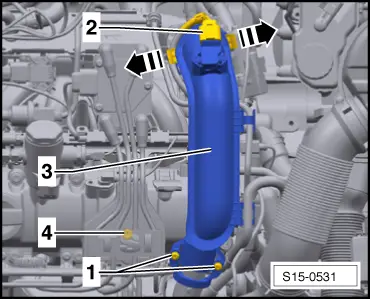
–  Release screws -1- and remove retaining clip.
–  Disconnect plug -2- at charge pressure sender -G31-.
–  Release the catches in -direction of arrow- and detach the pressure pipe -3- first of all from the throttle valve control unit -J338- and then from the exhaust gas turbocharger.
–  Fold open the cover and release the fixing screw -4-.
For the vehicles Octavia II, Yeti
  S15-0531
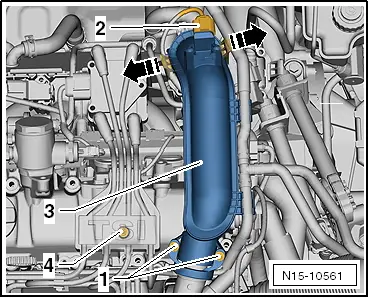
–  Release screws -1- and remove retaining clip.
–  Disconnect plug -2- at charge pressure sender -G31-.
–  Release the catches in -direction of arrow- and detach the pressure pipe -3- first of all from the throttle valve control unit -J338 - and then from the exhaust gas turbocharger.
–  Fold open the cover and release the fixing screw -4-.
Continued for all vehicles
  N15-10561
–  Disconnect all the spark plug connectors -arrows- using the extractor -T10112 A- from the spark plugs and lay the ignition cables to the rear.
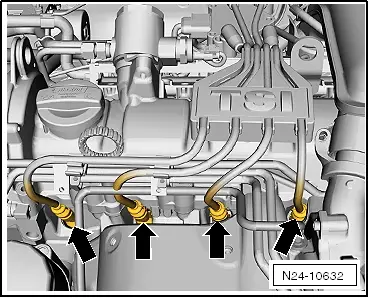
  N24-10632
–  Detach the non-return valve -1- from the cylinder head cover towards the rear in -direction of arrow-.
–  Remove the high pressure pump → Chapter.
–  Unplug connectors from the fuel injection valves.
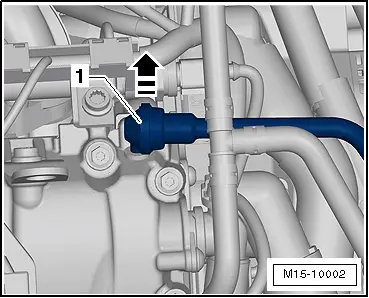
  M15-10002
–  Release the screws -arrows- and disconnect the fuel distributor from the injection valves.
–  Remove exhaust turbocharger → Chapter.
–  Disconnect the plug from the Hall sender -G40-.
–  Pull out oil dipstick.
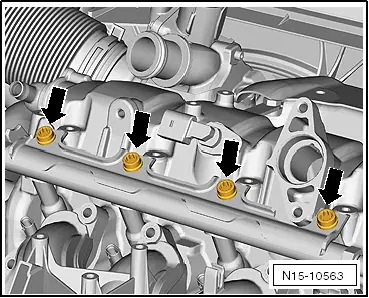
–  Slacken the fixing screws of the cylinder head cover crosswise from outside to inside and unscrew.
–  Carefully remove the cylinder head cover.
  Note
Ensure that no dirt and sealant residues get into the cylinder head.
Remove and install camshaft → Chapter.
Install cylinder head cover → Chapter.
  N15-10563

Removing and installing camshaft > < Removing and installing cylinder head cover and camshaft