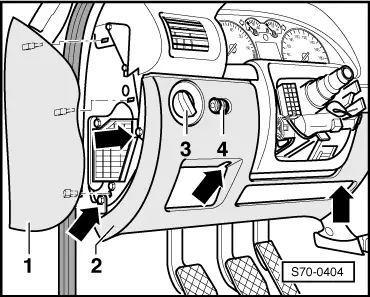
Removing side cover for left dash panel -1- with disassembly wedge -3409-.
–
Remove fixing screws -arrows- (2.5 Nm) and unclip diagnostic connector.
–
Slightly pull the bottom dash panel -2-.
–
Disconnect the connector of the adjuster for headlight range control -4- and connector for footwell lighting (or plug connections for switch for loud alarm system and for interior lighting switch and switch for roof sign TAXI, if available).
–
Remove bottom part of dash panel -2- from the vehicle.
Install
Installation is carried out in the reverse order. Pay attention to the following:
Links open Amazon search results in a new tab. As an Amazon Associate I earn from qualifying purchases.
Help keep workshop manuals free
workshop-manuals.com provides free online workshop manuals.
If they helped you fix your car, please consider sharing or
making a small donation to keep the servers running.