
Superb
|
 Caution
 WARNING
|
|
|
|
|
|
 Note
Note
|
|
|
|
|

|
|
|
|
|
|
|
|
|
Note
|
|
|

|
Note
|
|
|
|
|
|
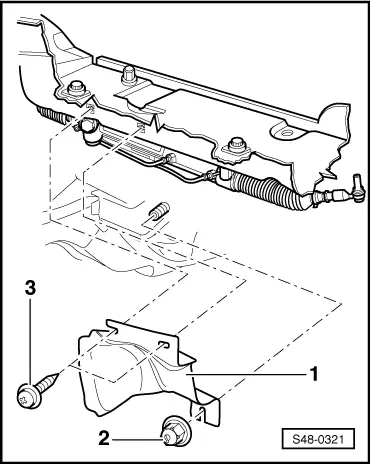
| Tightening torques: |
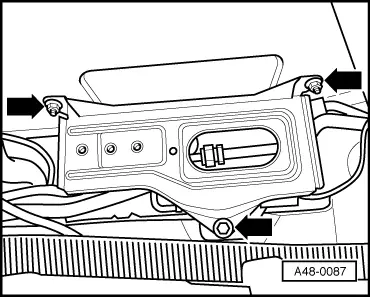
Steering gear to plenum chamber
| 40 Nm + 90° | ||
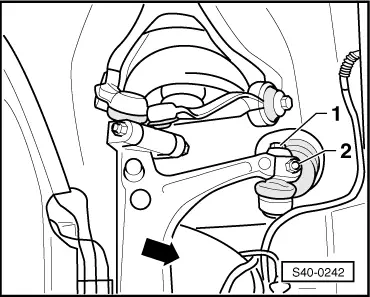
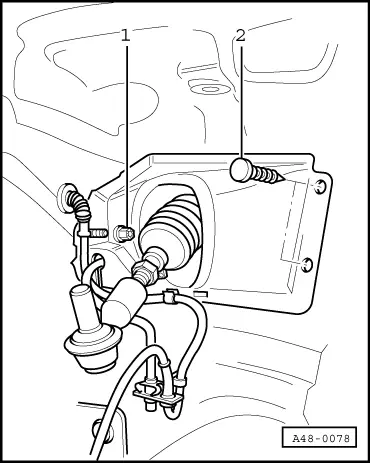
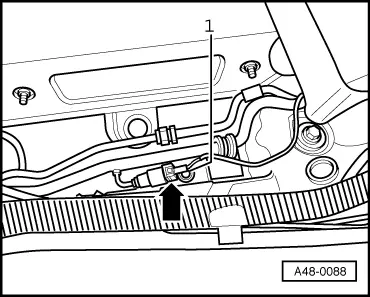
| Hollow screw for the return flow line to steering gear | 50 Nm | ||
| Hollow screw for the pressure line to steering gear | 40 Nm | ||
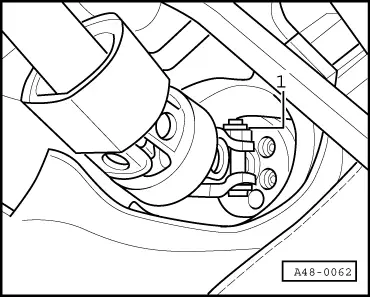
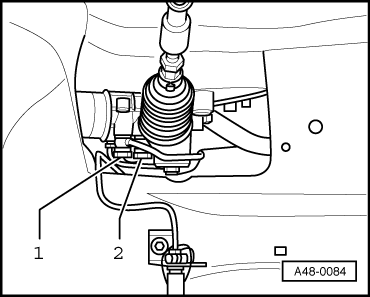
Universal joint of the steering column to power-steering gear
| 40 Nm | ||
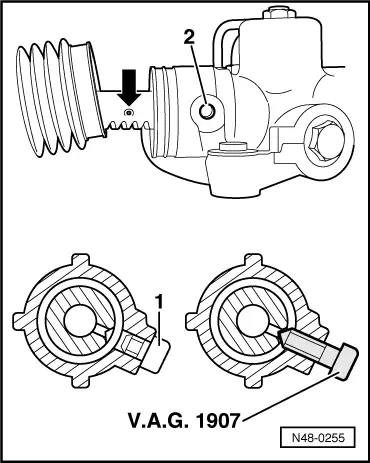
| Allan screw on the steering gear | 13 Nm | ||
| Wheel bolts | 120 Nm |