skoda Workshop Repair Guides

Skoda Workshop Service and Repair Manuals

Checking the coolant system for leaktightness > < Removing and installing fan shroud for radiator fan
Removing and installing radiator
(Octavia II, Yeti)
Special tools and workshop equipment required
t  Catch pan, e.g. - VAS 6208-
t  Pliers for spring strap clamps
Removing
–  Drain coolant → Chapter.
–  Removing fan shroud → Chapter.
   
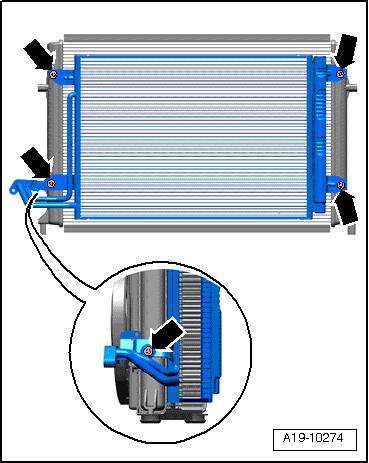
–  Remove top left coolant fitting fom radiator, to do so raise the retaining clip -arrow-.
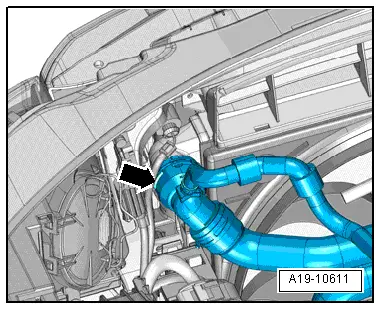
–  Detach the connection fitting of the top right coolant hose for the low temperature radiator.
–  Remove front bumper → Body Work; Rep. gr.63.
–  Remove headlights → Electrical System; Rep. gr.94.
Vehicles with air conditioning
  WARNING
Do not open the refrigerant circuit of the air conditioning system.
In order to avoid damage to the condenser as well as to the refrigerant lines and hoses, ensure that the lines and hoses are not over-tensioned, kinked or bent.
  A19-10611
–  Unscrew fixing screws at condenser -arrows-.
  A19-10274
Continued for all vehicles
–  Release screws for radiator bearing -1-.
–  Swivel the radiator slightly backwards.
–  Unhook radiator upwards and remove downwards.
Install
Installation is performed in the reverse order, pay attention to the following points:
–  Top up and bleed cooling system → Chapter.
Tightening torques: → Chapter
  S19-0187

Checking the coolant system for leaktightness > < Removing and installing fan shroud for radiator fan