| –
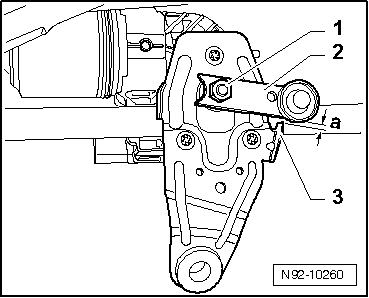
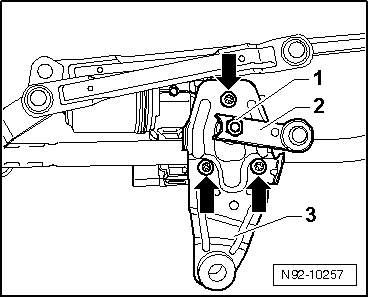
| Release nut -1- and detach engine crank -2- from the wiper motor shaft. |
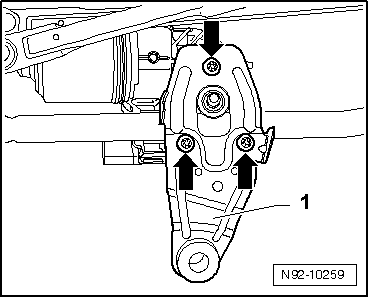
| –
| Unscrew the fixing screws -arrows- and remove the carrier plate -3-. |
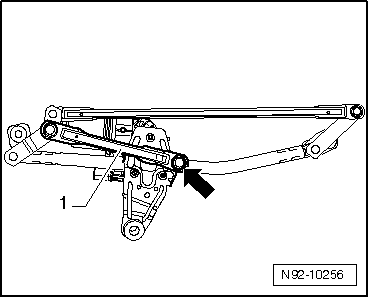
| –
| Take out the wiper motor with the control unit from the wiper frame. |

Note | t
| If the wiper motor is switched on during work, the front flap must be closed and the ignition must be switched on, otherwise the voltage supply of the wiper motor is interrupted. |
| t
| When switching off for the second time, the wiper motor overruns in the offset final setting so that the wiper blade lip is controlled in the other direction. |
| t
| The wiper motor runs downwards and then again a little upwards. This offset final setting cannot be used for installing the crank of the windscreen wiper motor. |
| t
| The final setting must be used in which the wiper motor runs directly and without overrun in the lower final setting. If the wiper motor runs in the offset final setting, the wiper motor must be switched on again. |
| t
| The function of the offset final setting (APS) is only active after 100 wash cycles as of switching off the APS with → Vehicle diagnostic tester in the function „targeted fault finding“ or after the installation of a new wiper motor. If this function is already activated, it can be determined by switching on and off the wiper motor repeatedly. |
| –
| Connect the wiper motor to the plug and run it in the lower final setting by operating the windscreen wiper switch which is used for installing the crank of the windscreen wiper motor. |
|
|
|