|
Auxiliary Housing, Replace (AF 20)
 Remove Remove
Remove transmission – see operation "Transmission, Remove
and Install (AF 20)". Secure converter against falling out.
|
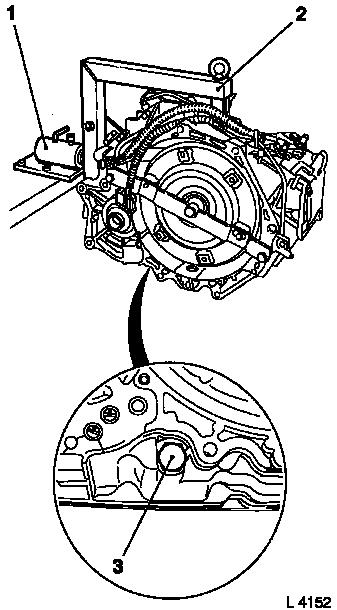
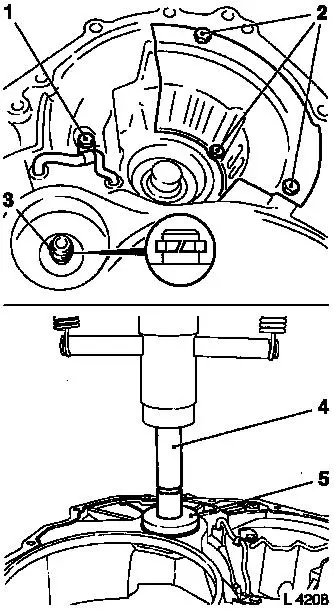
Attach transmission to KM-694-A (2). Attach assembly to KM-113-2
(1).
Remove fluid drain bolt (3), drain transmission fluid and
collect for damage diagnosis – see operation "Transmission
Fluid Condition, Check (AF 13-II/AF 17/AF 20/AF 22)".
Remove converter – see operation "Converter and/or Fluid
Pump Seal Ring, Replace (AF 13-II/AF 17/AF 20/AF 22)".
|
|
|
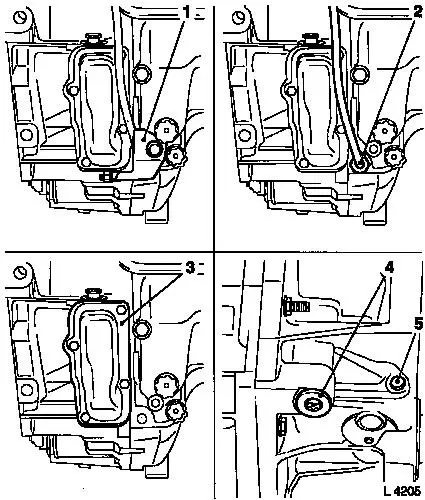
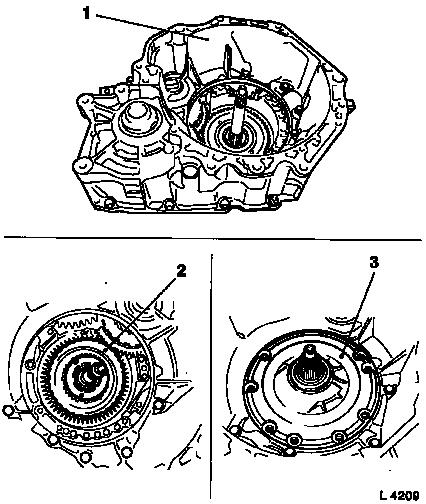
Remove cover plate (1) from side cover and transmission.
Remove fluid temperature sensor (2).
Remove auxiliary housing cover (3) from transmission.
Remove plug – M8 (5). Remove plug – M18 (4). Replace
seal rings of plugs.
|
|
|
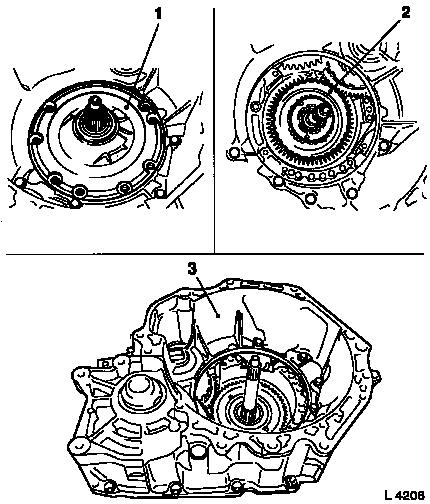
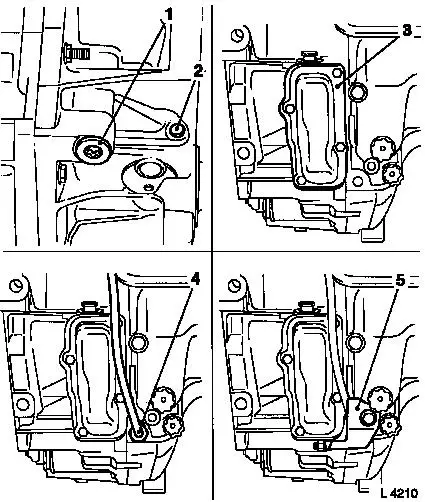
Remove fluid pump assembly (1) with multi-disc brake B1 and B2
– see operation "Fluid Pump Assembly with Multi-disc Brakes
B1 and B2, Remove and Install (AF 20)".
Remove freewheel F1 (2) – see operation "Freewheel F1,
Remove and Install (AF 20)".
Remove auxiliary housing (3) from main housing – 15
fastening bolts, note different bolt lengths. If necessary, detach
housing parts with plastic hammer.
 Clean Clean
Clean all components and check for wear and damage –
replace affected components, if necessary.
|
|
Remove
|
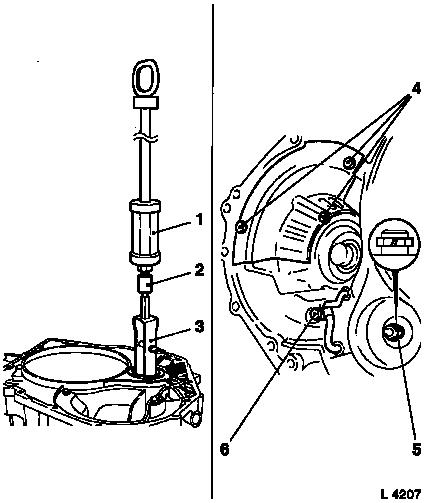
Pull roller bearing (arrow) out of auxiliary housing with
KM-J-26941 (3), KM-313 (1) and KM-483 (2) – heat auxiliary
housing with hot air blower, if necessary.
Remove pipe clamp (6) for fluid line. Release pipe ends with
large screwdriver – do not bend pipe. If necessary, remove
pipe with KM-J-7004 and KM-586. Remove fastening bolts (4) for
fluid baffle plate from auxiliary housing. Remove fluid baffle
plate with magnets (on underside of fluid baffle plate). Remove cut
seal ring from pin in housing (5).
|
|
Clean
Clean all components and check for wear and damage; replace
affected components, if necessary.
Remove gasket residue from main housing and carefully clean
sealing surfaces – ensure that no gasket residue falls into
the main housing.
 Install
|
Attach 3 magnets to underside of fluid baffle plate. Attach
fluid baffle plate to auxiliary housing – insert fastening
bolts (2) with locking compound, tightening torque 6 Nm / 4 lbf
ft.
Carefully drive fluid line into auxiliary housing with plastic
hammer – avoid deformation. Attach fluid line to auxiliary
housing with pipe clamp (1) – tightening torque 6 Nm / 4 lbf
ft. Attach new cut seal ring (3) to pin in housing – do not
expand seal ring more than necessary.
Press new roller bearing into auxiliary housing with KM-629-1
(5) and drift (4) until bearing lower edge touches the housing
floor.
|
|
|
Coat sealing surface on main housing with sealing compound.
Attach auxiliary housing (1) to main housing – 15 fastening
bolts, note different bolt lengths.
Torque
Auxiliary housing to main housing – 30 Nm / 22 lbf.
ft.
Install
Install freewheel F1 (2) – see operation "Freewheel F1,
Remove and Install (AF 20)".
Install fluid pump assembly (1) with multi-disc brake B1 and B2
– see operation "Fluid Pump Assembly with Multi-disc Brakes
B1 and B2, Remove and Install (AF 20)".
|
|
|
Install plug – M8 (2) with new seal ring –
tightening torque 8 Nm / 6 lbf. ft. Install plug – M18 (1)
with new seal ring – tightening torque 35 Nm / 26 lbf.
ft.
Coat sealing surfaces with sealing compound and attach auxiliary
housing cover (3) to transmission – tightening torque 8 Nm /
6 lbf. ft. Attach fluid temperature sensor (4) to transmission
– tightening torque 10 Nm / 7.5 lbf. ft. Attach cover plate
(5) to side cover and transmission – tightening torque 25 Nm
/ 18 lbf. ft.
|
|
Install converter – see operation "Converter and/or Fluid
Pump Seal Ring, Replace (AF 13-II/AF 17/AF 20/AF 22)". Secure
converter against falling out.
|
Attach fluid drain bolt (3) with new seal ring to transmission
– tightening torque 40 Nm / 29.5 lbf. ft.
Remove transmission assembly from KM-113-2 (1) with KM-694-A
(2).
Remove transmission from KM-694-A.
Install transmission – see operation "Transmission, Remove
and Install (AF 20)".
 Inspect
Check and correct level of transmission fluid – see
operation "Transmission Fluid Level, Check and Correct (AF 13-II/AF
17/AF 20/AF 22)".
|
|
|
