Workshop Manuals Factory service & repair Vauxhall
01 General Vehicle Information02 Maintenance, Body and Chassis Sheet Metal Parts, Frame03 Paint04 Body Equipment05 Heating, Ventilation, Air Conditioning (HVAC)06 Front Wheel Suspension, Wheels and Tyres07 Rear Axle and Rear Wheel Suspension08 Brakes09 Engine and Engine Aggregates10 Clutch and Transmission11 Fuel and Exhaust System12 Steering13 Electrical Equipment and Instruments14 Accessories
Vauxhall Astra H04 · Body Equipment
04 · Body & interior

Replace folding roof C-pillar - L67

Make
Vauxhall
Model
Astra H
Section
Folding roof › Repair Instructions › Replace folding roof C-pillar - L67
Body EquipmentReplace folding roof C-pillar - L67

Replace folding roof C-pillar - L67

  Remove

Object Number: 10677543  Size: DEFAULT

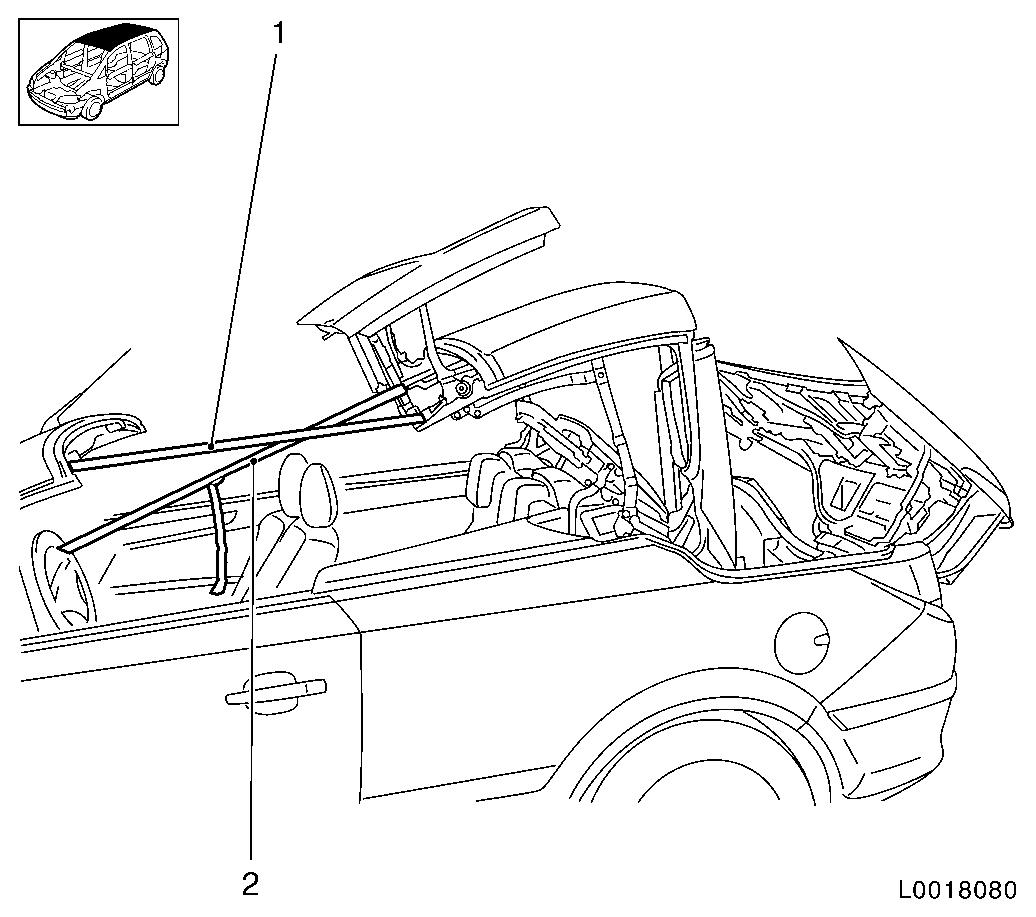
1.   Place folding top in service position
•   Folding top half open
•   Use special tool BO-47651-200 (1)
•   Secure roof with accompanying tensioner belt (2)

Object Number: 10677572  Size: DEFAULT

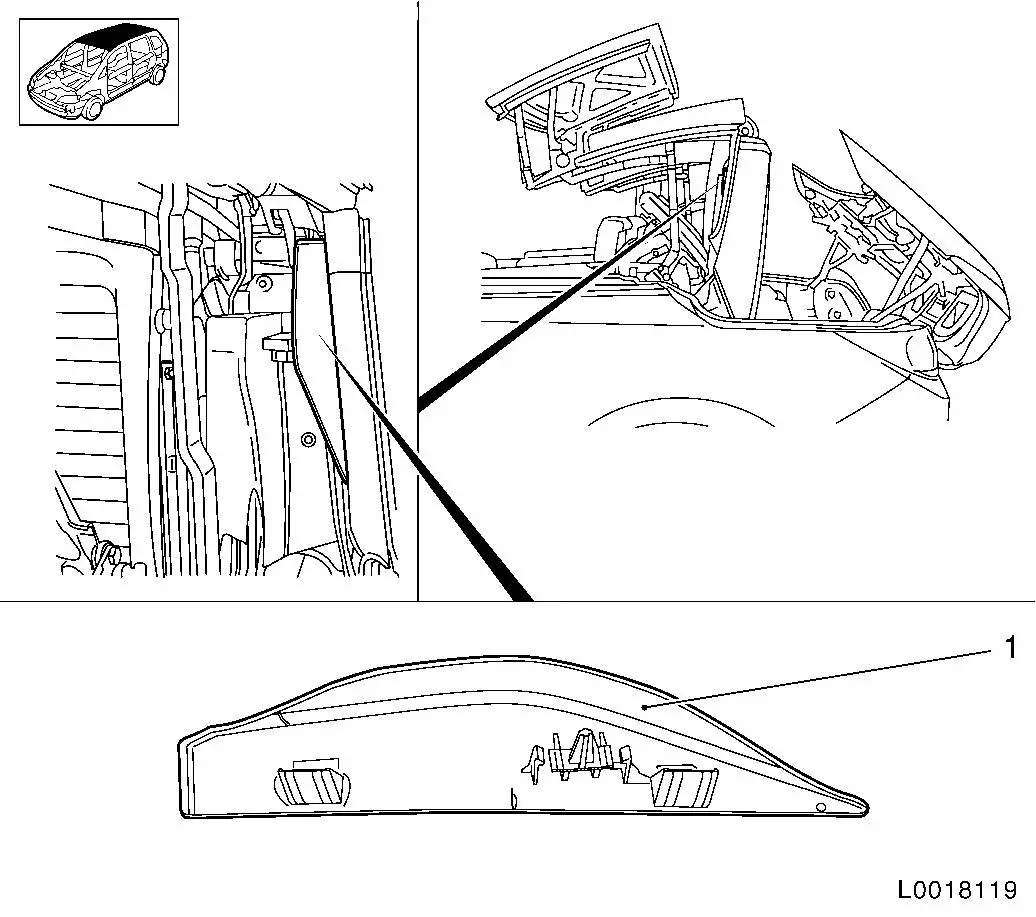
2.   Detach outer C-pillar panelling (1)
•   Detach 2x clamps

Object Number: 10677573  Size: DEFAULT

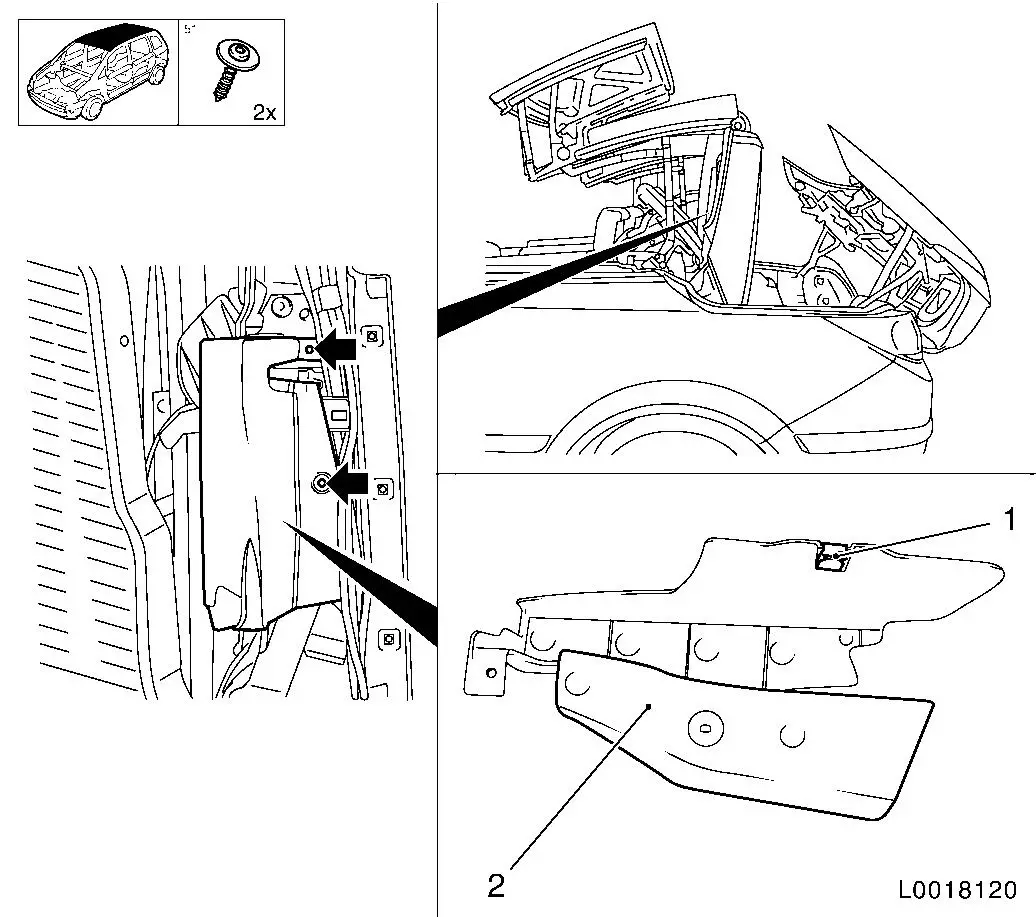
3.   Detach inner C-pillar panelling
•   Unscrew 2 x bolt (arrows)
•   Remove C-pillar inner panelling (2)
– Remove clamp (1)

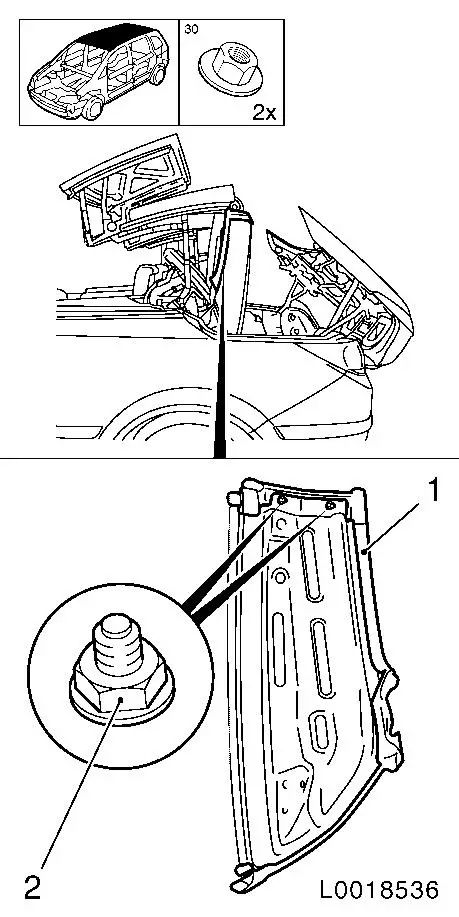
4.   Detach C-pillar seal (1)
•   Detach cover cap
•   Unscrew 2x nut (2)
•   Remove complete seal
– Remove Butyl cord carefully from bodyshell
Note:   When reusing the seal, carefully remove the butyl cord from the seal.
Object Number: 10677734  Size: DEFAULT


Object Number: 10677735  Size: DEFAULT

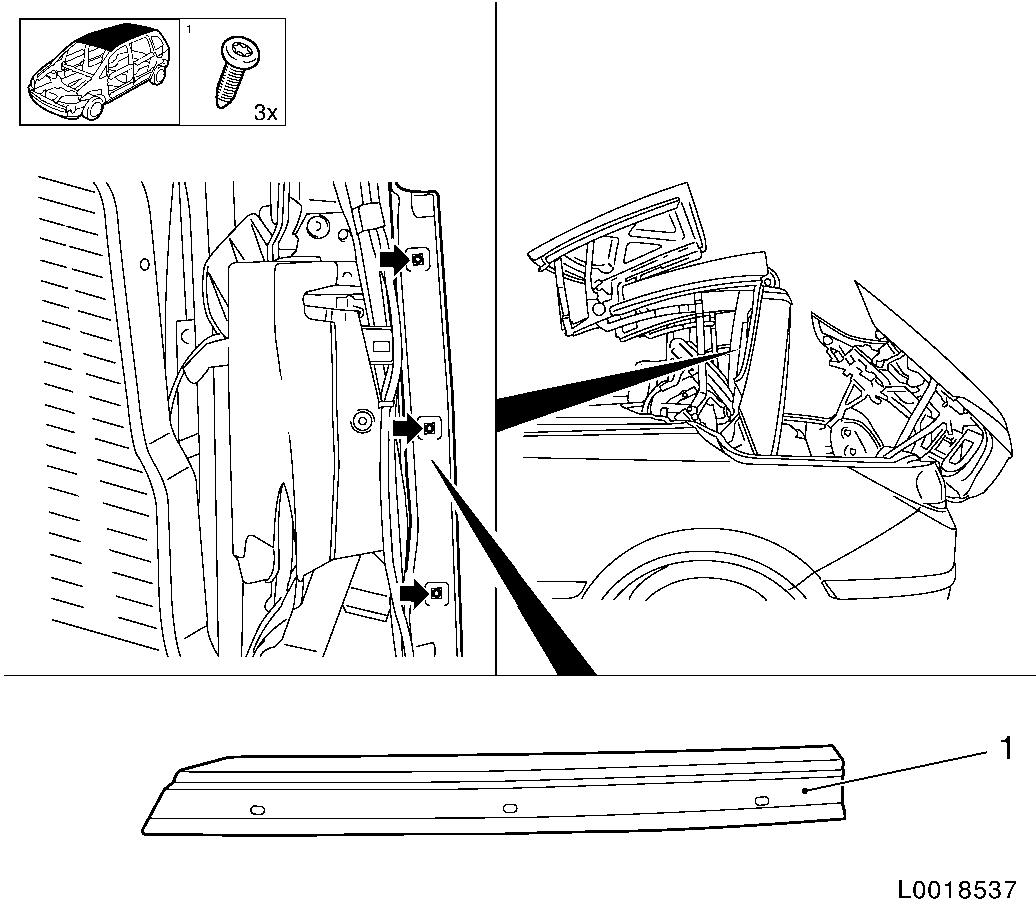
5.   Detach C-pillar seal retainer (1)
•   Unscrew 3x bolt (arrows)

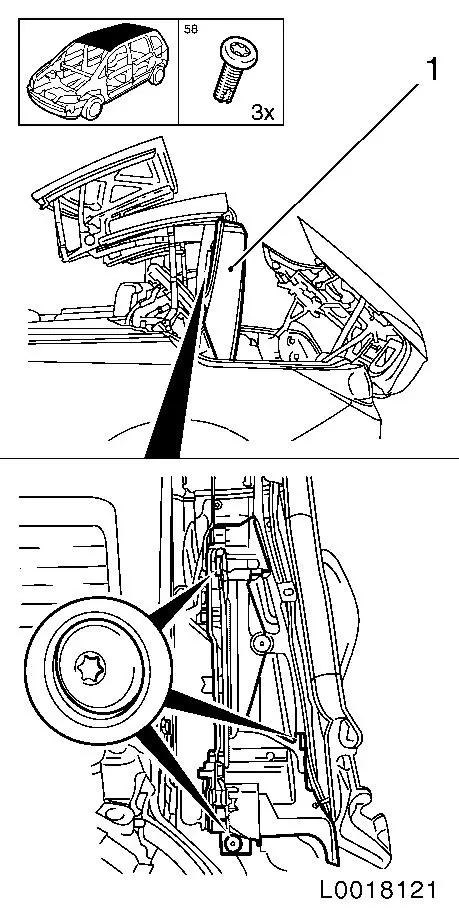
6.   Detach folding roof C-pillar
Note:   Mark installed position and note number of shims
•   Unscrew 3x bolt
•   Remove folding roof C-pillar (1)
7.   Rebuild small parts
Object Number: 10677574  Size: DEFAULT


  Install

8.   Attach seal seat
•   Tighten 3x bolts 3.7 Nm
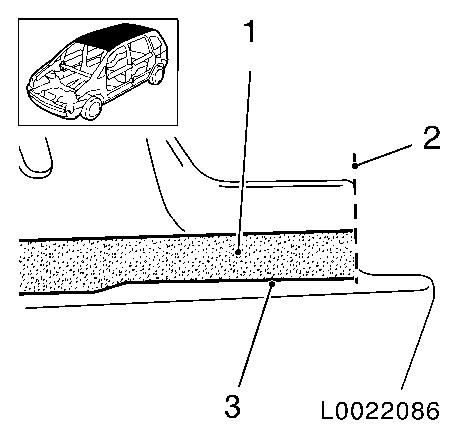
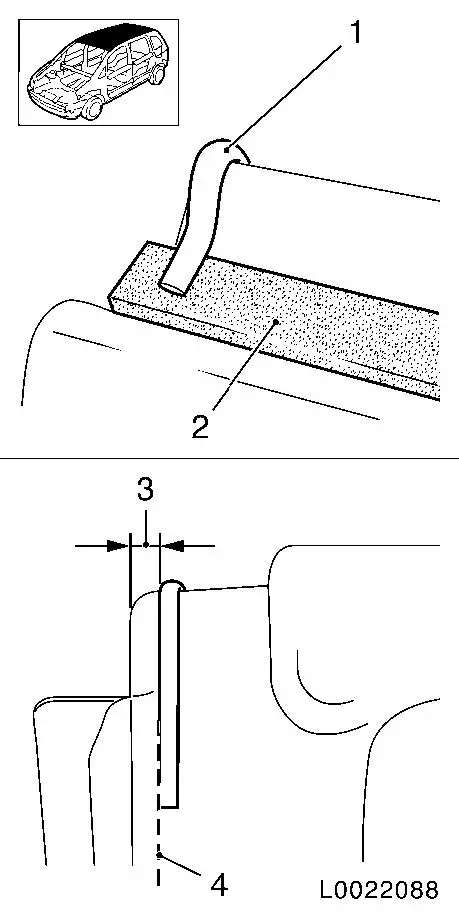
9.   Attach Hanno foam strips (1)
•   Affix Hanno foam strips flush with the edge (2)
•   Affix Hanno foam strips along the radius (3)
Object Number: 10680685  Size: DEFAULT


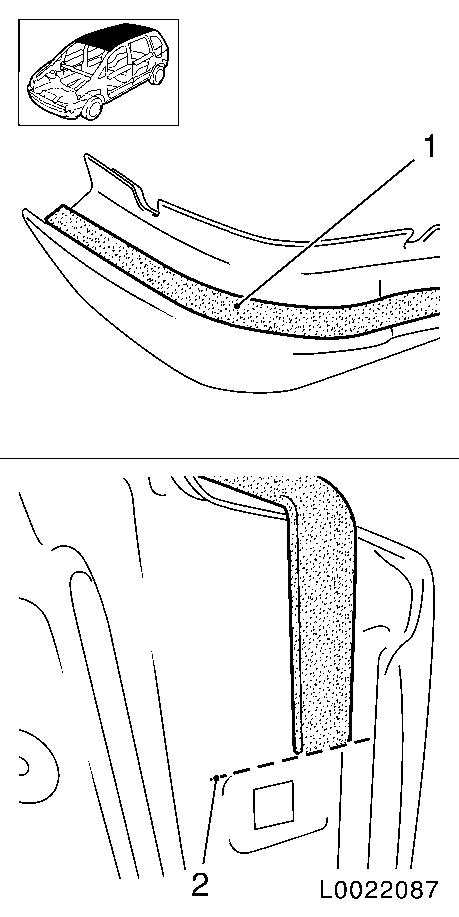
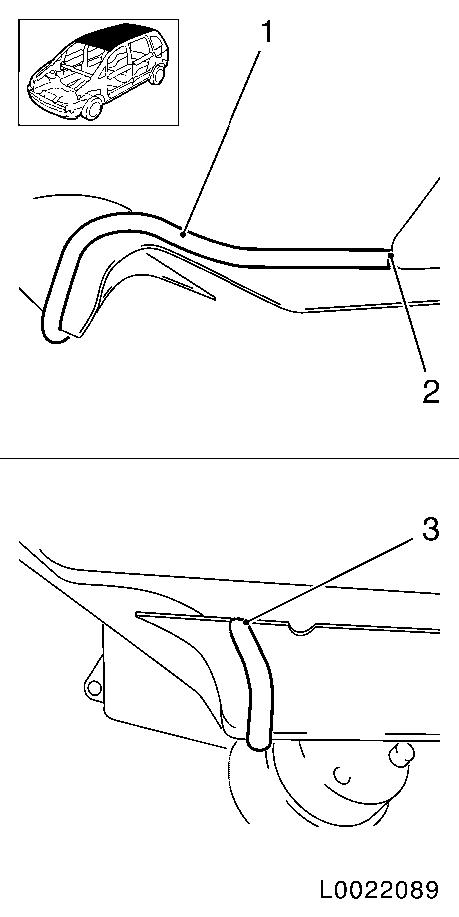
10.   Attach Hanno foam strips (1)
•   Affix Hanno foam strips following the contour up to the edge (2)
Object Number: 10680686  Size: DEFAULT


11.   Attach Butyl cord (1) to front face
•   Affix Butyl cord up to centre Hanno foam strip (2)
•   Turn down Butyl cord at edge and affix along contour (3, 4)
Object Number: 10680687  Size: DEFAULT


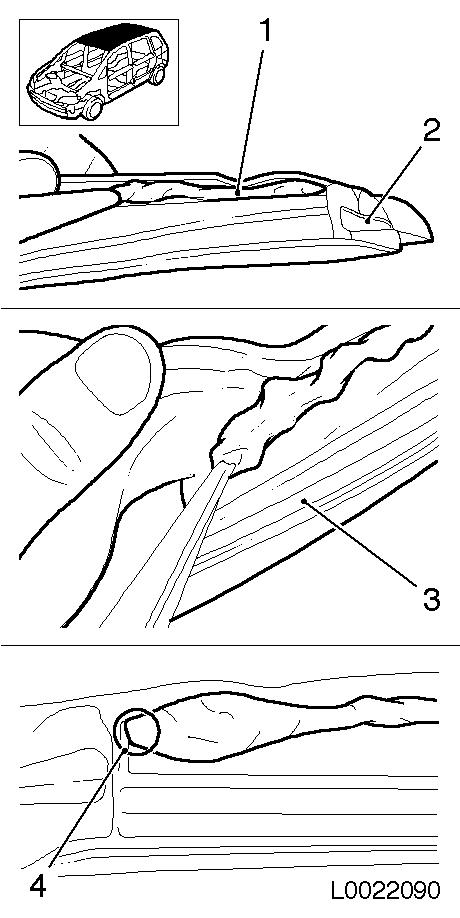
12.   Attach Butyl cord (1) in area of retaining strip/plate
•   Affix Butyl cord flush with the retaining strip (2)
•   Fold down Butyl cord and affix flus with retaining plate (3)
Object Number: 10680688  Size: DEFAULT


13.   Prepare C-pillar weatherstrip
•   Apply glass sealing compound (1) in the area of the flange (2) up to 3/4
•   Apply glass sealing compound in pocket (3) of weatherstrip with 5 mm diameter
•   Glass sealing compound must be applied up to the corner
Object Number: 10680689  Size: DEFAULT


14.   Attach C-pillar weatherstrip
Note:   Ensure correct weatherstrip routing
•   Tighten 2x nut 3.7 Nm
15.   Remove adhesive and seal residue
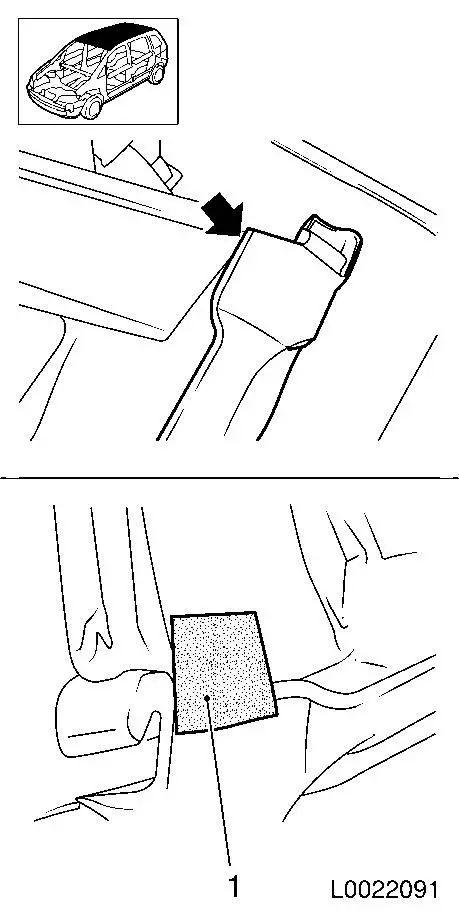
16.   Affix Hanno foam strip (1) at intersection (arrow) with super glue
Object Number: 10680690  Size: DEFAULT


17.   Attach folding roof C-pillar
•   Insert C-pillar
Note:   Note marking and number of shims
•   Tighten 3x bolts 13 Nm
Note:   Screws are microencapsulated and must be replaced! Threads re-cut!
– Secure shims from falling off with appropriate help
18.   Attach inner C-pillar panelling
•   Attach clamp
•   Tighten 2x bolts
19.   Attach outer C-pillar panelling
•   Insert into guide
•   Attach 2x clamps
20.   Close folding top
•   Remove tensioner belt
•   Remove special tool BO-47651-200
•   Close folding top
21.   Check gap and adjust if needed LUREF_1.gif

Parts & tools for this job For Vauxhall Astra

Links open Amazon search results in a new tab. As an Amazon Associate I earn from qualifying purchases.