|
Replace protective trim strip for rear panelling -
L48
 Remove Remove
| 1. |
Remove right and left tail lights 
|
|
| 3. |
Remove number plate (arrows) lights right and left
| • |
Disconnect 2x wiring harness plug
|
|
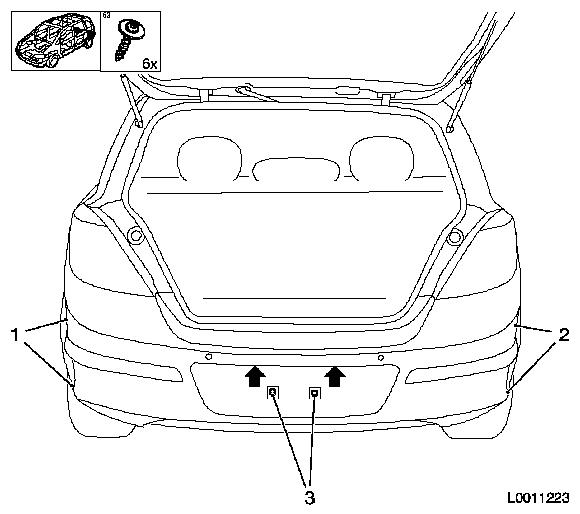
| 4. |
Loosen rear panelling
| • |
Unscrew 4x screws right (2) and left (1)
|
| • |
Unscrew 2x middle bolts (3)
|
|
|
| 5. |
In vehicles with Parkpilot: Disconnect wiring harness plug
(1)
Note: Removal of both
number plate lights not required
|
|

|
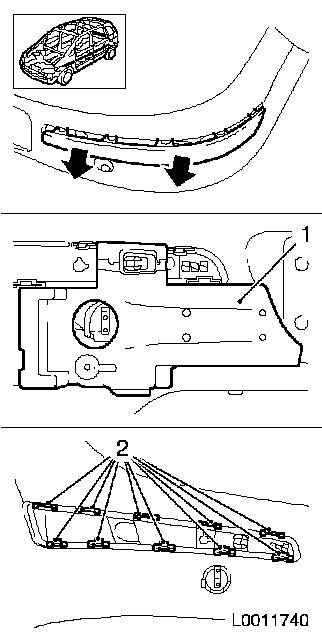
Important: Danger of damage!
Unlock rear panelling carefully sideways from the guide rails. Pull
rear panelling, side, upwards and outwards in the direction of the
arrow in the area of the guide rails.
|
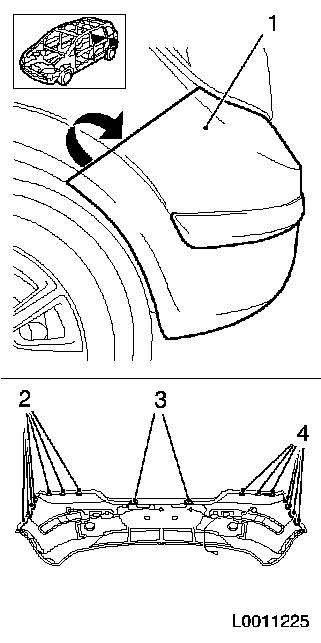
| 6. |
Detach rear panelling (1)
Note: 2nd mechanic
required!
| • |
Unclip rear panelling from right guide rail (2)
|
| • |
Unclip rear panelling from rear guide rail (3)
|
| • |
Unclip rear panelling from left guide rail (4)
|
|
|
|
| 7. |
Detach rear panelling protective trim
| • |
Unclip 10x clips (2) and remove protective trim strip
|
|
|
|
 Install
| 8. |
Attach rear panelling protective trim
| • |
Clip in 10x protective trim strip
|
|
| 9. |
Join rear panelling
Note: 2nd mechanic
required!
| • |
Lay number plate lights wiring harness
|
| • |
Clip in rear panelling in left guide rail
|
| • |
Clip in rear panelling in rear guide rail
|
| • |
Clip in rear panelling in right guide rail
|
|
| 10. |
Connect wiring harness plug in vehicles with Parkpilot
|
| 11. |
Attach rear panelling
| • |
Screw in 4x screws right and left
|
| • |
Tighten 2x middle bolts
|
|
| 12. |
Install left and right number plate lights
| • |
Connect 2x wiring harness plugs
|
|
| 14. |
Install right and tail lights
|
|
