|
Rear Axle, Remove and Install
| Spezialwerkzeugliste: |
- KM-6000-400
- KM-6000-400
- KM-6000-A
- KM-6002-300
- KM-6002-A
- KM-904
- MKM-558-10
|
Note: When lifting at
the jacking points on the vehicle, take care that all rear axle
bolts and the contact points for the centring device remain
accessible.
 Remove Remove
| 1. |
In vehicles with drum brake: top up brake fluid reservoir as
far as "MAX" marking and seal with MKM-558-10
|
| 2. |
Release handbrake
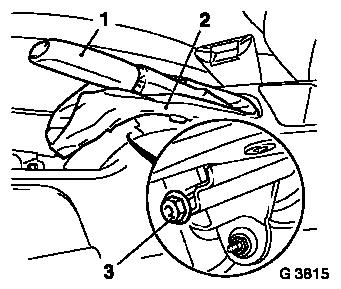
| • |
Release handbrake lever (1)
|
| • |
Detach gaiter of handbrake lever(2)
|
| • |
Slacken handbrake cable by turning back the adjusting nut
(3)
|
|
|
|
| 4. |
In vehicles with disc brakes: detach 2x handbrake cables from
brake caliper
| • |
Push down 2x operating levers (1) at brake caliper with
screwdriver
|
| • |
Detach 2x handbrake cables
|
| • |
Remove 2x retaining clips (2)
|
| • |
Pull 2x handbrake cables out of bracket
|
|
| 5. |
In vehicles with drum brakes: disconnect 2x handbrake cables
(4) from connecting piece (3)
|
|
|
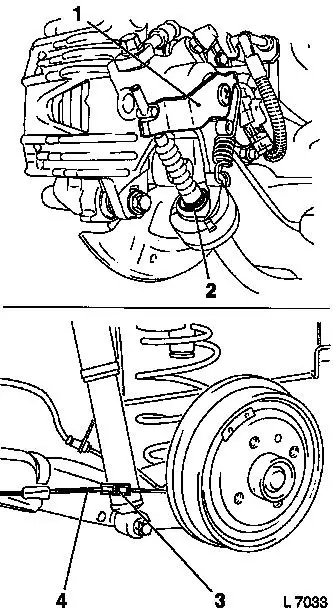
| 6. |
In vehicles with disc brakes: detach 2x brake anchor plate
Note: The brake system
remains closed and the brake linings installed!
If removal of the brake anchor plate is not possible (e.g. brake
discs run in), it is also necessary to remove and install the brake
linings.
| • |
Separate 2x wheel speed sensor wiring harness plug
|
| • |
Unscrew 4x bolt
| – |
Detach brake lining and wheel speed sensor wiring harness
|
| – |
Remove brake anchor plate and hang in wheel housing
|
|
|
| 7. |
In vehicles with drum brakes: detach 2x wheel sensor wiring
harness from rear axle
| • |
Detach 2x wheel sensor wiring harness plugs
|
| • |
Unclip 8x wiring harnesses
|
|
| 8. |
In vehicles with drum brakes: detach 2x brake nozzle from
vehicle underbody
| • |
Detach 2x brake line connection from brake hose
Note: Collect escaping
brake fluid and close openings
|
| • |
Pull 2x brake hose out of bracket
|
|
| 9. |
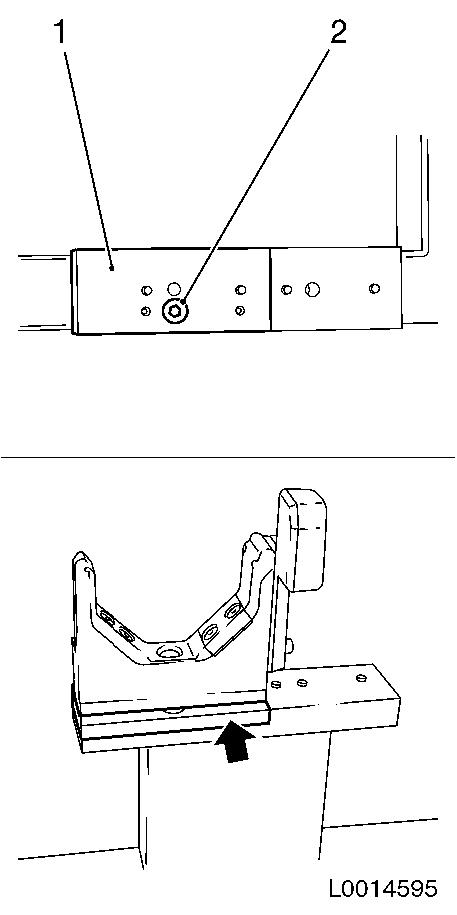
Attach 2x rear axle mounting to KM-6002-A on Astra-H model L 48, L 08 and L 67
| • |
Tighten 2x bolt
Note: Note installation
position (arrow)!
|
|
|
|
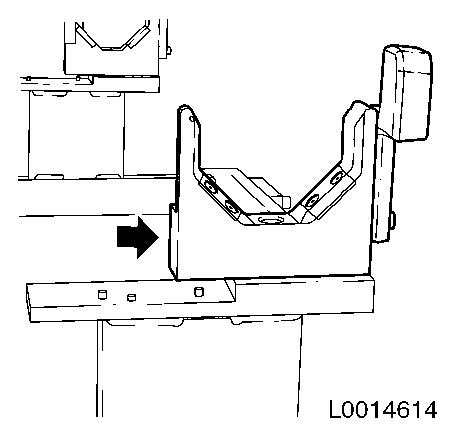
| 10. |
Attach 2x rear axle mounting to KM-6002-A on Astra-H estate (L 35, L 70)
| • |
Attach KM-6002-300 (1), (arrow) to
KM-6002-A
Note: Installed
position of KM-6002-300 (1), (arrow)
|
| • |
Attach rear axle mounting
|
|
|
|
|
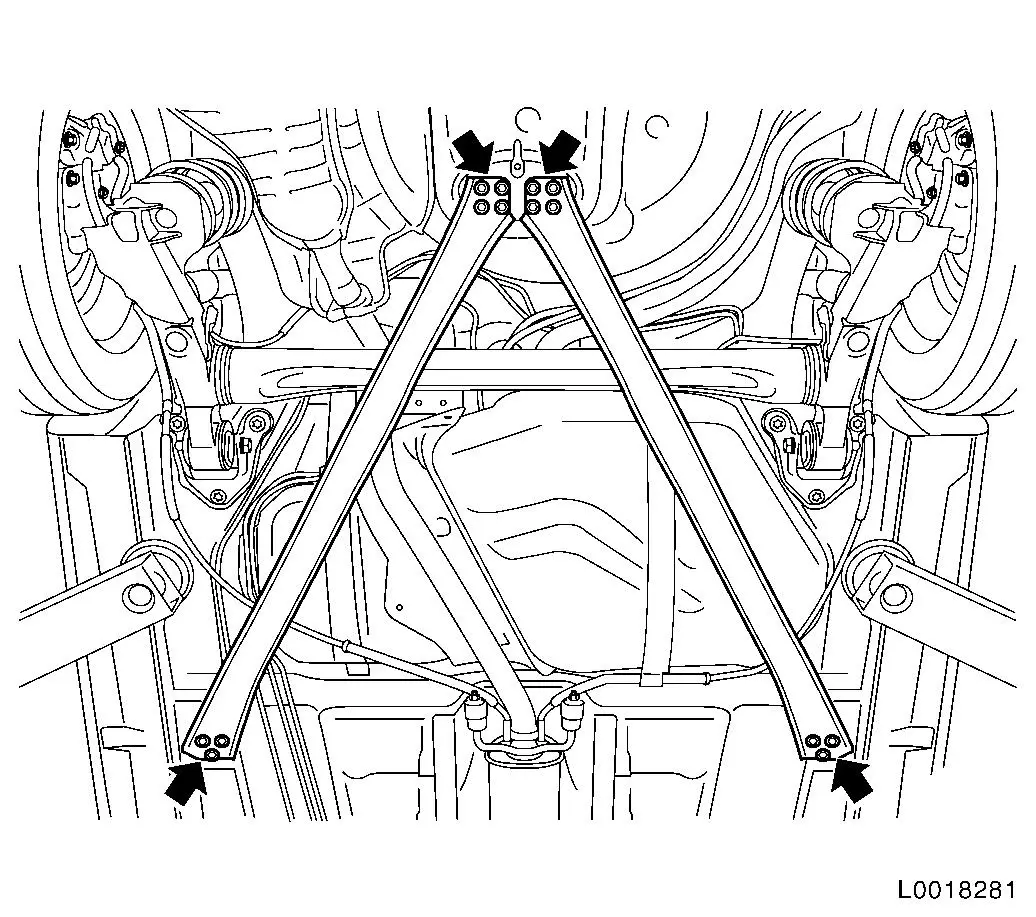
| 11. |
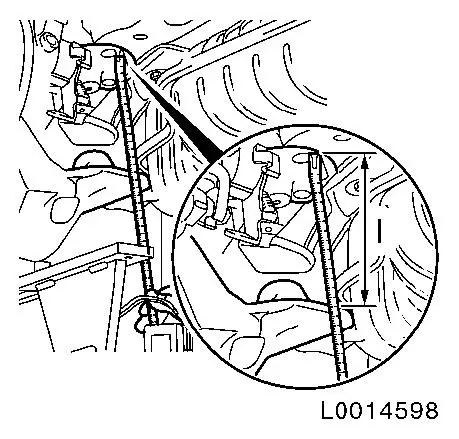
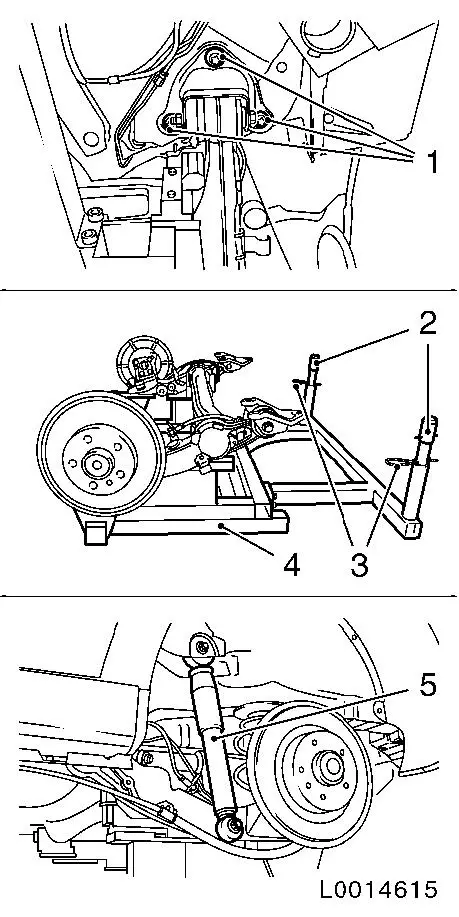
On Astra-H convertible (L67): Remove right and left torsion
struts
|
|
| 13. |
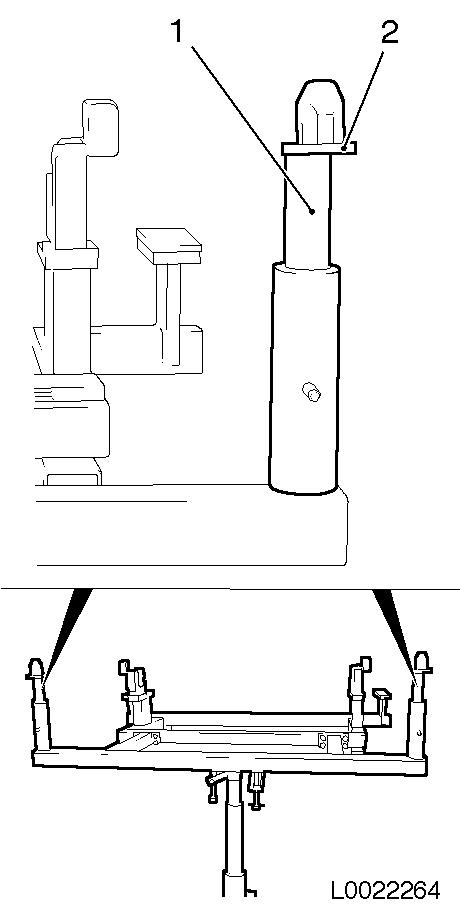
Place hydraulic jack KM-904 connected
to KM-6000-A and erect
Note: Due to the
changed position of guide holes on the vehicle underbody, KM-6000-400 (1) must be fitted to KM-6000-A for Astra-H notchback (L 69). The plastic
cap (2) of KM-6000-400 (1) must point
outwards.
|
|
|
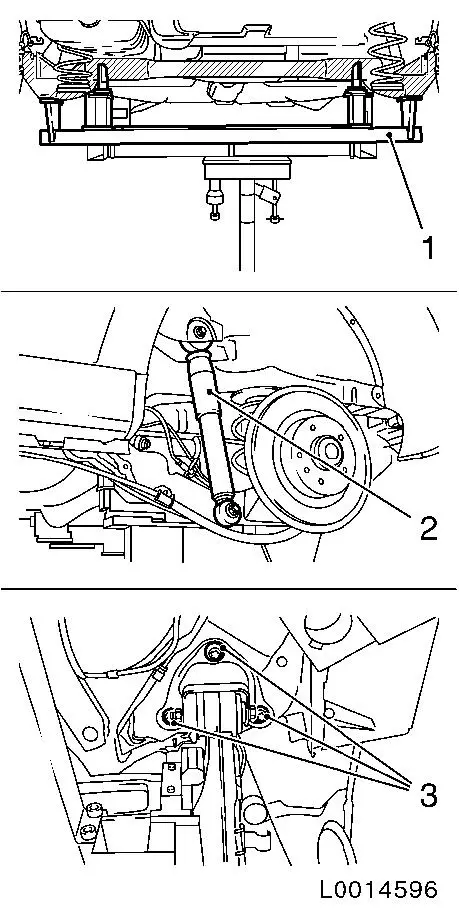
| 14. |
Detach 2x shock absorbers (2) from rear axle
|
| 15. |
Lower hydraulic jack carefully until rear axle is freely
suspended.
|
| 16. |
Remove springs
| • |
Remove 4x damping rings
Note: Note installation
position of damping rings.
|
|
Important: The bolts must not be
removed from the rear axle bracket using an impulse or impact
screwdriver.
|
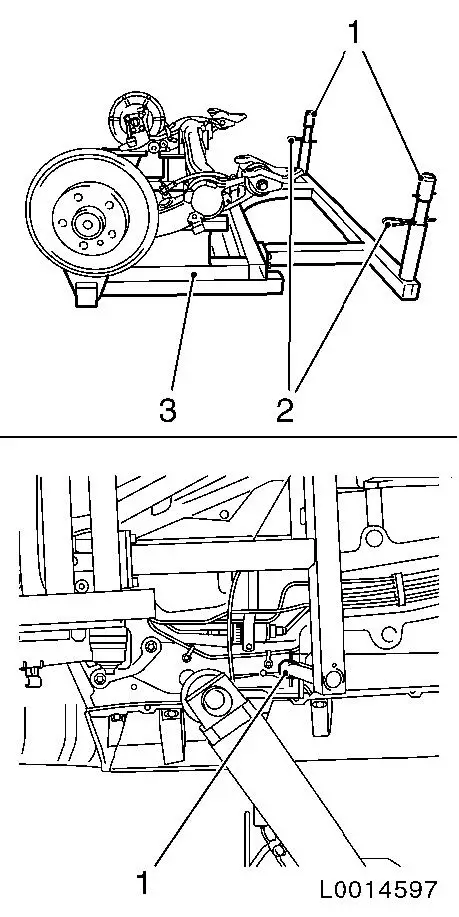
| 17. |
Detach rear axle
Warning: Ensure that the vehicle
does not lift from the lifting platform attachment points.
|
| • |
Support rear axle by raising the hydraulic jack
|
| • |
Unscrew 6x bolts (3) from vehicle underbody
|
|
| 18. |
Lower hydraulic jack completely with rear axle.
|
|
|
 Install
| 19. |
Check thread of the cage nuts on the vehicle underbody for
damage.
|
| 20. |
Pull out the guides (1) of KM-6002-A
(3) and arrest with the locking pins (2).
|
| 21. |
Attach rear axle to vehicle underbody
| • |
Lift rear axle with hydraulic jack, KM-904 and KM-6002-A
Note: Both front guides
of KM-6002-A must rest in the guide holes
with the collar and both rear axle brackets on the vehicle
underbody
|
| • |
Screw in 6x new bolts
Note: The rear axle
bracket bolts must not be installed using an impulse or impact
screwdriver.
|
|
|
|
| 22. |
Lift rear axle with hydraulic jack, KM-904 and KM-6002-A until
distance measurement I = 173 ± 10
mm between the spring mounting of the rear axle and the
spring mounting of the vehicle underbody. Distance measurement I
must be the same on both the right and left side.
|
|
|
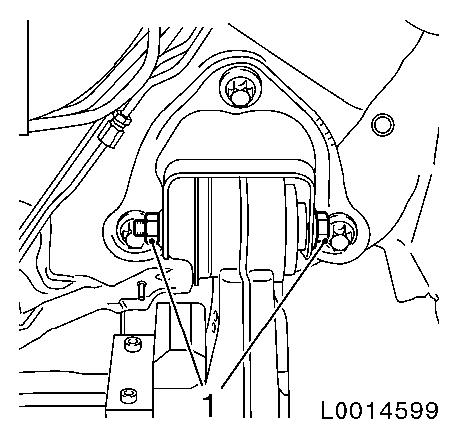
| 23. |
If the bolted joint on the rear axle bracket on the damping
bush is undone: tighten new bolted joint (1) on the rear axle
bracket on the damping bush ( 90 Nm +
60° + 15° )
|
|
|
| 24. |
Tighten 6x new bolt (1) on the rear axle bracket on the vehicle
underbody ( 90 Nm + 30° +
15° )
|
| 25. |
Attach springs
| • |
Draw out locking pins (3) and push in guides (2) of KM-6002-A (4)
|
| • |
Lower hydraulic jack until rear axle is freely suspended
|
| • |
Attach 4 damping rings to springs
|
| • |
Insert 2x springs
Note: Note installation
positions.
|
|
| 26. |
Attach shock absorbers to rear axle
| • |
Raise rear axle until both shock absorbers (5) can be attached
to rear axle
Note: Ensure that the
vehicle does not lift from the lifting platform attachment
points.
|
| • |
Tighten 2x bolt 130 Nm
Note: For vehicles with
level control: push pressure line or connection piece on to
connection on shock absorber - ensure retaining clamp sits
perfectly.
|
|
| 27. |
Lower hydraulic jack and remove.
|
| 28. |
On Astra-H convertible (L67): Install left torsion strut
|
| 29. |
On Astra-H convertible (L67): Install right torsion strut
|
| 30. |
In vehicles with disc brakes: attach 2x brake anchor plate
| • |
Attach brake anchor plate
|
| • |
Tighten 4x bolts 100 Nm
Note: Clean thread and
insert fastening bolt with bolt locking compound!
|
| • |
If removed: install brake linings 
|
|
| 31. |
In vehicles with drum brakes: attach 2x brake hose to vehicle
underbody
| • |
Insert 2x brake hose into bracket on vehicle underbody
|
| • |
Secure 2x brake hoses with retaining plate
|
| • |
Attach 2x brake line to brake hose 16
Nm
|
|
| 32. |
Attach wheel sensor wiring harness to rear axle
| • |
Connect 2x wheel sensor wiring harness plugs
|
| • |
Clip in 8x wiring harnesses
|
|
|
|
| 33. |
In vehicles with disc brakes: attach handbrake cable to brake
caliper
| • |
Insert 2x handbrake cables into bracket on brake caliper
|
| • |
Attach 2x retaining clips (2) to handbrake cable
|
| • |
Push down 2x operating levers (1) at brake caliper with
screwdriver
|
| • |
Attach 2x handbrake cables
|
|
| 34. |
In vehicles with drum brake: connect 2x handbrake cables (4)
with connecting piece (3)
|
|
|
| 35. |
Fit rear wheels 110 Nm
|
| 36. |
In vehicles with drum brakes: fill and drain brake system
| • |
Fill with brake fluid to "MAX" mark
|
| • |
Screw cover to brake fluid reservoir
|
|
|
