Workshop Manuals Factory service & repair Vauxhall
01 General Vehicle Information02 Maintenance, Body and Chassis Sheet Metal Parts, Frame03 Paint04 Body Equipment05 Heating, Ventilation, Air Conditioning (HVAC)06 Front Wheel Suspension, Wheels and Tyres07 Rear Axle and Rear Wheel Suspension08 Brakes09 Engine and Engine Aggregates10 Clutch and Transmission11 Fuel and Exhaust System12 Steering13 Electrical Equipment and Instruments14 Accessories
Vauxhall Astra H09 · Engine and Engine Aggregates
09 · Engine

Replace vacuum reservoir (Turbo-Charging)

Make
Vauxhall
Model
Astra H
Section
Turbo-Charging › Repair Instructions › Replace vacuum reservoir
Engine and Engine AggregatesReplace vacuum reservoir

Replace vacuum reservoir

Note:   If present

  Remove

1.   Open bonnet
2.   Disconnect battery
•   Detach earth connection from earth terminal
– Slacken nut
3.   Raise vehicle by its full height
4.   Detach the lower engine cover and right engine splash guard
5.   Place collecting basin underneath.
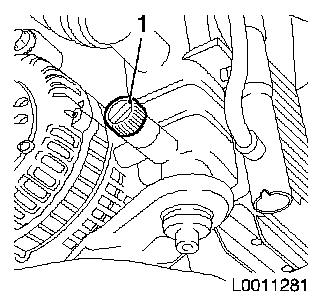
6.   Drain coolant
•   Open drain bolt on radiator (1)
•   Collect coolant
•   Close drain bolt
Object Number: 3446550  Size: DEFAULT


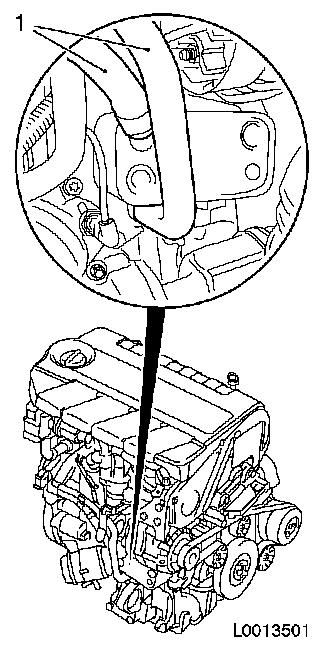
7.   Detach 2x coolant hoses (1) from heat exchanger
•   Undo 2 clamps
Object Number: 7361571  Size: DEFAULT


8.   Lower vehicle by its full height
9.   Remove engine cover
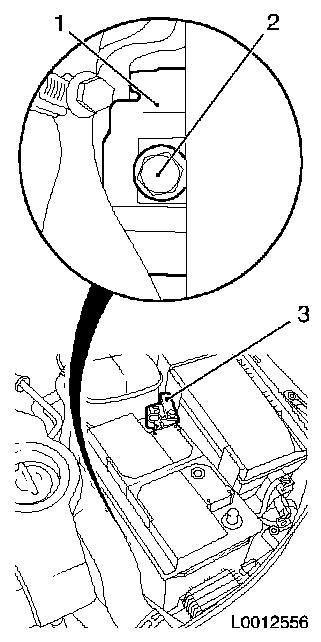
10.   Remove battery
•   Detach positive terminal (3) from positive pole
– Slacken nut
•   Remove bracket 1)
– Unscrew bolt (2)
Object Number: 7360933  Size: DEFAULT


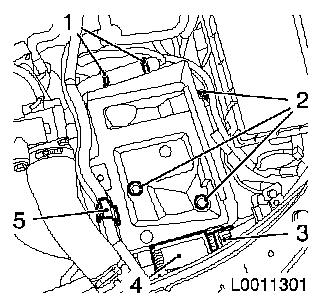
11.   Remove battery support.
•   Remove pre-glow system control unit (4)
•   Remove wiring harness plug (3)
•   Unclip coolant hose bracket (5)
•   Detach wiring harness
– Undo cable tie (1)
– Unclip 2x brackets
•   Unscrew 3x bolts (2)
Object Number: 3446570  Size: DEFAULT


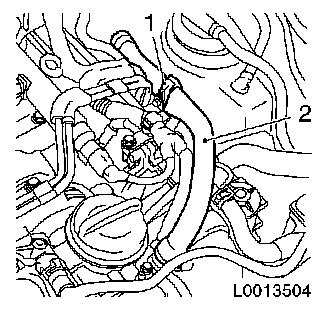
12.   Detach engine vent hose (2)
•   Undo 2 clamps
•   Unclip from bracket (1)
Object Number: 7361574  Size: DEFAULT


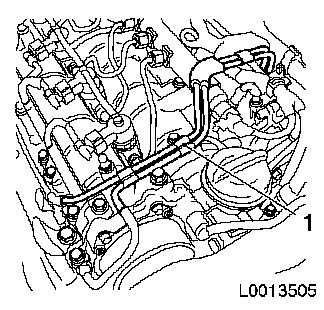
13.   Remove vacuum line (1)
•   Detach 4x vacuum hoses
Note:   Mark vacuum hoses
•   Unscrew 3 bolts
Object Number: 7361575  Size: DEFAULT


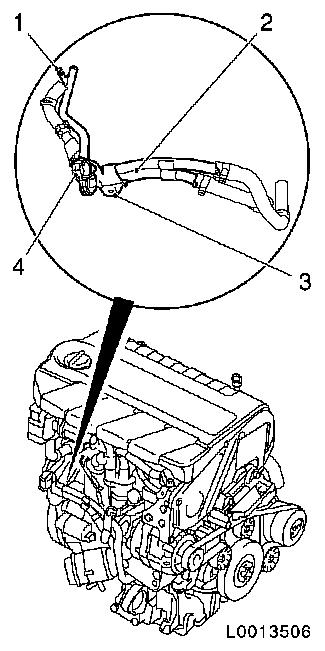
14.   Remove coolant pipe (2)
•   Unclip 2x coolant hoses from bracket (4)
•   Undo bracket (3)
– Unscrew 2x nuts
•   Undo bracket (1)
– Unscrew nut
•   Detach 2x coolant hoses
– From thermostat housing
– From coolant pipe
– Undo 2 clamps
Object Number: 7361576  Size: DEFAULT


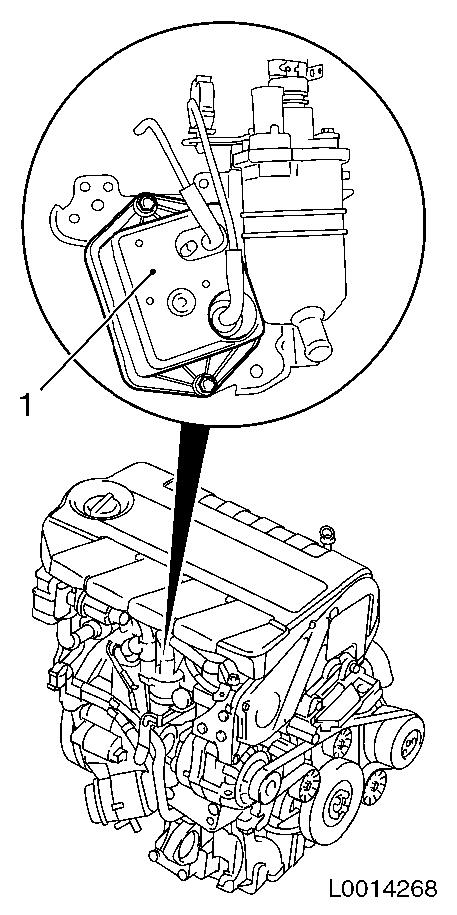
15.   Remove vacuum reservoir (1)
•   Unscrew 2x bolts
Object Number: 8326058  Size: DEFAULT


16.   Transfer 2x vacuum line
Note:   Pay attention to assignment

  Install

17.   Install vacuum reservoir
•   Tighten 2x bolts
18.   Install coolant pipe
•   Attach 2x coolant hoses
– To thermostat housing
– To coolant pipe
– Attach 2x clamps
•   Clip 2x coolant hoses into bracket
•   Tighten 3x nut 9 Nm
19.   Attach vacuum line
•   Connect 4x vacuum hoses
Note:   Pay attention to marks
•   Tighten 3x bolt 9 Nm
20.   Attach engine venting hose
•   Attach 2x clamps
•   Clip into bracket
21.   Install battery holder
•   Tighten 3x bolts
•   Attach wiring harness
– Connect cable ties
– Clip on 2x brackets
•   Attach pre-glow system control device
•   Attach wiring harness plug
•   Clip on coolant hose bracket
22.   Install battery
•   Install bracket
– Tighten bolt
•   Insert battery insulation
•   Attach positive connection to positive terminal
– Tighten nut
•   Attach positive cable to positive terminal
– Tighten bolt
23.   Install engine cover
24.   Raise vehicle by its full height
25.   Attach 2x coolant hoses to heat exchanger
•   Attach 2x clamps
26.   Install lower engine cover and right engine splash guard
27.   Lower vehicle by its full height
28.   Connect battery
•   Attach ground connection to ground terminal
29.   Top up coolant or ensure correct quantity is present.
30.   Program volatile memories
31.   Close bonnet

Parts & tools for this job For Vauxhall Astra

Links open Amazon search results in a new tab. As an Amazon Associate I earn from qualifying purchases.