|
Rear Front Ring Gear Assembly with Freewheel F1,
Dismantle and Assemble (AF17)
 Remove Remove
| 1. |
Remove front ring gear assembly with freewheel F1 and planetary
carrier
|
|
| 2. |
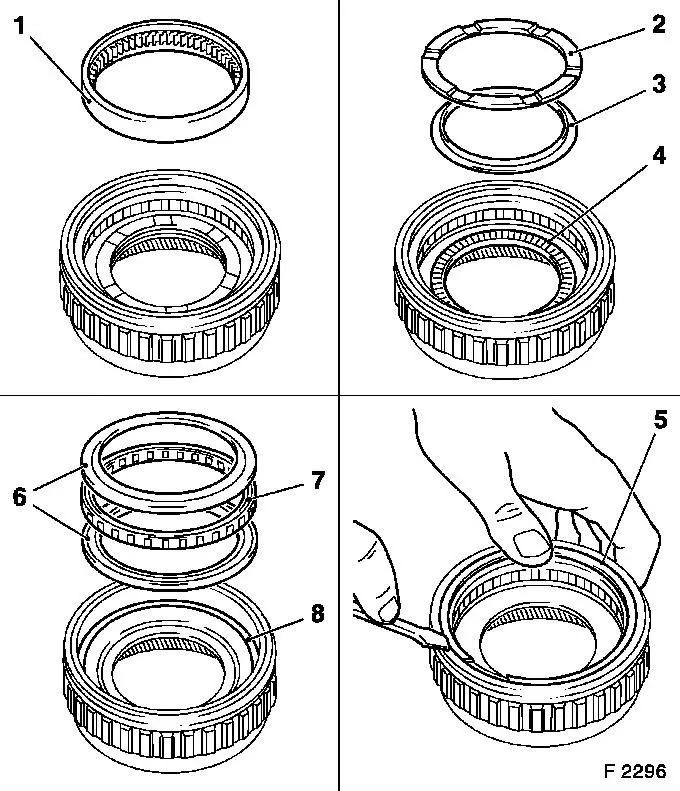
Remove freewheel F1 (7)
| • |
Remove inner ring, freewheel F1 (1)
|
| • |
Remove thrust washer (2).
|
| • |
Remove thrust washer (3)
|
| • |
Remove axial needle bearing (4)
|
| • |
Remove retaining ring (5)
|
| • |
Remove 2x bearing ring (6) with freewheel F1
|
| • |
Remove thrust washer (8).
|
|
|
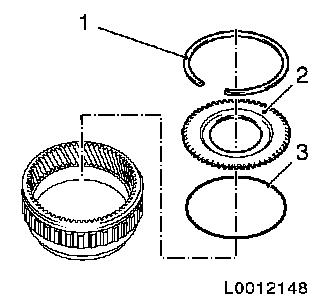
| 3. |
Remove flange (2)
Note: Note installation
position of the flange and the O-ring.
| • |
Remove retaining ring (1)
|
|
|
|
 Install
| 4. |
Install flange (2)
| • |
Install O-ring (3)
Note: Use new
O-ring
|
| • |
Install retaining ring (1)
Note: Use new retaining
ring.
|
Important: Ensure that retaining
ring is correctly seated in groove.
|
| • |
Press retaining ring into groove with screwdriver
|
|
|
|
|
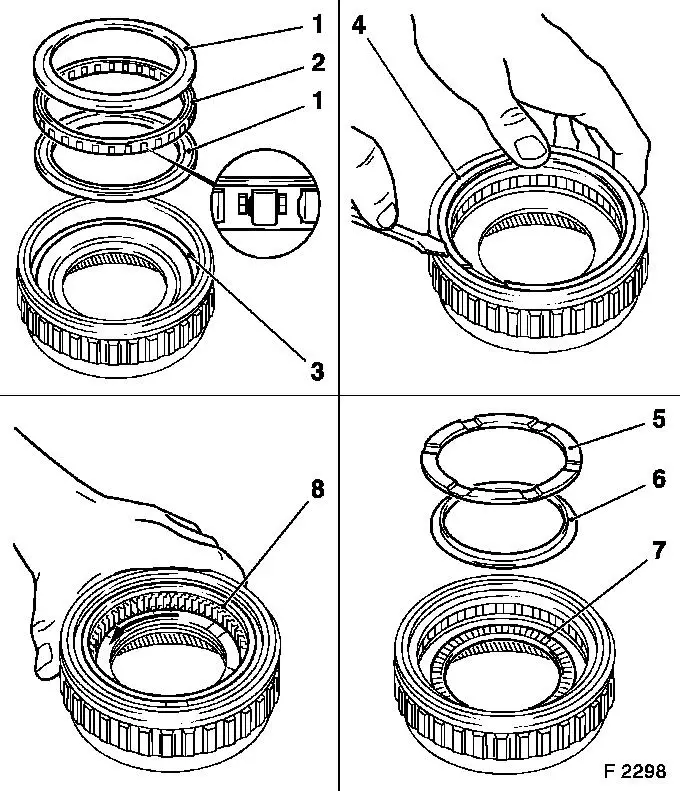
| 5. |
Install freewheel F1 (2)
| • |
Insert thrust washer (3)
|
| • |
Install freewheel F1 with 2x bearing ring (1)
Note: Collar for
overrunning clutch faces upwards.
|
| • |
Attach retaining ring (4)
Note: Use new retaining
ring.
|
| • |
Insert axial needle bearing (7).
|
| • |
Insert friction washer (6)
Note: Bevel points
upwards.
|
| • |
Insert thrust washer (5)
|
| • |
Install inner ring, freewheel F1 (8) in freewheel
|
|
|
| 6. |
Check function of freewheel
| • |
Turn rear ring gear clockwise
|
| • |
Rear ring gear counter-clockwise
|
|
| 7. |
Install front ring gear assembly with freewheel F1 and
planetary carrier
|
|
