
Centre Pillar Reinforcement Replacement (Collision Repair)
- Make
- Vauxhall
- Model
- Astra J
- Section
- Collision Repair › Repair Instructions › Centre Pillar Reinforcement Replacement
‹ Prev Front End Upper Tie Bar Support SectioningNext › Rear Floor Rear Panel Replacement - 5-Door Hatchback 68 with Rear Carrier
Body RepairCentre Pillar Reinforcement Replacement
Center Pillar Reinforcement ReplacementNote: According to different corrosion warranties, only the regional mandatory joining methods are allowed. Removal Procedure
|
| Warning: Refer to
Approved Equipment for Collision Repair
Warning . |
| Warning: Refer to
Collision Sectioning Warning . |
| Warning: Refer to
Glass and Sheet Metal Handling
Warning . |
| 1. | Disable the SIR System. Refer to SIR Disabling and Enabling . |
| 2. | Disconnect the negative battery cable. Refer to Battery Negative Cable Disconnection and Connection . |
| 3. | Remove all related panels and components. |
| 4. | Visually inspect the damage. Repair as much of the damage as possible. |
| 5. | Remove the sealers and anti-corrosion materials from the repair area, as necessary. |
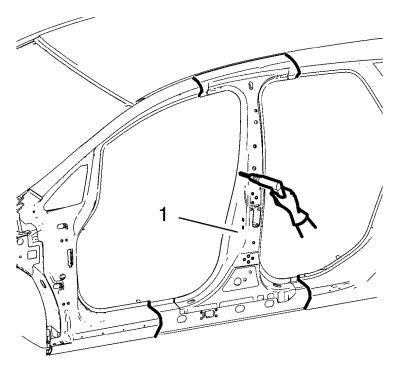
| 6. | Locate and mark all the necessary factory welds of the center pillar reinforcement (1). |
| 7. | Drill all factory welds. Note the number and location of welds for installation of the service assembly. |
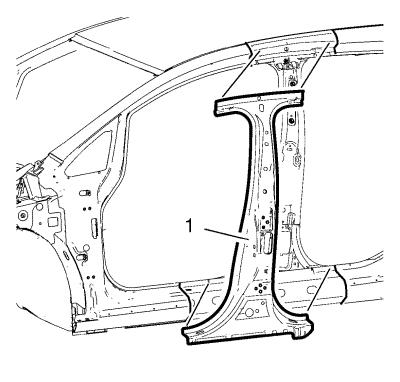
| 8. | Remove the damaged center pillar reinforcement (1). |
Installation Procedure
| 1. | Prepare all mating surfaces as necessary. |
| 2. | Align the center pillar reinforcement. |
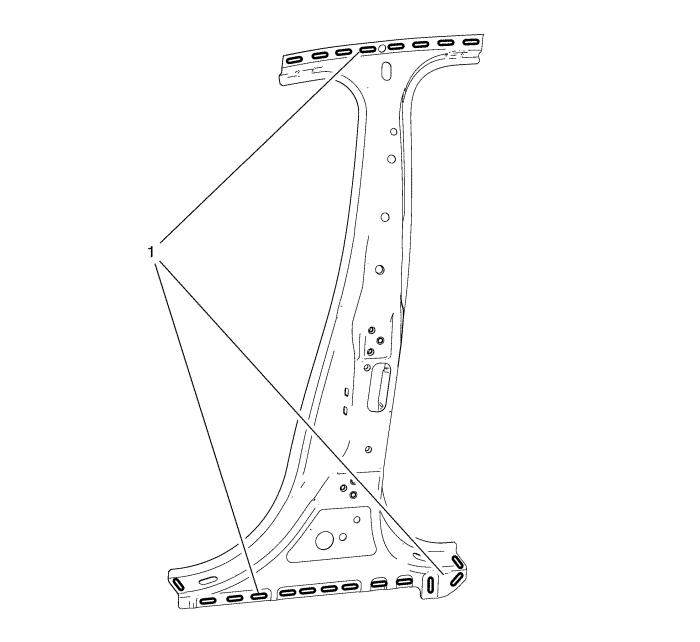
| 3. | Create 6 x 20 mm slots (1) for MIG-brazing. |
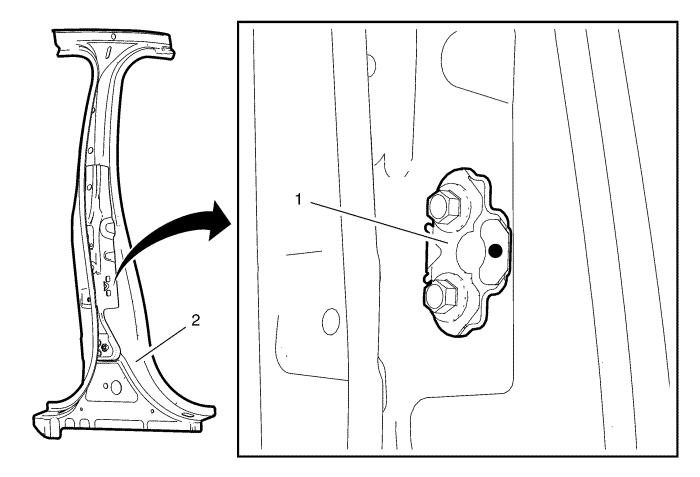
| 4. | Install the front side door lock striker bracket (1) to the center pillar reinforcement (2) with a spot weld. |
| 5. | Clean and prepare the attaching surfaces for spot welding and brazing. |
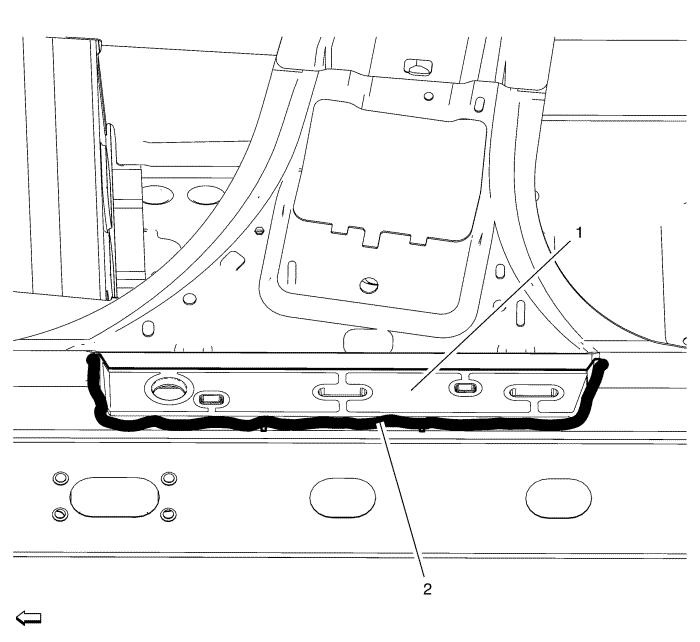
| 6. | Apply one-part urethane adhesive (2) to the sound barrier (1). |
| 7. | Position the center pillar reinforcement (1) on the vehicle. |
| 8. | Verify the fit of the center pillar reinforcement. |
| 9. | Clamp the center pillar reinforcement into position. |
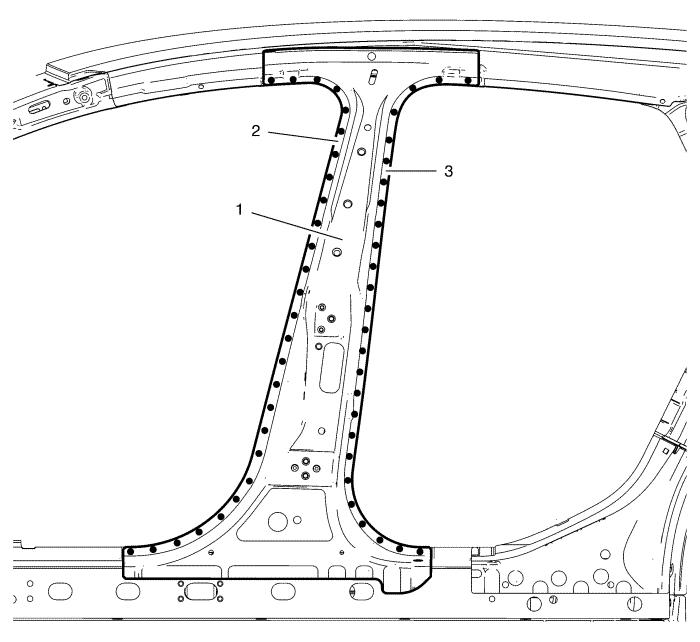
| 10. | Spot weld the center pillar reinforcement (1) accordingly. |
| • | Front side door opening flange (2) - 27 spot welds |
| • | Rear side door opening flange (3) - 27 spot welds |
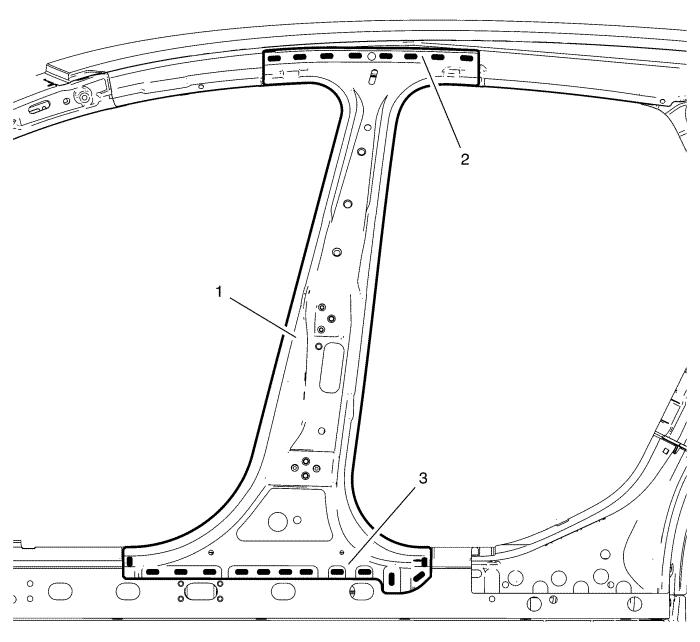
| 11. | Braze the center pillar reinforcement (1) accordingly. |
| • | Center pillar reinforcement upper (2) - 8 x 6 x 20 mm slot brazes |
| • | Center pillar reinforcement lower (3) - 13 x 6 x 20 mm slot brazes |
| 12. | Apply the sealers and anti-corrosion materials to the repair area, as necessary. |
| 13. | Paint the repaired area. |
| 14. | Install all related panels and components. |
| 15. | Connect the negative battery cable. Refer to Battery Negative Cable Disconnection and Connection . |
| 16. | Enable the SIR system. Refer to SIR Disabling and Enabling . |
‹ Prev Front End Upper Tie Bar Support SectioningNext › Rear Floor Rear Panel Replacement - 5-Door Hatchback 68 with Rear Carrier
Parts & tools for this job For Vauxhall Astra
- TOOLTrim removal tool kitSearch: trim removal tool kit
- PARTTouch-up paintSearch: Vauxhall touch up paint
- PARTPanel clip assortmentSearch: Vauxhall panel clips assortment
Links open Amazon search results in a new tab. As an Amazon Associate I earn from qualifying purchases.