Oil Pan Replacement
Special Tools
EN-37228 Separation Tool
For equivalent regional tools refer to
Special Tools .
Removal Procedure
| 5. |
Place a drain pan under the
oil drain plug. |
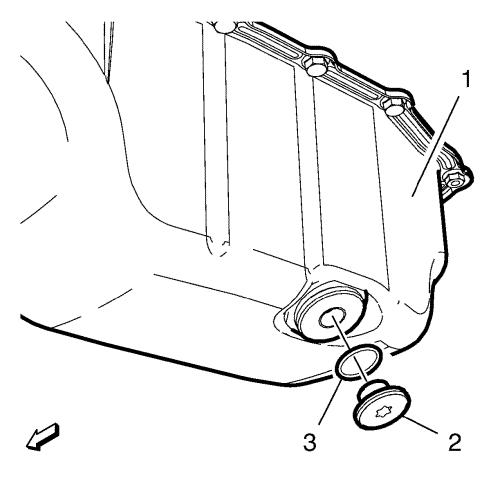
| 6. |
Remove the oil pan drain plug
(2) and the oil pan drain plug gasket (3). |
| 7. |
Install a NEW oil pan drain
plug gasket (3) and the oil pan drain plug (2) and tighten to
20 N·m (15 lb ft) after draining the engine
oil. |
|
Note: For vehicles
with air conditioning. Air conditioning system remains closed.
|
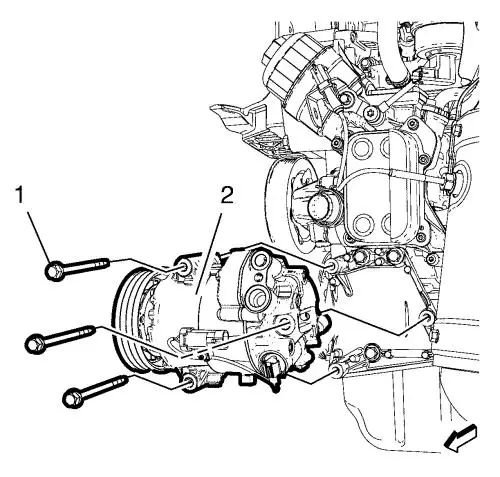
| 9. |
Remove the 3 air conditioning
compressor bolts (1). |
| 10. |
Remove the air conditioning
compressor (2) and hang aside. |
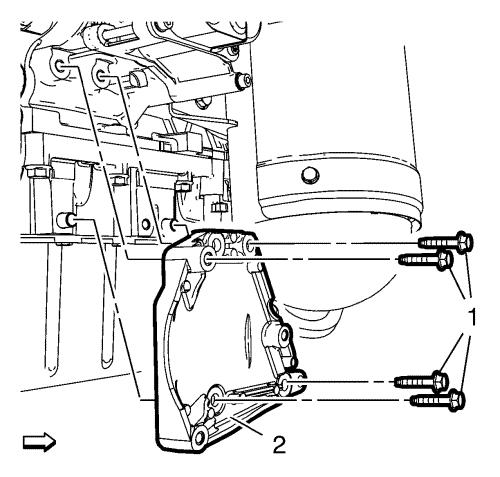
| 11. |
For vehicles with air
conditioning, remove the 4 air conditioning compressor bracket
bolts (1). |
| 12. |
Remove the air conditioning
compressor bracket (2). |
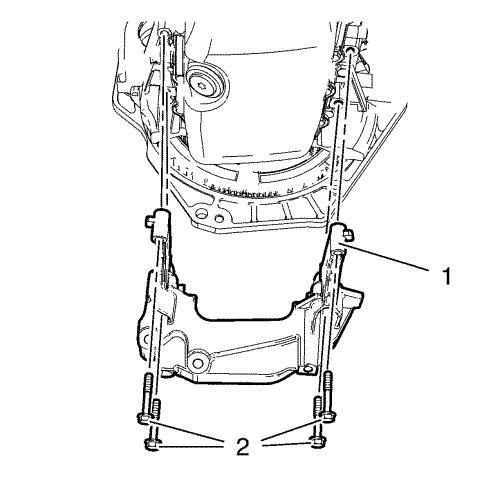
| 13. |
Remove the 4 transmission
support brace bolts (2). |
| 14. |
Remove the transmission
support brace (1). |
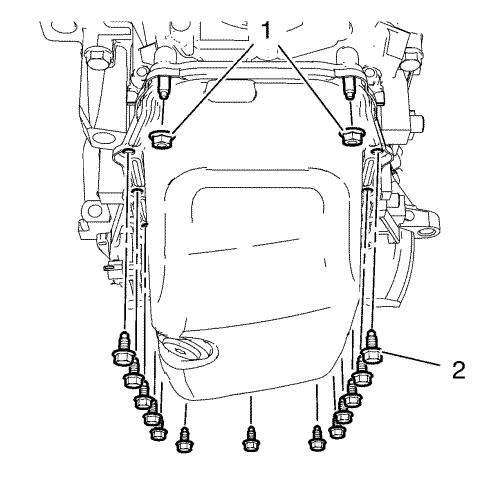
| 15. |
Remove the 2 oil pan nuts
(1). |
| 16. |
Remove the 13 oil pan bolts
(2). |
| 17. |
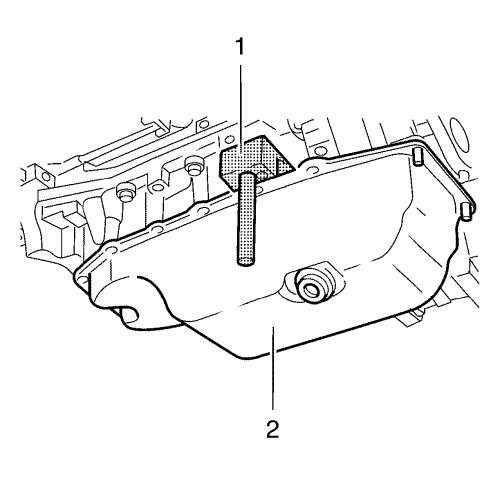
Loosen carefully the oil pan
(2) from the lower cylinder block with the EN-37228
separation tool (1). |
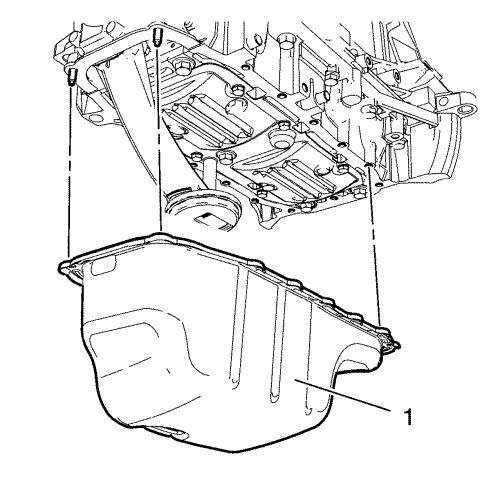
| 18. |
Remove the oil pan (1).
|
Installation Procedure
| 1. |
Clean the sealing
surfaces. |
|
Note: The complete
installation procedure of the oil pan should be done in 10
minutes.
|
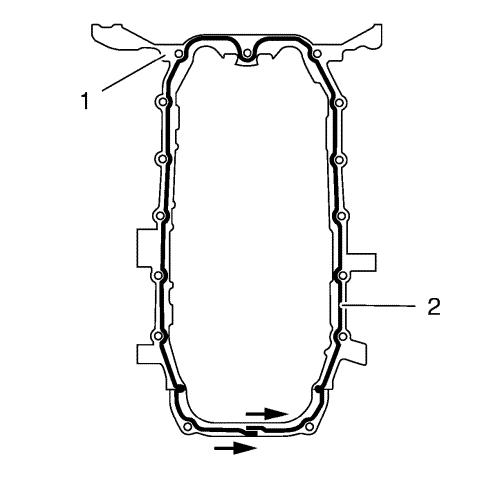
| 2. |
Apply silicone sealing
compound (2) to the oil pan sealing surface (1). The thickness of
the sealing bead (1) should be 3.0 - 4.0 mm (0.118 - 0.157
in) . |
| 3. |
Install the oil pan
(1). |
| 4. |
Hand tighten the 2 oil pan
nuts (1). |
| 5. |
Hand tighten the 13 oil pan
bolts (2). |
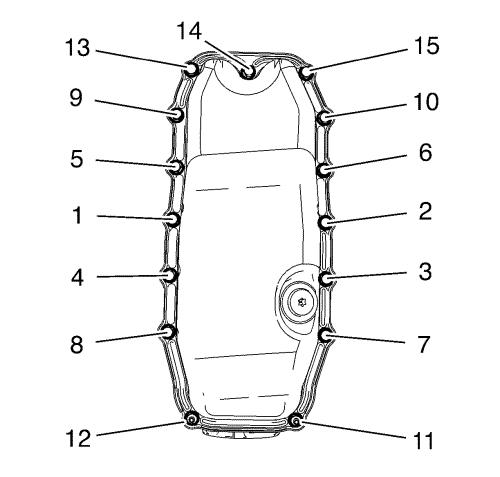
| 6. |
Tighten the 13 oil pan bolts
and 2 oil pan nuts in sequence as shown: |
| |
• |
Tighten in first step to
4 N·m (35 lb in) . |
| |
• |
Tighten in second step to
9 N·m (80 lb in) . |
| 7. |
Install the transmission
support brace (1). |
| 8. |
Install the 4 transmission
support brace bolts (2) and tighten to 30 N·m (22 lb
ft) . |
| 9. |
For vehicles with air
conditioning, install the air conditioning compressor bracket
(1). |
| 10. |
Install the 4 air conditioning
compressor bracket bolts (2) and tighten to 22 N·m
(16 lb ft) . |
| 11. |
For vehicles with air
conditioning, install the air conditioning compressor (2).
|
| 12. |
Install the 3 air conditioning
compressor bolts (1) and tighten to 22 N·m (16 lb
ft) . |
|
