
XC90 AWD L5-2.5L Turbo VIN 59 B5254T2 (2005)
Note! Only applies to vehicles with 6-cylinder engines and CV joint with 4 bolts.
Clean the joint using isopropanol P/N 1161 721 or similar.
Use 4 new screws.
Lubricate the threads and underneath the screw heads. Use normal lubricating oil. Wipe off any excess lubricating oil to prevent it getting between the
flange surfaces.
Note! When it is difficult to use a protractor to take the measurement, see: Screwed joint, torque/angle tightening See: Description and
Operation/Screwed Joint, Torque/Angle Tightening.
Tighten according to: See: Description and Operation/Screwed Joint, Torque/Angle Tightening
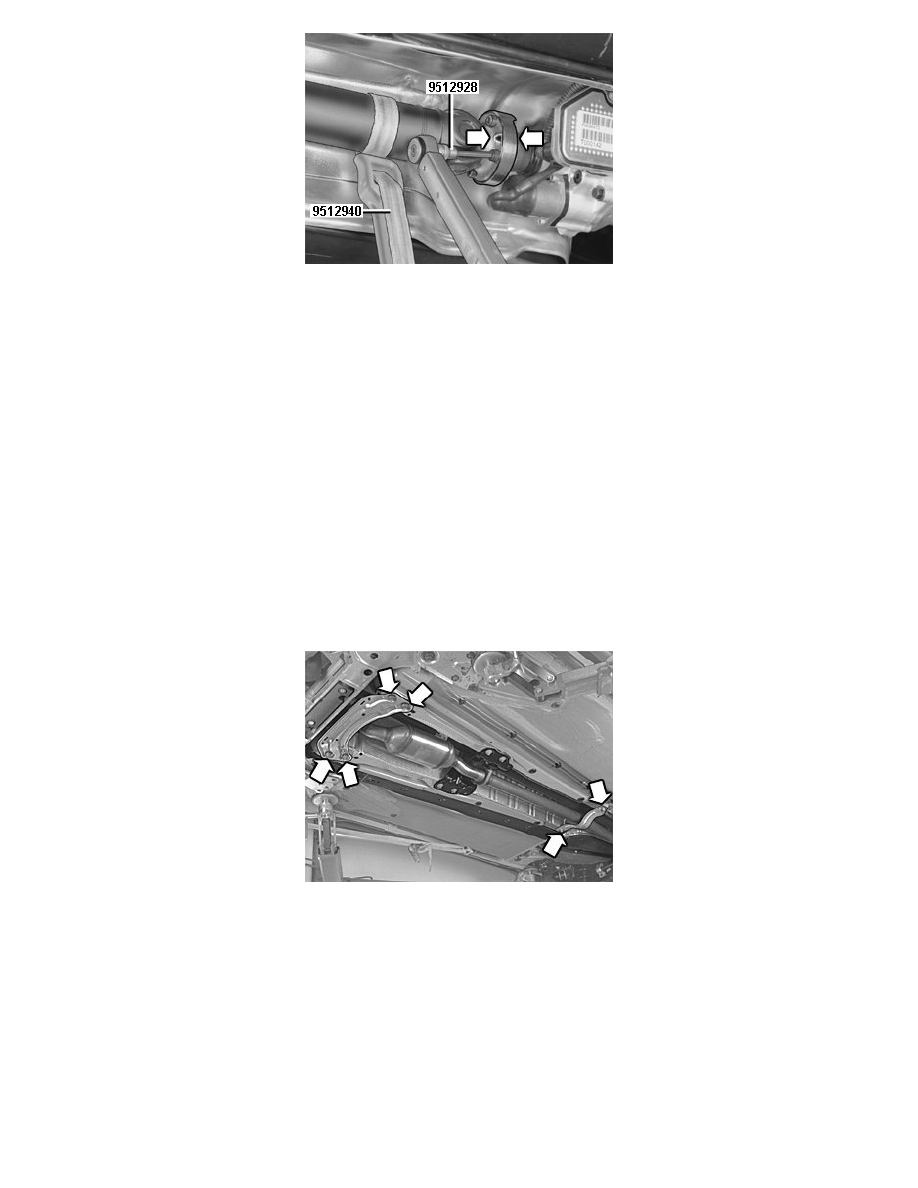
Note! There are cast markings on the propeller shaft CV joint's flange and on the flange just beside the bolt holes. The markings should be
opposite each other.
Use counterhold 951 2940 Counterhold See: Tools and Equipment/951 2940 Counterhold and socket 951 2928 Ball hex 6MM/ 3/8 See: Tools and
Equipment/951 2928 Ball Hex 6mm/3/8.
Hint: To angle tighten, mark the material and then the screw 120° in front of the marking. Then tighten so that the markings are opposite each other.
Installing members and the exhaust system
Tighten the 4 M8 screws for the support for the center bearing.
Tighten the 2 x M8 screws for the propeller shaft center bearing. See: See: Automatic Transmission/Transaxle/Specifications/Mechanical
Specifications/Tightening Torque
Install:
-
the front cross member to the body using 4 M8 screws. Tighten
-
the brake pipe in the mountings in the member
-
the rear exhaust pipe assembly using 2 M8 screws. Tighten
Note! Check that the gasket on the exhaust pipe's flange joint is free from defects.
-
the rear cross member, 2 M8 nuts. Tighten.