| Removal and Installation Special Tool(s) | | Remover/Installer, Cooling Hose Clamp 303–397 (24–003) | Removal | | -
Remove the radiator grille. | | | -
Secure the air conditioning (AC) condenser. | | | -
Remove the splash shield. | | | -
Using the special tool, disconnect the coolant hose. | | | -
Using the special tool, disconnect the coolant hose. | | | -
Using the special tool, disconnect the coolant hose. | | | -
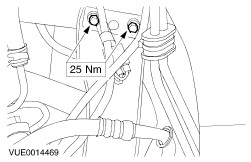
Remove the AC condenser left-hand bolt. | | | -
Remove the AC condenser right-hand bolt. | | | -
Remove the radiator support bracket right-hand bolts. | | | -
Remove the radiator support bracket. | | | -
If installing a new radiator, remove the radiator left-hand insulators. | | | -
If installing a new radiator, remove the radiator right-hand insulators. | Installation | | -
NOTE:When the battery is disconnected and reconnected, some abnormal drive symptoms may occur while the vehicle relearns its adaptive strategy. It may need to be driven 16 km (10 miles) or more to relearn its adaptive strategy. NOTE:Make sure the AC condenser upper locating gangs are correctly installed into the radiator upper locating brackets. To install, reverse the removal procedure. | | |