
Removal
- Make
- Aston Martin
- Model
- DB9 Factory Workshop Manual
- Year
- Issue 2, 2005
- Section
- Body Closures › Removal
01 Body systemRemoval
| Repair Operation Time (ROT) | |
|---|---|
| Item | Code |
| Remove and reinstall | 01.03.AB |
Removal
Warning
The bonnet is heavy. Removal is a two person operation.
- Open the bonnet.
- Disconnect the windscreen wash pipe.
- Slightly loosen the bolts (x4) that secure the bonnet to the hinge.
- With the bonnet supported, disconnect the gas struts and remove the hinge bolts (x4).
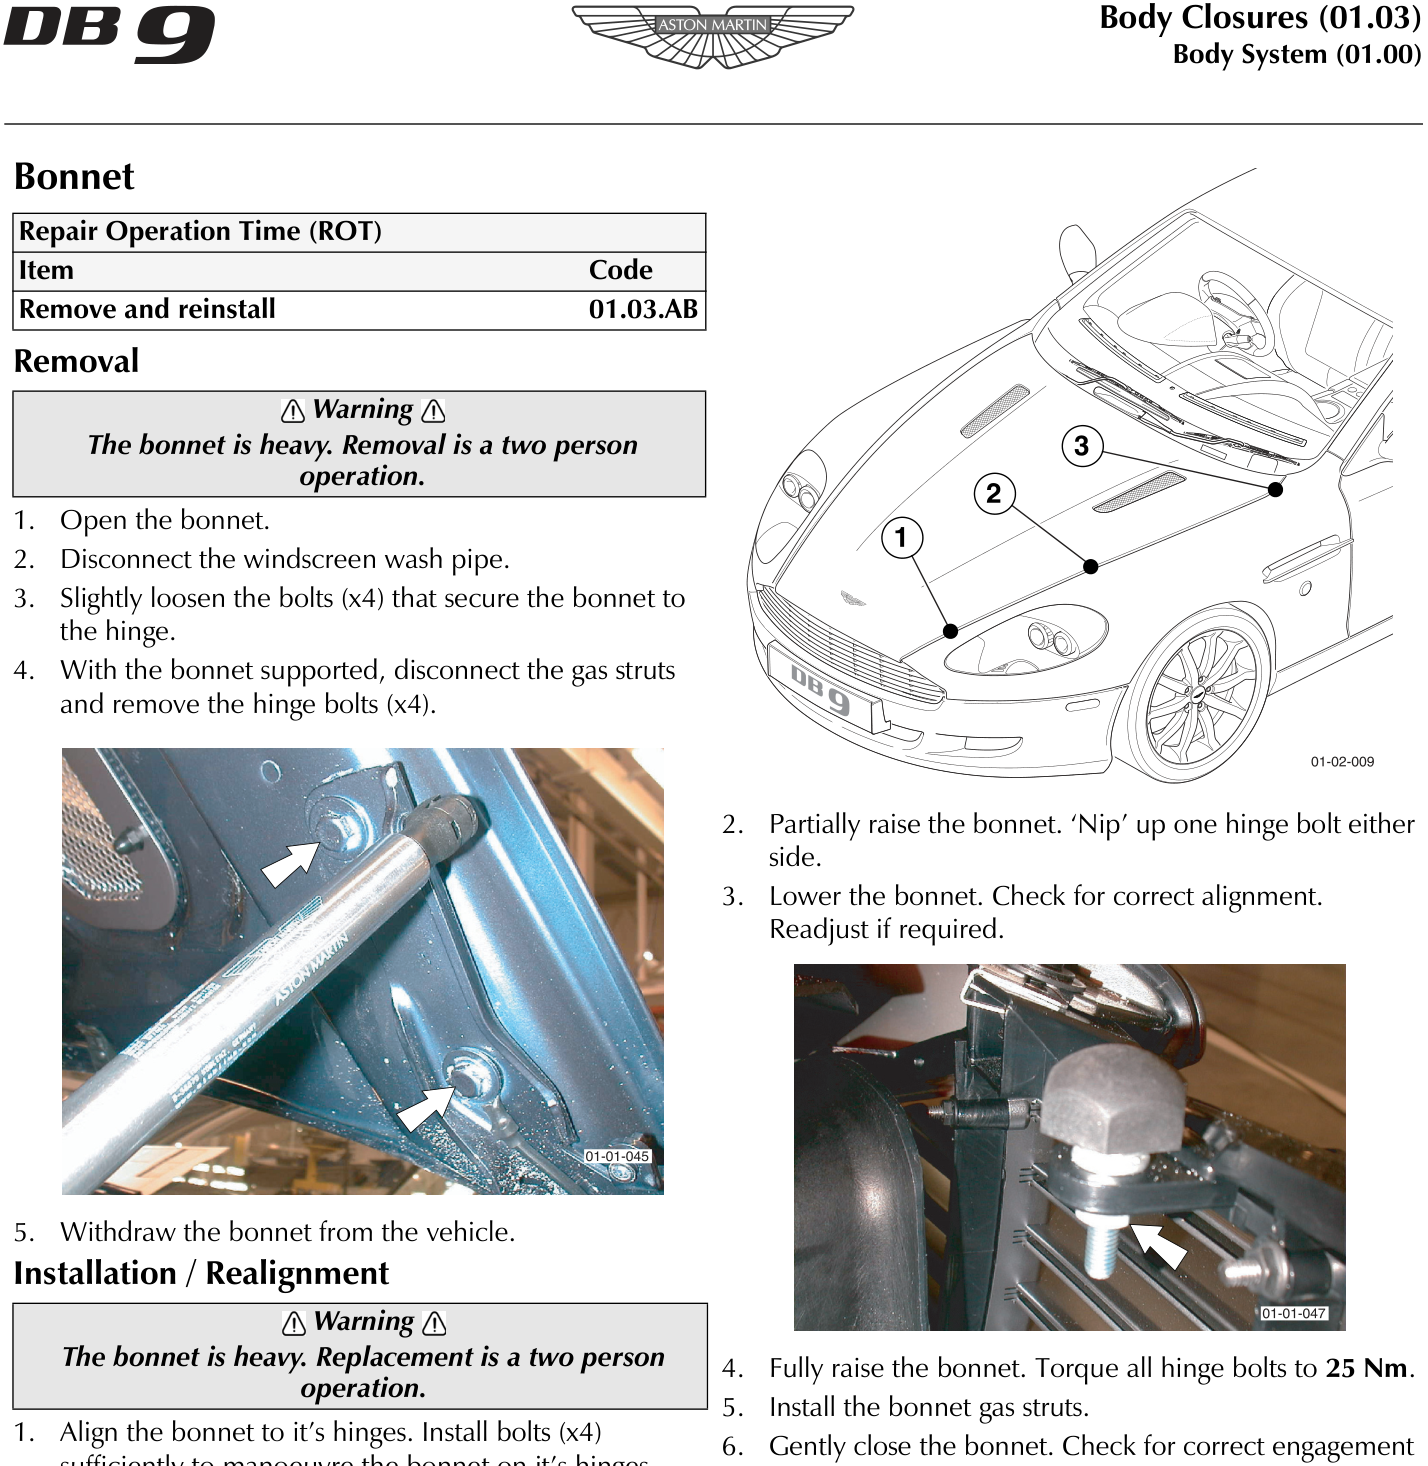
- Withdraw the bonnet from the vehicle.
Installation / Realignment
Warning
The bonnet is heavy. Replacement is a two person operation.
- Align the bonnet to it’s hinges. Install bolts (x4) sufficiently to manoeuvre the bonnet on it’s hinges. Gently lower the bonnet. Adjust so that the corners do not touch the wings at the front and rear. Align the bonnet front edge centrally in the aperture.
- Partially raise the bonnet. ‘Nip’ up one hinge bolt either side.
- Lower the bonnet. Check for correct alignment. Readjust if required.
- Fully raise the bonnet. Torque all hinge bolts to 25 Nm.
- Install the bonnet gas struts.
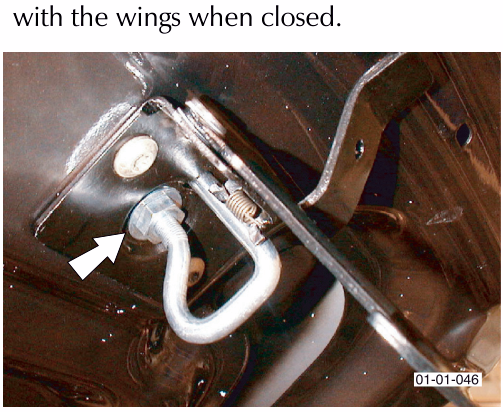
- Gently close the bonnet. Check for correct engagement of the bonnet latch. Adjust if required to achieve the flush specification.
- Turn the nut anti-clockwise to raise or clockwise to lower the bonnet catch until the bonnet is flush with the wings when closed.
- Fully close the bonnet. Check for correct operation of the bonnet release lever.
Parts & tools for this job For 2005 Aston Martin DB9
- TOOLTrim removal tool kitSearch: trim removal tool kit
- PARTTouch-up paintSearch: Aston Martin touch up paint
- PARTPanel clip assortmentSearch: Aston Martin panel clips assortment
Links open Amazon search results in a new tab. As an Amazon Associate I earn from qualifying purchases.