
Engine Removal from the Frame
- Make
- Aston Martin
- Model
- DB9 Factory Workshop Manual
- Year
- Issue 2, 2005
- Section
- Engine Assembly › Engine Removal from the Frame
03 EngineEngine Removal from the Frame · page 1 of 2
- Charge the A/C unit (Refer to 'Air Conditioning (A/C) System (12.03)', page 12-3-1).
- Check the road wheel alignment (Refer to 'Road Wheel Alignment (04.00)', page 4-1-2).
Always check the steering angle sensor (viaWDS) after any work carried out on the steering or the suspension systems or the yaw rate sensor.
- Connect the vehicle battery.
Engine Removal from the Frame
Removal
- Release the exhaust manifolds from the catalysts.
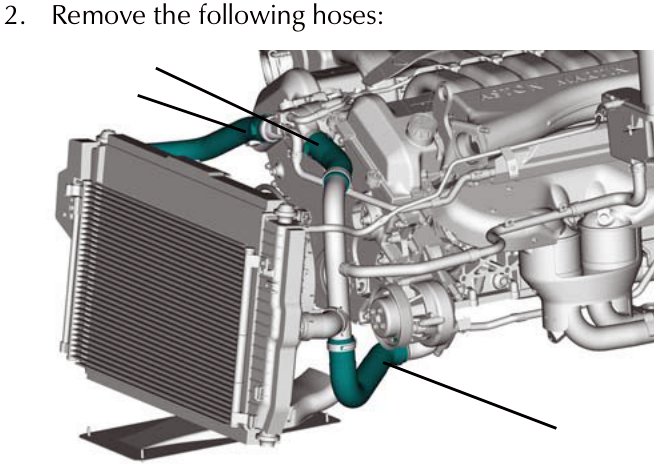
- Remove the following hoses:
- Disconnect the AC pipe from the condensor.
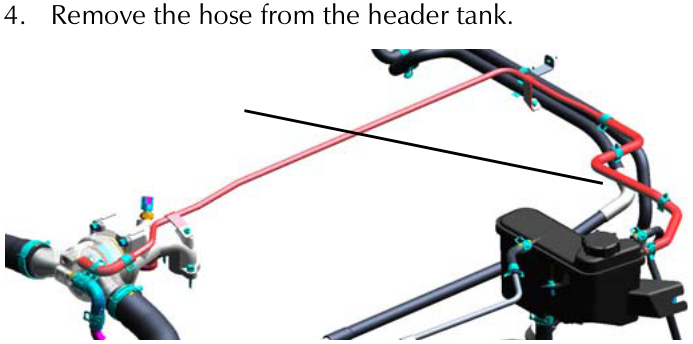
- Remove the hose from the header tank.
- Disconnect the cables from the starter motor and the alternator.
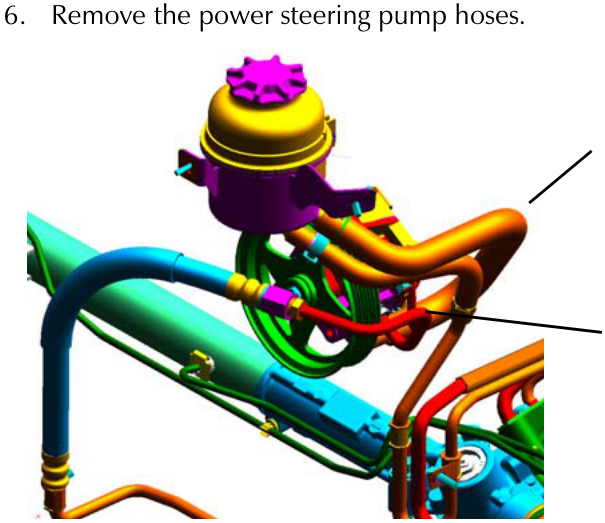
- Remove the power steering pump hoses.
- Attach the lifting eyes (x4) to the cylinder heads.
- Install the engine lifting gear to a suitable hoist.
- Raise the hoist to take up ‘slack’ in lifting gear.
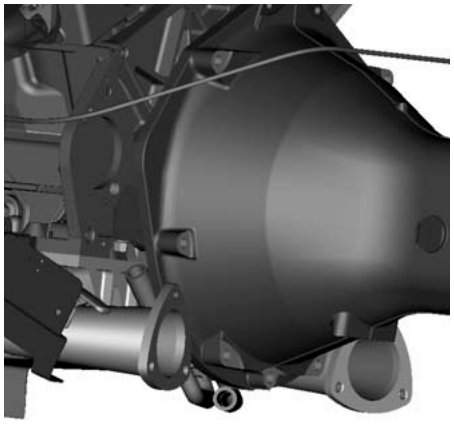
- Remove the torque tube.
- Ensure the torque tube is supported.
- Remove bolts (x) that secure the torque tube to the engine block.
- Ensuring the torque tube and engine are adequately supported, move the engine frame and hoist forward until there is room to manoeuvre the torque tube away from the engine block and exhaust manifolds.
- Remove the engine mount nuts (x2).
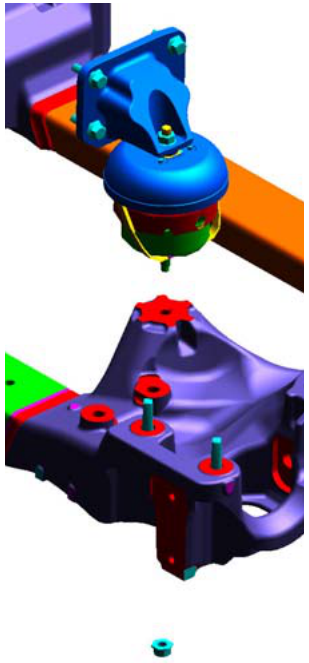
- Lift the engine clear of the frame assembly. Secure the engine to an appropriate stand. Detach the lifting gear.
Parts & tools for this job For 2005 Aston Martin DB9
- PARTEngine gasket setSearch: Aston Martin DB9 2005 engine gasket set
- TOOLTorque wrenchSearch: 3/8 inch torque wrench
- TOOLFeeler gauge setSearch: feeler gauge set
Links open Amazon search results in a new tab. As an Amazon Associate I earn from qualifying purchases.