
41. Automatic Gearbox Only. (page 4 of 4)
- Make
- Aston Martin
- Model
- DB9 Factory Workshop Manual
- Year
- Issue 2, 2005
- Section
- Engine Assembly
03 Engine41. Automatic Gearbox Only. · page 4 of 4
- Automatic Gearbox Only.
Install the manual override cable.
- Manual Gearbox Only.
- Install the gear change linkage
- Install the wiring harness plugs
- Manual Gearbox Only.
Caution
Clutch fluid must not be allowed to contact the vehicle paint work. Remove spilt clutch fluid from the paint work by rinsing away with running water.Install the clutch pipe.
- Install the brake pipes:
Caution
Brake fluid must not be allowed to contact the vehicle paint work. Remove spilt brake fluid from the paint work by rinsing away with running water.
- Install the LH front brake caliper pipe to the modulator
- Install the rear brake pipe brackets.
- Install the brake pipes to all remaining brake calipers.
- Install the handbrake cable to the handbrake lever
- Connect the torque tube to body (engine) earth lead.
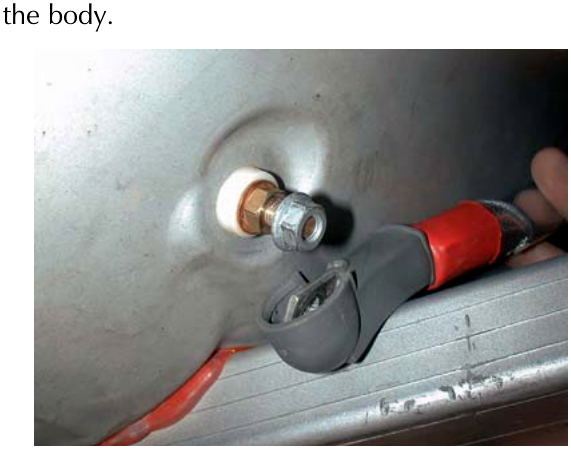
- Connect the Starter / Alternator / Jump terminal cable to the body.
- Install the heater coolant pipes.
- Connect the VMV.
- Connect the fuel lines.
- Install the headlight units (L/H and R/H).
- Install both air filter boxes.
- Install the PCMs. Connect the engine wiring harness plugs.
- Connect the following forward wiring harness plugs.
- Fan pack
- Headlight levelling sensor
- MAF sensor
- ABS speed sensor
- Header tank level sensor
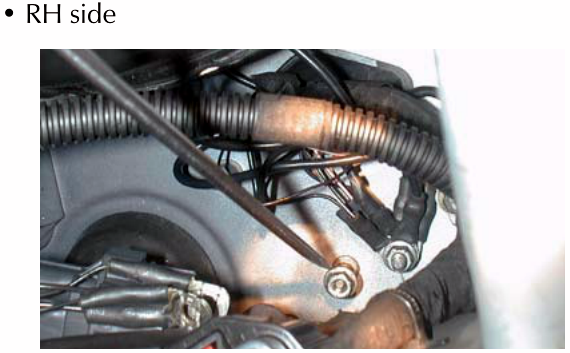
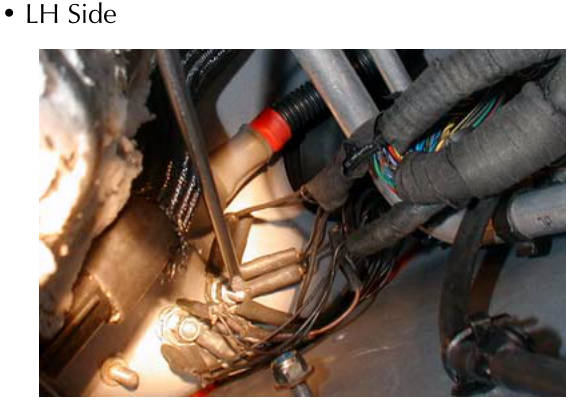
- Connect the earth points to the bulkhead.
- Install the steering intermediate shaft.
- Install the fusebox.
- Connect the wiring harness plugs
- Connect the main power feed
- Install the fusebox bracket and fusebox
- Install the power steering reservoir.
- Install the jump start cable.
- Install the A/C pipes.
- Install the bolts and reinforcement struts along the inner wings.
- Install the header tank.
Caution
Before installing the engine bay cross-braces ensure that the at the vehicle is resting on it’s roadwheels.
- Install the engine bay corner cross braces. Do not tighten.
- Install the front bumper.
- Install the road wheel arch liners.
- Install:
- Front and rear undertrays
- Shear plates
Note the positions of the (x4) spacers from removal on the front shear plate.
- Bleed the brakes (Refer to ‘Brake Bleeding - WDS’, page 6-4-4).
- Install the road wheels (Refer to ‘Road Wheel Nut Torque Tightening’, page 4-5-7).
- Torque the engine bay cross-braces to 49 Nm.
- Fill the coolant (Refer to ‘Coolant Drain / Fill’, page 3-4-3)
Parts & tools for this job For 2005 Aston Martin DB9
- PARTTransmission filter kitSearch: Aston Martin DB9 2005 transmission filter kit
- FLUIDAutomatic transmission fluidSearch: Aston Martin automatic transmission fluid
- TOOLFluid transfer pumpSearch: fluid transfer pump
Links open Amazon search results in a new tab. As an Amazon Associate I earn from qualifying purchases.