
Installation
- Make
- Aston Martin
- Model
- DB9 Factory Workshop Manual
- Year
- Issue 2, 2005
- Section
- Lubrication System › Installation
03 EngineInstallation · page 1 of 2
- Remove bolts (x15 M8) and (x5 M6) that secure the sump. Withdraw the sump. Discard the sump gasket and oil seal (oil pump).
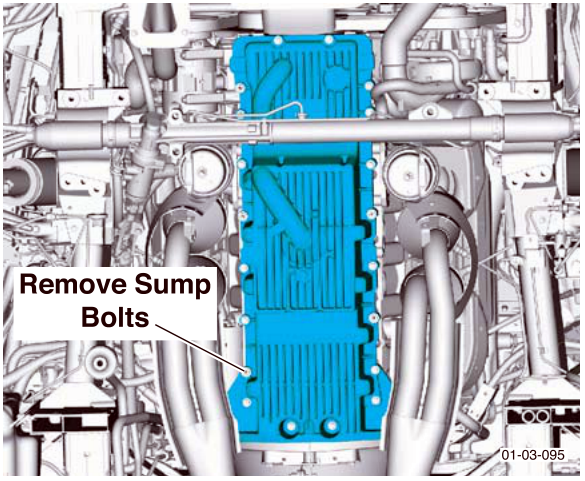
- Clean the sump and engine block mating surfaces.
Installation
- Ensure the sump is clean.
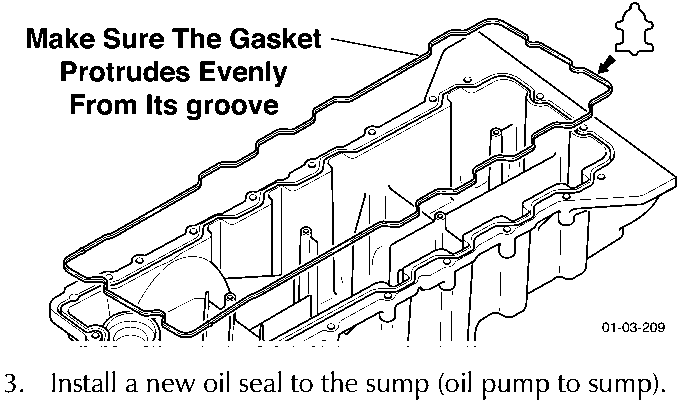
- Install a new sump gasket. Ensure that the gasket protrudes evenly from its groove all around the sump.
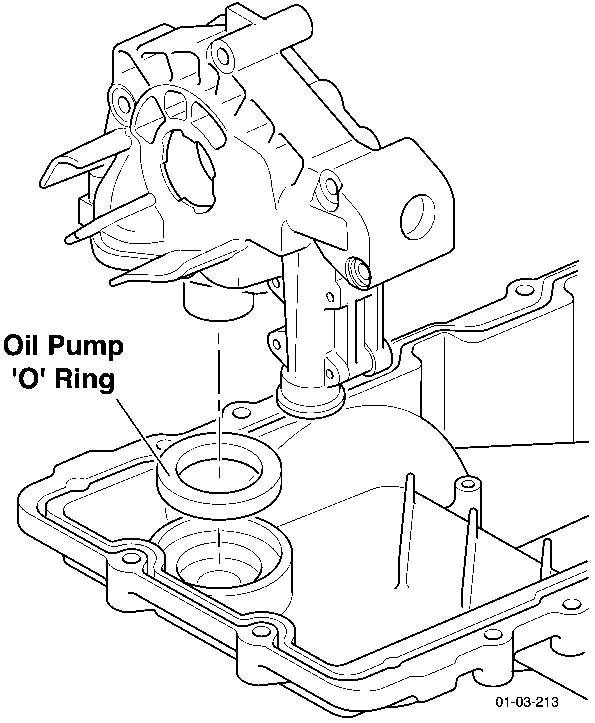
- Install a new oil seal to the sump (oil pump to sump).
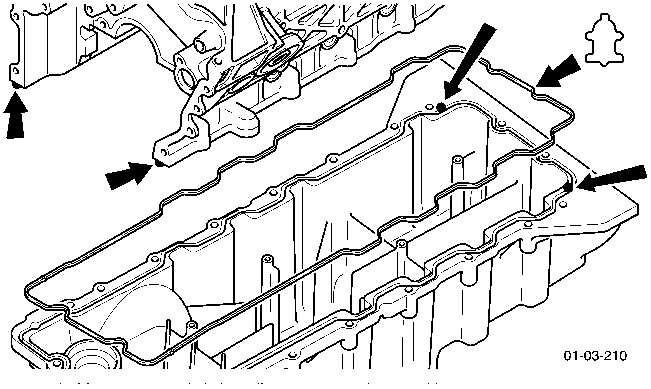
- Apply dots (10 mm Dia approx.) of sealant to the sump sealing surface in the positions indicated.
The sump must be installed and secured within 6 minutes of applying beads of sealant.
Parts & tools for this job For 2005 Aston Martin DB9
- PARTOil filterSearch: Aston Martin DB9 2005 oil filter
- TOOLOil filter wrenchSearch: oil filter wrench
- FLUIDEngine oilSearch: Aston Martin DB9 engine oil
Links open Amazon search results in a new tab. As an Amazon Associate I earn from qualifying purchases.