
Maintenance
- Make
- Aston Martin
- Model
- DB9 Factory Workshop Manual
- Year
- Issue 2, 2005
- Section
- Front Disc Brake › Maintenance
Maintenance
Brake Caliper (Front and Rear)
| Repair Operation Time (ROT) | |
|---|---|
| Item | Code |
| Brake Caliper Renew | (LH) TBA |
| (RH) TBA | |
| (LH) TBA | |
| (RH) TBA | |
Removal
Front calipers shown.
Place a cloth around the brake reservoir filler neck to absorb any possible brake fluid spillage.
- Raise the vehicle and make safe.
- For each affected wheel station remove the road wheel(s).
Retract the caliper pistons (allowing easier removal of caliper). Retracting the caliper pistons may cause the brake fluid reservoir to overflow.
- Disconnect the brake pad wear sensor.
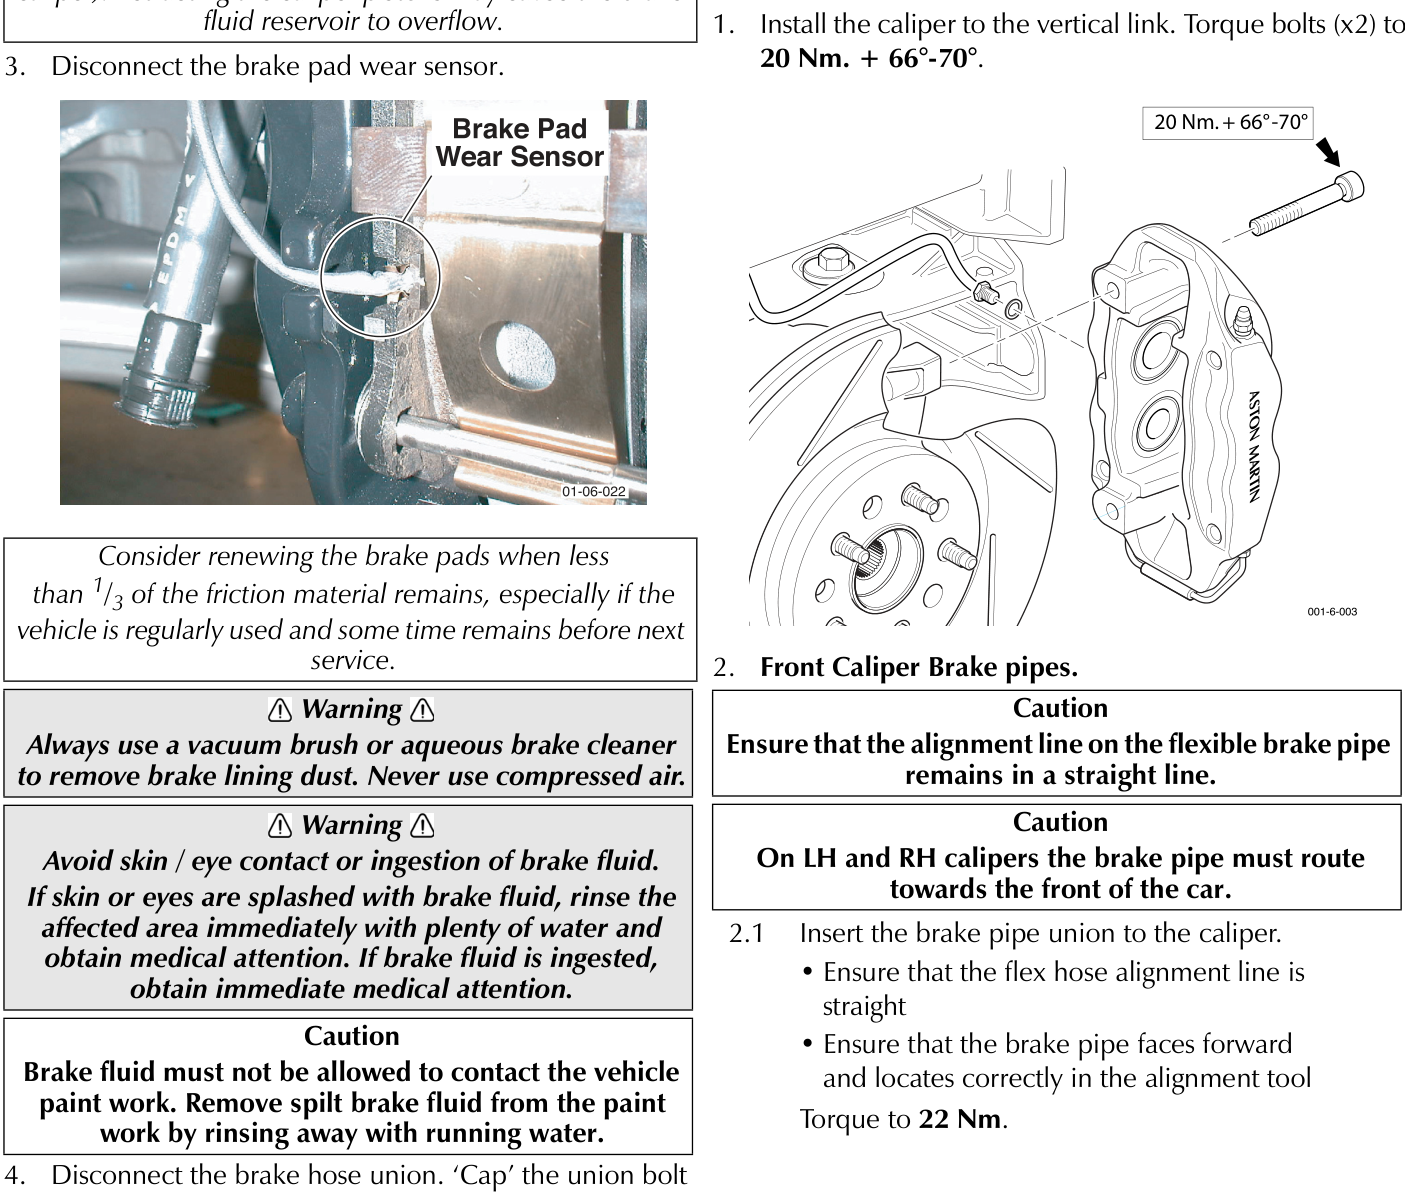
Consider renewing the brake pads when less than 1/3 of the friction material remains, especially if the vehicle is regularly used and some time remains before next service.
Warning
Always use a vacuum brush or aqueous brake cleaner to remove brake lining dust. Never use compressed air.
Warning
Avoid skin / eye contact or ingestion of brake fluid. If skin or eyes are splashed with brake fluid, rinse the affected area immediately with plenty of water and obtain medical attention. If brake fluid is ingested, obtain immediate medical attention.
Caution
Brake fluid must not be allowed to contact the vehicle paint work. Remove spilt brake fluid from the paint work by rinsing away with running water.
- Disconnect the brake hose union. ‘Cap’ the union bolt and plug the hose aperture in the caliper.
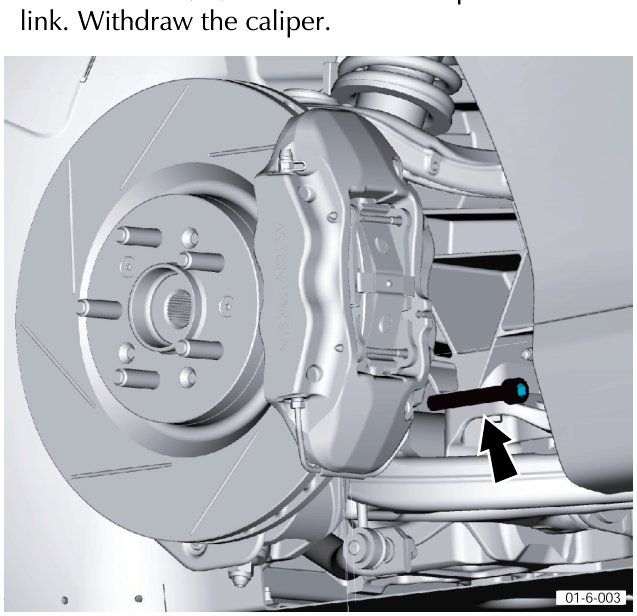
- Remove bolts (x2) that secure the caliper to the vertical link. Withdraw the caliper.
Installation
- Install the caliper to the vertical link. Torque bolts (x2) to 20 Nm. + 66°-70°.
- Front Caliper Brake pipes.
Caution
Ensure that the alignment line on the flexible brake pipe remains in a straight line.
Caution
On LH and RH calipers the brake pipe must route towards the front of the car.
- Insert the brake pipe union to the caliper.
- Ensure that the flex hose alignment line is straight
- Ensure that the brake pipe faces forward and locates correctly in the alignment tool
Parts & tools for this job For 2005 Aston Martin DB9
- PARTOil filterSearch: Aston Martin DB9 2005 oil filter
- TOOLOil filter wrenchSearch: oil filter wrench
- FLUIDEngine oilSearch: Aston Martin DB9 engine oil
Links open Amazon search results in a new tab. As an Amazon Associate I earn from qualifying purchases.